bluename
 How to Adjust Aloe Vera Watering for High Temperatures
It happened last summer. I walked over to my prized aloe vera plant, its plump leaves usually a sign of perfect health, and felt a sickening squish. The base was soft, mushy, and brown. I had killed it with kindness, or more accurately, with water. In my panic during a heatwave, I assumed it was thirsty. I was dead wrong. That moment sparked a two-week experiment and a complete overhaul of how I approach aloe vera watering for high temperatures. If you’ve ever wondered if your aloe needs more water when the mercury rises, you’re asking the right question, but the answer is more nuanced than a simple yes or no.
My goal was clear: develop a fail-safe, observation-based method to keep my aloes thriving, not just surviving, through scorching weather. Here’s exactly what I did, what I learned, and how you can avoid the fatal squish.
Understanding the Aloe’s Desert DNA
First, I had to reset my thinking. Aloe vera is a succulent, a plant built for arid environments. Its thick, gel-filled leaves are water storage tanks. During high temperatures, its natural instinct is to slow down and conserve resources, not ramp up growth. Overwatering suffocates the roots, creating the perfect conditions for root rot—the silent killer I’d encountered.
I found a great article from the Royal Horticultural Society (RHS) that reinforced this. They state, "Succulents like aloe vera are highly susceptible to overwatering, especially in humid conditions or when light levels are low. The compost must be allowed to dry out between waterings." This was my cornerstone principle.
My Two-Week Observation and Adjustment Protocol
I selected three established aloe plants for my experiment. All were in terra cotta pots with excellent drainage holes, using a gritty, well-draining cactus mix. The thermostat hovered between 90-95°F (32-35°C) for the duration.
Week 1: The Deep Dry-Out and Initial Check
I started with a radical step: I did not water any of them. I wanted to establish a true baseline of what "dry" meant for my specific environment. This was scary, but crucial.
- Day 1-3: I used the classic "finger test," plunging my finger 2-3 inches into the soil. It was bone-dry. The leaves were firm.
- Day 4-5: The leaves on one plant felt slightly less rigid, with a hint of flexibility. No wrinkling yet. The soil was dust-dry.
- Day 6-7: The same plant now showed very slight wrinkling on the lower, older leaves. This was my signal. The other two plants still had firm leaves.
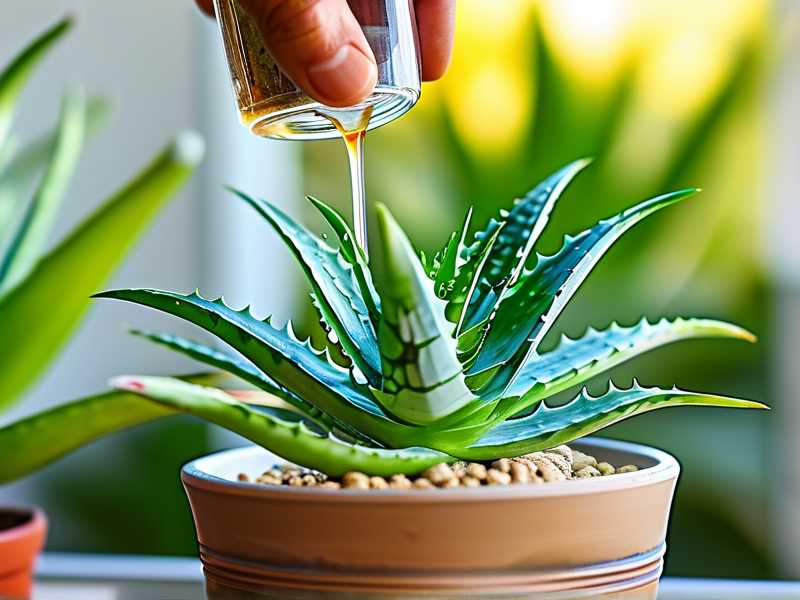
Action Taken: On the evening of Day 7, I gave the slightly wrinkled plant a thorough, deep soak. I placed it in the sink and watered slowly until water ran freely from the drainage hole. I let it drain completely before returning it to its sunny spot. I left the other two plants untouched.
Week 2: Monitoring the Response and Refining the Signal
- Day 8-10 (48-72 hours post-watering): The watered plant plumped up beautifully. The wrinkles smoothed out, and the leaves regained their turgid feel. This confirmed the plant was simply using its stored water, which is normal and healthy.
- Day 11-13: I continued monitoring all plants. The second plant began to show the same subtle leaf-softening around Day 12.
- Day 14: I watered the second plant using the same deep-soak method. The third plant still had firm leaves and showed no signs of thirst.
The "Aha!" Moment: In identical heat, with identical soil and pots, their water needs were on different schedules—one needed water weekly, another every 12 days, and the third was likely on a 14-16 day cycle. The plant's condition, not the calendar or the heat alone, was the only reliable guide.
The Crucial Factors Beyond the Thermometer
My experiment showed that adjusting aloe vera watering schedules isn't just about air temperature. These factors became my checklist:
- Pot Material: My terra cotta pots "breathe," allowing moisture to evaporate from the sides. A plastic or glazed ceramic pot would have held moisture much longer, necessitating even longer intervals between waterings.
- Light Exposure: My plants are on a south-facing patio. Intense, direct sun accelerates soil drying. An aloe in bright indirect light would drink slower.
- Humidity: A dry heat pulls moisture from soil faster than a humid heat. During our dry heatwave, evaporation was rapid.
- The Plant's Language: I learned to "listen." Slight leaf wrinkling or softening (like a firm cucumber going slightly flexible) is the true thirst cue. Pale color or brown, crispy tips often indicate sunburn or mineral buildup, not thirst. A squishy base is a five-alarm fire for overwatering.
The Pitfalls I Encountered (And How to Fix Them)
Pitfall #1: The Surface Deception. The top inch of soil would be parched, but moisture lingered below. Watering based on this led to my initial overwatering disaster.
- Solution: The finger test must go deep—at least to the second knuckle. Even better, I now use a slim wooden chopstick. Insert it into the soil for 10 minutes. If it comes out with damp soil or stains, wait. If it's clean and dry, it's time to water.
Pitfall #2: Watering at High Noon. I once watered in the peak afternoon heat, thinking it would cool the roots.
- Solution: This can scorch leaves if water sits in the rosette and acts like a magnifying glass. More importantly, water evaporates too quickly from the hot soil before roots can absorb it. I now water deeply in the early morning or late evening, allowing for optimal uptake.
Pitfall #3: Ignoring Dormancy Signs. One plant seemed to stop drinking altogether.
- Solution: I learned from the Arizona-Sonora Desert Museum (ASDM) that some aloes can enter a semi-dormant state in extreme heat as a survival tactic. If the plant isn't growing and shows no thirst signs for weeks, respect its dormancy. Withhold water until cooler temperatures return and it shows active growth.
Putting It All Together: The High-Heat Watering Action Plan
- Forget the Schedule. Erase "water every X days" from your mind.
- Assess Conditions. Note your pot type, sun exposure, and humidity.
- Learn the Thirst Signal. Wait for slight leaf wrinkling/softening on lower leaves.
- Test the Soil. Use the deep finger test or chopstick method to confirm dryness.
- Water Deeply & Properly. Soak the soil completely until water drains out the bottom. Never let the pot sit in a saucer of water.
- Observe the Plump-Up. Your plant should perk up within 1-3 days.
- Repeat. Go back to step 1 and wait for the next thirst signal.
Will misting my aloe vera help in high heat? No, please don't. Misting does not increase humidity meaningfully and can lead to water sitting in the leaf axils, promoting fungal or bacterial rot. Aloes absorb water through their roots, not their leaves. Focus on correct root hydration instead.
My aloe's leaves are turning brown and thin. Is it underwatering? Brown, thin, and crispy leaves, especially at the tips, can be a sign of severe, long-term underwatering. However, it's more often sunburn or a natural aging process. Assess your watering history. If you water deeply and the plant plumps up but the brown remains, it's likely old damage. Prevent new damage by providing some afternoon shade during extreme heatwaves.
Can I use ice cubes to water my aloe vera slowly? This is a popular tip for some houseplants but is ill-advised for aloes. The sudden cold shock can damage the sensitive root system. Always use water that is at or near room temperature for a gentle, effective soak.
Mastering aloe vera care in hot weather is about becoming a plant detective, not a rigid scheduler. High temperatures change the equation, but they don't automatically mean more frequent watering. They mean more vigilant observation. By trusting the plant's signals—the slight give in a leaf, the telltale wrinkle—and supporting it with deep, infrequent soaks, you work with its natural desert wisdom. My aloes now sail through heatwaves, their water reserves managed not by my assumptions, but by their own clear, quiet communication.