bluename
How to Adjust Pot Drainage for Rainy Indoor Weather
If you are dealing with soggy soil, fungus gnats, or that faint swampy smell after days of rain, the fix usually comes down to one thing. Adjust pot drainage for rainy indoor weather before your roots drown. I learned this the hard way after losing a monstera to a week of summer storms. The rain was outside. My watering can was inside. And I still managed to overwater it. Because indoor humidity and low light change everything.
Most houseplant problems are not about neglect. They are about love that shows up as too much water. And when rainy weather rolls in, even experienced growers get thrown off. The air gets heavy. The soil stays wet longer. The plant slows down. You keep the same watering schedule. Then the leaves yellow, the stems go soft, and you are left wondering what went wrong.
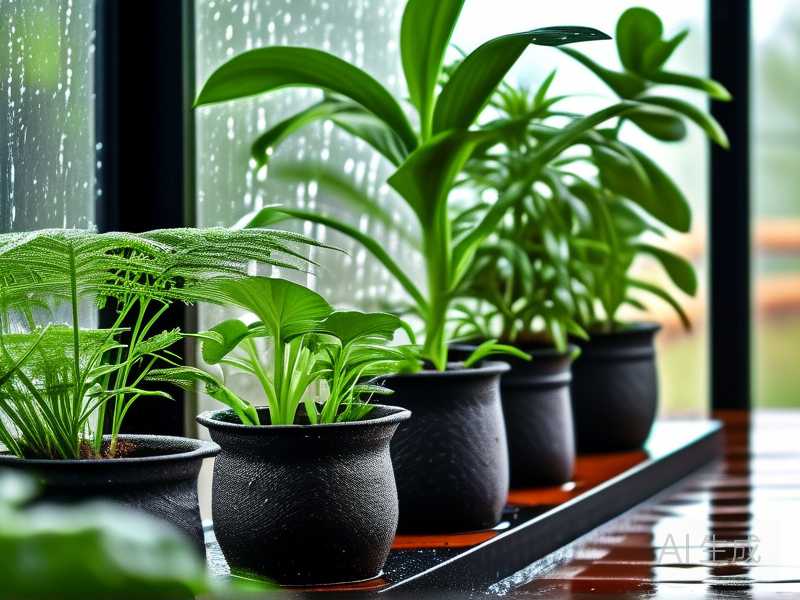
I want to walk you through exactly how I handle pot drainage when the weather turns wet. This is not theory. I have killed plants, revived plants, repotted in a panic at midnight, and tested different setups for over a decade. Let us get into it.
Why Rainy Indoor Weather Changes Everything
You might think indoor plants are safe from rain. In a way, they are. But they still feel the weather. Humidity rises. Light levels drop. Air movement slows. All of that affects how fast water evaporates from the soil.
When it rains for days, my living room can sit at 70 to 80 percent humidity. The soil in my pots just does not dry out. A plant that normally needs water every five days might go nine or ten days without needing a drop. If I ignore that, I am basically forcing the roots to sit in a cold, wet sponge.
The RHS points out that most houseplants suffer more from overwatering than underwatering. I have found that to be painfully true. Root rot sets in when oxygen cannot reach the roots. Wet soil fills those air pockets with water. No oxygen. No healthy roots. Then the damage starts.
My First Big Drainage Mistake
Years ago, I bought a beautiful fiddle leaf fig. It was in a thick ceramic pot with one small drainage hole. I placed it near a south-facing window. Life was good until a rainy spell hit. The plant stopped growing. Then the lower leaves started dropping.
I assumed it needed more water because the top of the soil felt dry. Big mistake. The bottom of the pot was still soaked. I watered again anyway.
Within two weeks, I pulled the plant out and found black, mushy roots. That smell is something you never forget. I tried to save it. Cut away the rot. Repotted into fresh mix. It did not make it.
That was my second dead fiddle leaf fig. The first died from too much sun. We will get to that later. But that rainy week taught me one thing. Drainage is not just about holes. It is about the whole system. The pot. The soil. The environment. And my own habits.
How to Adjust Pot Drainage for Rainy Indoor Weather: Start With the Pot
The first thing I check is the pot itself. If it has no drainage hole, the plant is already at risk. Some people grow plants in cachepots with no holes. That can work if you are very careful. But during rainy weather, I do not recommend it. Not for beginners.
You want at least one good drainage hole. More is better. When water flows out the bottom, you know the soil is saturated enough. Then you dump the excess. Never let the pot sit in water. That saucer full of old water is a root rot waiting to happen.
I used to leave water in saucers because I thought it added humidity. It does. But it also suffocates roots. Now I water over a sink or a bucket. I let the pot drain fully. Then I put it back on a dry saucer.
If your favorite decorative pot has no hole, use a plastic nursery pot inside it. Pull the inner pot out to water. Let it drain completely. Then drop it back in. Simple. And it saves you from guessing.
Plastic vs. Terracotta vs. Ceramic
Pot material makes a huge difference. I like terracotta for plants that hate wet feet. Think succulents, cacti, snake plants, and most peperomias. Terracotta breathes. Moisture wicks through the clay walls. That helps soil dry faster when the air is damp.
Plastic pots hold moisture longer. That is useful in dry climates. But during rainy spells, plastic can stay wet for too long. Glazed ceramic is similar. It is basically non-porous. If you live somewhere with long wet seasons, terracotta can save your plants.
I once grew a pothos in a glazed ceramic pot without checking the hole size. It had one hole, but the pot was deep and narrow. The bottom third never dried. The pothos lived, but it grew slowly and dropped older leaves. I switched it to a wider terracotta pot with a gritty mix. Within a month, it pushed out new growth.
So if you are wondering how to adjust pot drainage for rainy indoor weather, start by looking at the pot. Is it too big? Too deep? Does it hold water like a bowl? Change one thing at a time and watch how the plant responds.
Choose the Right Pot Size
I have made the mistake of giving a plant too much room. More soil sounds good. More space for roots. But more soil also means more water retention. A small root system in a huge pot cannot use all that moisture. It sits there. Then root rot comes knocking.
During rainy weather, this gets worse. The soil stays wet even longer. So I stick to pots that are only one to two inches wider than the root ball. If you repot a small plant into a massive pot, you are asking for trouble.
I also avoid tall, narrow pots for most tropical plants. The top dries fast, so you think the plant is thirsty. But the bottom is swampy. I prefer pots that are wider than they are deep, or at least balanced. That helps moisture move through the mix more evenly.
Soil Mix: The Real Hero of Drainage
Even with perfect pots, bad soil will hold too much water. Heavy potting soil straight from the bag is often too dense for indoor plants. It works okay in bright, warm, dry conditions. But when it rains for a week, that soil turns into mud.
I mix my own potting soil for most tropical houseplants. My base recipe looks like this:
- 3 parts high-quality potting mix
- 1 part perlite or pumice
- 1 part orchid bark or coco chunks
This makes a chunky, airy mix. Water moves through it quickly. Roots get oxygen. And it does not compact into a brick after a few waterings.
For succulents and cacti, I use a leaner mix. About half potting soil and half gritty material like perlite, coarse sand, or poultry grit. I want water to run through almost immediately. Succulents hate staying wet. Especially during humid, rainy weather.
The AHS has some useful guidance on container growing. They emphasize that soil in containers behaves differently than garden soil. I agree. You cannot just dig up dirt from outside and expect it to work indoors. It compacts. It holds too much water. And it may carry pests or pathogens.
My Two-Week Experiment With a Soggy Monstera
Let me share a real example. Last year, I adopted a monstera from a friend. The soil was dense and always damp. When rainy weather hit, the plant started drooping. Yellow spots appeared on the lower leaves.
I lifted the root ball out of the pot. The bottom was soaked. The soil smelled sour. There were a few mushy roots but the top half looked okay.
I decided to act. First, I removed as much old soil as I could. Then I cut off the rotted roots with clean scissors. I rinsed the healthy roots with room-temperature water. I repotted into a terracotta pot with my chunky aroid mix.
For the next two weeks, I did not water. I just let the plant settle. I checked the soil every couple of days by sticking my finger down to the second knuckle. The top felt dry after three days, but deeper down it was still slightly moist. So I waited.
After one week, the drooping stopped. By the end of two weeks, the leaves looked firmer. I watered lightly then. Just enough to see a little runoff. Then I let it drain completely.
What I learned from that two-week observation: plants can recover if you catch the problem early. But you have to stop watering. That is the hardest part for most people. We want to fix things by doing more. Sometimes the fix is doing less.
Watering Guidelines for Rainy Days
Here is my simple rule. Do not water on a schedule when the weather is wet. Check the soil first. Stick your finger in. If it feels damp, wait. If you are not sure, wait another day.
90% of indoor plants die from overwatering. I know that sounds dramatic. But after years of growing, I believe it. Most plants do not die from thirst. They die from roots that could not breathe.
During rainy indoor weather, I cut back my watering by at least half. Sometimes more. A plant that gets watered weekly in summer might only need water every 12 to 14 days during a rainy winter stretch. And that is okay.
I also try to water in the morning. That gives any water on the leaves time to evaporate. It also means the soil has all day to start drying. Watering at night, especially in humid conditions, invites fungal problems.
Bottom Watering vs. Top Watering
For some plants, bottom watering helps. You set the pot in a basin of water and let the soil soak it up from below. This encourages deep roots and keeps the top layer drier. That can reduce fungus gnats, which love wet topsoil.
But bottom watering has a downside in rainy weather. If the soil is already damp, you can easily oversaturate it. I only bottom water when the soil is truly dry. And I let the plant drain thoroughly afterward.
For most of my plants, I still top water. I pour slowly around the soil surface, not on the leaves. I keep pouring until I see water escape the drainage holes. Then I stop. I dump the saucer after about 15 minutes. No standing water.
Signs You Are Overwatering During Rainy Spells
Watch for these signs:
- Yellowing lower leaves, especially if they feel soft
- Mushy stems near the soil line
- Fungus gnats flying around the pot
- Soil that stays wet for more than a week
- A sour or musty smell from the pot
- New leaves that turn brown or black before unfurling
If you see these, stop watering. Check the roots. Remove any black or mushy parts. Repot into fresh, well-draining mix. And reduce your watering frequency.
Improving Air Flow Indoors
Rainy weather often means closed windows. Stale air makes drainage problems worse. I like to run a small fan near my plant shelves. Not directly on the plants, but enough to keep air moving.
Good air flow helps the top of the soil dry. It also reduces mold and mildew. If you have a ceiling fan, use it on low. Open a window when the rain stops. Even a few hours of fresh air helps.
I also group plants wisely. Some plants love humidity, like ferns and calatheas. But if I pack them too close, the air gets stagnant. I leave space between pots. That small gap lets moisture escape.
Grouping certain plants can actually raise humidity. That is usually a good thing. But during rainy weather, too much humidity can keep soil wet. So I might spread out my most sensitive plants. Just a few extra inches can help.
Using Gravel Trays and Humidity Domes
A lot of people use pebble trays to raise humidity. That works. But do not let the pot sit directly in the water. The pot should sit on the pebbles, above the water line. Otherwise, the soil wicks up water from the tray. That defeats the purpose.
I made that mistake with a calathea. I thought I was helping with humidity. Instead, the bottom of the pot was always wet. The plant developed brown leaf tips and root issues. Once I raised the pot above the water, it recovered.
As for humidity domes, I rarely use them on mature plants. They trap too much moisture. Good for propagation, but risky for established plants during wet weather. If you use one, open it daily to let fresh air in.
Repotting During Rainy Weather: Should You Do It?
I get this question a lot. Can you repot when it has been raining for days? The short answer is yes, if the plant is in trouble. But do it carefully.
If the soil is waterlogged and the plant is declining, repot immediately. Do not wait for sunny weather. Root rot spreads fast. I have waited before, and I regretted it. By the time I repotted, the roots were too far gone.
When repotting during humid weather, I use dry or barely damp mix. That gives the roots some recovery time. I also avoid watering immediately after repotting unless the plant is a thirsty type. For most tropical plants, I wait a day or two. Then I water lightly.
I also skip fertilizer right after repotting. The roots are stressed. They do not need food. They need oxygen and time.
Choosing the Right Drainage Layer
Some people swear by adding rocks or pebbles at the bottom of a pot. I used to do that too. But research and experience have shown it does not help. In fact, it can make things worse.
Water does not move easily from fine soil to coarse rock. It tends to sit above the rock layer. That creates a perched water table. The soil above stays wetter than it should.
Now I skip the rocks. I fill the entire pot with the same well-draining mix. I make sure the drainage holes are clear. That is all you need. Do not waste money on fancy drainage layers.
If you want to keep soil from washing out the holes, use a small piece of mesh or a coffee filter. I have used paper towels in a pinch. Just do not block the water flow.
The Role of Light in Drying Out Soil
Light and water go hand in hand. When light levels drop, plants photosynthesize less. They use less water. So the soil stays wet longer.
During rainy spells, I move some plants closer to windows. Not into direct sun, just into brighter spots. More light means more water uptake. It also means faster evaporation from the soil surface.
But be careful. If your plant was in low light and you suddenly move it to bright light, it can burn. Move it gradually. A few feet at a time. Watch the leaves for signs of stress.
I have a snake plant that sits in a dim corner most of the year. During rainy weeks, I move it to a spot about five feet from an east window. That small change helps the soil dry in about half the time. The plant seems happier too.
Common Pests That Thrive in Wet Soil
Wet soil attracts pests. Fungus gnats are the most common. They breed in constantly moist potting mix. You will see tiny black flies crawling on the soil surface.
To deal with them, let the top inch or two of soil dry out. You can also use sticky traps to catch adults. And you can water with a diluted hydrogen peroxide solution. I have done one part 3% hydrogen peroxide to four parts water. It helps kill larvae without harming the plant. But use it sparingly.
I also use mosquito bits steeped in water. That contains a bacteria that kills fungus gnat larvae. It takes a couple of weeks to see results. But combined with less watering, it works.
Wet soil can also encourage root mealybugs and springtails. Springtails are mostly harmless. Root mealybugs are not. If you see white cottony masses on the roots, isolate the plant. Remove the old soil. Wash the roots gently. Treat with insecticidal soap or neem oil. Then repot into fresh mix.
Should You Use a Moisture Meter?
I used to think moisture meters were gimmicks. Then a friend gave me one. Honestly, it helped me learn what “dry” actually feels like. The meter reads moisture at different depths. That is useful for deep pots where your finger can only reach so far.
Now I use a combination. I check with my finger for most plants. For big pots or plants that hate being overwatered, I use the meter. It takes the guesswork out of things.
During rainy weather, I check more often. Not to water more. But to know when the soil is finally dry enough. A meter can show you that the middle of the pot is still wet even though the top is dry. That has saved me from watering too early many times.
Adjusting Drainage for Different Types of Plants
Not all plants need the same treatment. A fern in a plastic pot might do fine with extra moisture. A pothos might tolerate it. But a succulent? No.
I adjust based on the plant.
For succulents, cacti, and euphorbias, I use terracotta pots. Gritty mix. Water rarely. During rainy weather, I might go three weeks or more without watering.
For aroids like monstera, philodendron, and pothos, I use a chunky aroid mix. Plastic or terracotta, depending on the plant size. I let the top two inches dry before watering.
For ferns and calatheas, I keep them in plastic pots with a slightly heavier mix. They like consistent moisture. But even they need good drainage. I never let them sit in water.
For orchids, I use bark-based mixes in pots with lots of ventilation holes. Rainy weather can be tricky for orchids because the bark stays damp. I water less and make sure air circulates around the roots.
The trick is to learn what each plant needs. Then adjust based on the weather. That takes time. I have killed enough plants to know what works in my home. You will learn what works in yours.
Three Fatal Mistakes New Growers Make
It took me years to learn these lessons. Let me spell them out clearly.
- Watering too much
I did this constantly. I wanted to care for my plants, and watering felt like care. But plants are not that simple. More water does not equal more love. It often equals dead roots. The single best thing you can do is wait. When in doubt, do not water.
- Light in the wrong place
Some plants need bright indirect light. Others can handle low light. I used to put a cactus in a dark bathroom and wondered why it stretched and rotted. Then I put a maidenhair fern in a blazing south window and watched it crisp. Match the plant to the light you actually have.
- Using the wrong pot or soil
I covered this earlier, but it bears repeating. A pot without drainage is a death sentence for most plants. Heavy soil holds too much water. Put those together, and your plant is living in a swamp. Even if you water correctly, it may still rot.
I have killed my share of plants because of these mistakes. The third time I lost a plant to root rot, I finally stopped blaming the plant. The problem was me. Once I fixed my habits, my plants started thriving.
How Long Does It Take for a Plant to Recover?
It depends on the damage. Mild overwatering can be fixed in a week or two. Severe root rot may take months. And some plants never recover.
I had a peace lily that went through bad root rot. I cut away most of the roots and repotted the healthy crown. It sat in a corner for two months doing nothing. Then I saw a tiny new leaf. It took another three months to look halfway decent.
Patience is key. Do not keep changing things. Pick a spot with good light. Water sparingly. Let the plant heal. Constant poking and repotting just adds stress.
How to Adjust Pot Drainage for Rainy Indoor Weather: A Quick Recap
Let me simplify everything for you.
First, check your pot. Make sure it has drainage holes. Use a pot material that works for your plant and your climate. Terracotta helps wet soil dry faster.
Second, fix your soil. Use a mix with perlite or bark to improve drainage. Heavy, dense soil is the enemy.
Third, change your watering habits. During rainy weather, water less often. Check the soil before you water. Do not follow a schedule.
Fourth, improve air flow. Run a fan. Open windows when you can. Do not crowd plants too tightly.
Fifth, watch your plants. Yellowing leaves, mushy stems, and fungus gnats are warning signs. Act early.
That is it. You do not need expensive tools or complicated systems. Just pay attention. Adjust based on the weather. And give your plants a chance to dry out between waterings.
Frequently Asked Questions
How often should I water my indoor plants during rainy weather?
It varies, but most plants need less water when it rains because humidity is higher and light is lower. Check the soil with your finger. If the top two inches feel dry for most tropical plants, you can water. For succulents, wait until the soil is dry all the way through. In my home, I water about half as often during rainy stretches.
Can I use a pot without a drainage hole if I put rocks at the bottom?
No. Rocks at the bottom do not replace drainage holes. They often make things worse by trapping water above the rock layer. If you love a pot with no holes, keep the plant in a plastic nursery pot and set it inside the decorative pot. Remove the inner pot to water and let it drain completely.
What is the fastest way to fix soggy soil indoors?
The fastest fix is to remove the plant from the wet soil. Shake off as much soggy mix as you can. Check the roots and cut away any that are black or mushy. Repot into a well-draining mix in a pot with drainage holes. Then wait a few days before watering. Place the plant in bright, indirect light and keep air moving around it. You should see improvement within one to two weeks if the damage is not too severe.
At the end of the day, adjusting pot drainage for rainy indoor weather is mostly about restraint. Less water. More patience. Smarter pots and soil. Once you get the hang of it, your plants will handle rainy days just fine. And so will you.