Aloe Verafor Hair Shine: My 2-Week Journey with a Simple DIY Rinse
Ever feel like your hair has lost its spark? No matter what fancy shampoo you use, it just looks dull, feels rough, and refuses to catch the light. I’ve been there. As a long-time plant enthusiast, I’ve turned my home into a mini-jungle, but my own hair often felt like the driest plant in the collection. That’s when I decided to look beyond the shelf and into my own garden, specifically at the humbleAloe Verafor hair shine. I’d heard the whispers about its legendary moisturizing properties, but I needed to see it for myself. So, I committed to a two-week experiment, creating and using a pure, DIYAloe Verarinse. What followed was a journey of surprising results, a few messy lessons, and ultimately, the rediscovery of my hair’s natural luster.
Why I Trusted Aloe Vera: More Than Just a Sunburn Soother
Before diving into the recipe, let’s talk about why aloe vera is a superstar for hair care. We all know it’s fantastic for soothing skin, but its benefits for hair are backed by both tradition and science. Aloe vera gel is packed with vitamins A, C, E, B12, and folic acid. It contains enzymes that promote healthy hair growth and amino acids that strengthen hair follicles.
Most importantly for shine, it’s a phenomenal natural moisturizer. The polysaccharides and glycoproteins in aloe vera create a humectant effect, meaning they help your hair and scalp retain moisture. A well-moisturized hair shaft has a smoother cuticle—the outer layer of your hair. When the cuticle lies flat, it reflects light evenly, giving you that coveted, healthy shine. It also helps reduce scalp dryness and flakiness, creating a better environment for hair to thrive. Organizations like the American Herbal Products Association (AHSA) recognize aloe vera’s long history of safe topical use for skin and hair wellness, which gave me the confidence to try it.

My Simple, 2-Ingredient DIY Aloe Vera Rinse Recipe
Forget complicated formulas with a dozen ingredients. I wanted purity and simplicity. Here’s the exact recipe I used, perfected after a bit of trial and error.
Ingredients:
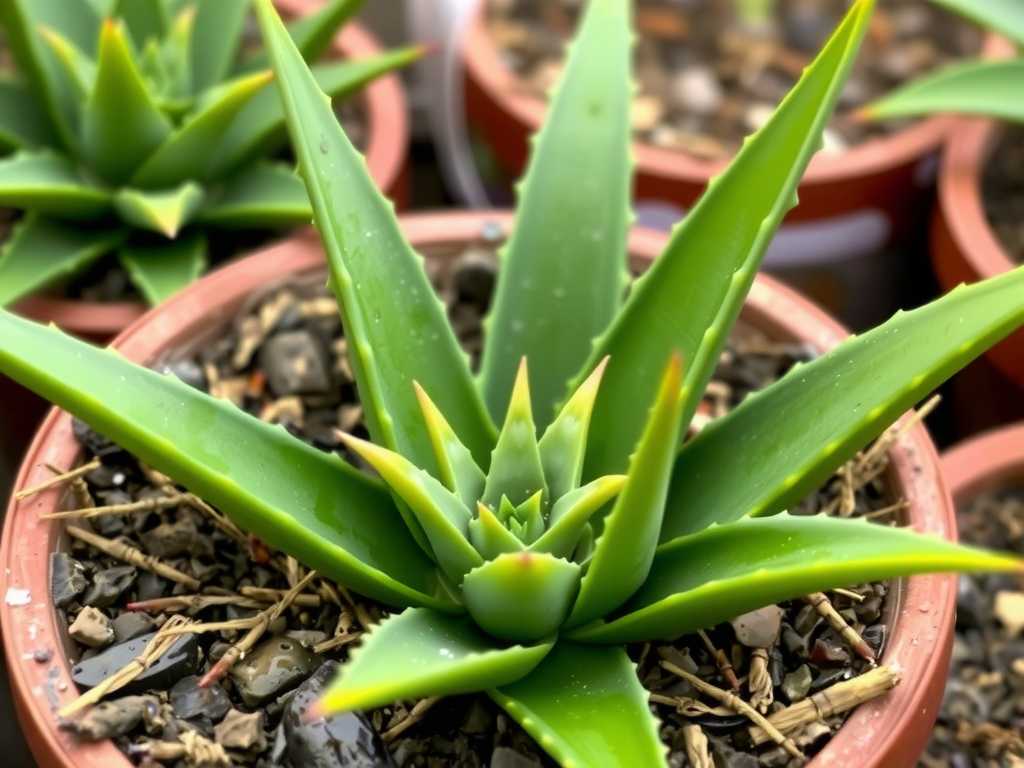
- 1 large, fresh aloe vera leaf:This is non-negotiable for me. Fresh gel is more potent and free from the preservatives and thickening agents found in some store-bought gels. I sourced mine from my own plant, ensuring it was organic and well-cared-for.
- 1 cup of filtered or distilled water:Tap water can contain minerals that might build up on hair over time. Using filtered water ensures nothing interferes with the aloe’s goodness.
My Step-by-Step Process:
Harvesting the Gel:I selected a thick, mature leaf from the outer part of my aloe plant. Using a sharp knife, I cut it at the base. Here was my firstmajor “aha” moment and pitfall: the yellow sap, called aloin. This latex-like substance can be a skin irritant for some people and is very bitter. To avoid it, I placed the leaf upright in a glass for about 10 minutes. This let the yellowish aloin drain out. Then, I laid the leaf flat on a cutting board, carefully sliced off the serrated edges, and filleted the top and bottom green layers away from the clear inner fillet.
Scooping and Blending:I used a spoon to scoop the translucent gel into my blender. I got about half a cup of pure gel from one large leaf. I added one cup of filtered water to the blender.
Creating the Rinse:I blended the mixture on high for 30-45 seconds until it was completely smooth and liquid. It had a slightly viscous, slippery consistency. I then poured it through a fine-mesh strainer into a clean glass bottle to catch any last fibrous bits. This yielded about 1.5 cups of rinse, enough for a week when stored properly.
Storage:This is a fresh product with no preservatives.Critical pitfall number two:it can spoil quickly. I stored my bottle in the refrigerator and made a fresh batch every 5-6 days to ensure potency and safety. The cold rinse also felt incredibly refreshing on my scalp!
My 2-Week Application Routine & Honest Observations
I have straight, color-treated hair that tends to be dry and frizzy. I used the rinse 3 times a week after my regular, sulfate-free shampoo. I did not use conditioner on the days I used the rinse, as I wanted to isolate the effects of the aloe vera.
My Weekly Process:
- After shampooing and thoroughly rinsing, I would lean over the tub and slowly pour the cool aloe vera rinse over my scalp and hair, section by section. I made sure to saturate it completely.
- I gently massaged it into my scalp for a minute, feeling the instantly soothing, cooling sensation—a huge perk I hadn’t even anticipated!
- I then combed it through my lengths with a wide-tooth comb to ensure even distribution.
- I left it on for 5-7 minutes while I washed my body. Unlike a conditioner, it doesn’t need to be rinsed out completely. I did a very light, quick rinse with cool water, leaving a trace of it in my hair. This is key for the ongoing moisturizing effect.
- I then followed my usual routine of gently blotting with a microfiber towel and air-drying.
Week 1 Observations:The first use was… interesting. My hair felt clean but strangely “squeaky” and almost tangled when wet—a sensation I didn’t love. This waspitfall number three: aloe vera doesn’t have the silicones or heavy emollients of commercial conditioners that provide instant slip. I persevered. Upon air-drying, my hair felt incredibly light and had zero residue. By the third application, the wet detangling became easier. I noticed my scalp felt less itchy, and my hair had a subtle, healthy-looking gleam in natural light, not a greasy shine. Theshine from aloe verawas starting to show, but it was natural, not glossy.
Week 2 Observations:This is where the magic became undeniable. The “squeak” was gone. My hair felt stronger when wet, with less breakage as I combed. The true victory was the texture and shine. My hair was noticeably softer to the touch. The frizz around my crown, which I usually battle with serums, was significantly tamed. The shine was no longer subtle; it was a clear, reflective glow. My hair looked hydrated from root to tip. TheDIY aloe vera hair rinsewas delivering anatural hair shinethat looked like I had just stepped out of a salon, but without any heavy product buildup. I even received a compliment from a friend who asked if I had gotten a new haircut!
Troubleshooting: The Pitfalls I Faced and How I Solved Them
My journey wasn’t perfectly smooth. Here’s what went wrong and how I fixed it:
The Aloin Issue (Yellow Sap):As mentioned, not draining the leaf led to a slightly irritating, very bitter rinse on my first attempt.Solution:Always let the leaf drain vertically after cutting. The extra 10 minutes is crucial for a gentle, effective rinse.
Spoilage:I left a batch out for two days by mistake. It developed a slightly off smell.Solution:Treat it like fresh food. Make smaller batches (enough for 4-5 days max) and always, always refrigerate. Mark the bottle with the date you made it.
Initial Tangling:The lack of instant slip was discouraging at first.Solution:I started applying the rinse with a spray bottle for more even distribution. I also applied a single drop of argan oilonlyto my ends after the aloe rinse, which solved the wet-combing issue while preserving the aloe’s shine benefits on the rest of my hair.
Not for Extreme Dryness Alone:For very coarse or severely dry hair, aloe is a fantastic humectant but might need a companion.Solution:For my final rinse of the week, I sometimes added a teaspoon of raw honey to the blend for extra hydration, or followed with a light oil on the ends as mentioned.
Your Questions, Answered
Can I use store-bought aloe vera gel?You can, but you must be meticulous. Choose a gel that lists “100% aloe vera gel” or “aloe barbadensis leaf juice” as the first ingredient. Avoid versions filled with colors, thickeners like carbomer, or excessive preservatives. The fresh leaf is always superior for potency and purity, but a high-quality, pure store-bought gel is a good alternative.
How often should I use an aloe vera rinse?It depends on your hair type. For oily hair, 1-2 times a week is sufficient. For normal to dry hair like mine, 2-3 times a week worked perfectly. Listen to your hair. If it starts to feel too soft or limp, scale back. It’s about finding a balance.
Will aloe vera make my hair greasy?No, when used correctly, it should not. Aloe vera is lightweight and moisturizing without being oily. The greasiness pitfall usually comes from not rinsing lightly (if you have fine hair) or using a contaminated/spoiled batch. If you have very fine hair, you might do a more thorough rinse or use it less frequently.
My two-week deep dive into usingaloe vera for hair shinetransformed my perspective on hair care. It moved me from a passive consumer of products to an active participant in my hair’s health. The process taught me patience—the shine built gradually, as true health does. It’s a simple, cost-effective, and profoundly natural way to nourish your hair from the scalp down. The glow you get isn’t from a coating; it’s from within, a sign of hair that is genuinely hydrated and happy. My aloe plant now has a permanent place of honor on my windowsill, not just as a decorative piece, but as a trusted partner in my wellness routine. Give it a try; your hair might just thank you with its own radiant light.
发表评论