bluename
 How to Make Aloe Vera Toner for Sensitive Skin: A Plant Lover's 2-Week Journey
If you have sensitive skin, you know the struggle of finding a product that doesn't cause redness, stinging, or irritation. For years, I chased after gentle toners, only to be met with disappointment from hidden fragrances or harsh preservatives. That's when I decided to take matters into my own hands. As a long-time plant enthusiast, my gaze naturally fell on the humble aloe vera plant sitting on my windowsill. I embarked on a mission to create my own pure, effective aloe vera toner for sensitive skin. This is my detailed, two-week account of the process, the results, and every lesson learned along the way.
Why I Trusted Aloe Vera for My Sensitive Skin
Before diving into the how, it's crucial to understand the why. My research, backed by organizations like the American Herbal Products Association (AHSA), confirmed what plant lovers have known for centuries. Aloe vera gel is packed with polysaccharides, vitamins, and enzymes that offer profound soothing and anti-inflammatory properties. It's a natural humectant, drawing moisture into the skin without clogging pores. For someone dealing with reactivity and dryness, formulating a homemade aloe vera skin toner seemed like the perfect way to harness these benefits in their purest form, free from unnecessary additives.
Gathering My Ingredients and Tools
Purity was my top priority. I didn't want to compromise with store-bought gels that might contain fillers. Here’s what I gathered:
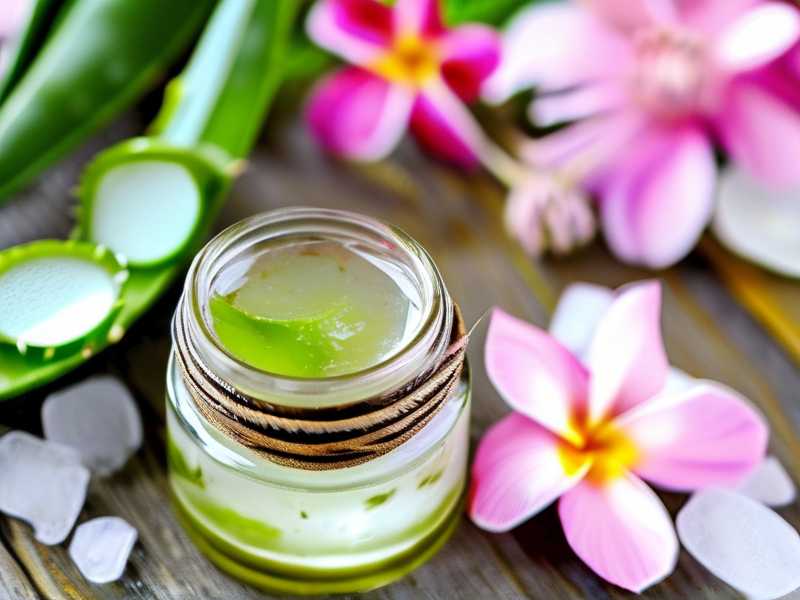
- A Mature Aloe Vera Leaf: I selected a thick, plump leaf from the outer section of my 3-year-old plant. Mature leaves contain more potent gel.
- Distilled Water: To ensure no impurities or minerals could irritate my skin.
- Vegetable Glycerin (Optional): A natural, skin-friendly humectant to boost hydration for my dry patches.
- A Clean Knife and Cutting Board
- A Spoon, Blender, and Fine-Mesh Strainer/Cheesecloth
- A Dark Glass Bottle with a Spray or Pump Top: Dark glass protects the toner's integrity from light degradation.
My Step-by-Step Process to Create the Toner
Step 1: Harvesting and Preparing the Gel I carefully cut a large leaf at the base, placed it upright in a jar for 15 minutes to let the yellowish, skin-irritating latex (aloin) drain out—a critical step for sensitive skin care. I then rinsed it, laid it flat, and carefully filleted the green rind away from the clear inner gel. Using a spoon, I scooped every bit of that glorious gel into my blender.
Step 2: Blending and Straining I added about 1/4 cup of distilled water to the blender with the gel to facilitate blending. After pulsing it into a smooth, foamy liquid, I poured it through a cheesecloth-lined strainer over a bowl. I gently pressed to extract every drop of pure, filtered aloe juice. This step removes any fibrous bits, ensuring a silky-smooth aloe vera facial mist.
Step 3: Formulating and Bottling Into the strained aloe juice, I added one teaspoon of vegetable glycerin for extra hydration support. I whisked it gently until fully incorporated. Finally, I funneled the finished toner into my sterilized dark glass bottle. I labeled it with the date—homemade products have a shorter shelf life, and this is non-negotiable.
The 2-Week Test: My Daily Observations and Skin's Response
I committed to using my DIY aloe vera toner twice daily, after cleansing and before moisturizing. Here’s how my skin reacted over the fortnight:
Days 1-3: The Initial Calm. Immediate relief. The first spray felt incredibly soothing and cool. My skin, which often felt tight after washing, remained supple. No stinging or redness—a first for any toner I'd used. The lightweight texture absorbed instantly.
Days 4-7: Hydration and Subtle Changes. The persistent dry patches on my cheeks began to soften noticeably. My skin felt more balanced; the oily T-zone seemed less shiny, likely due to better hydration. The overall complexion appeared less ruddy. I was thrilled with this natural toner for sensitive skin.
Days 8-14: Consolidated Benefits and a Glow. By the second week, the calming effect was cumulative. My skin barrier felt stronger, less reactive to environmental triggers. The gentle, consistent hydration led to a healthier, more resilient texture and a subtle, natural glow. It became the most reliable step in my routine.
The Hiccups: Problems I Faced and How I Solved Them
This journey wasn't without its learning curves. Here are the pitfalls I encountered:
- The Shelf-Life Shock: After 5 days in the fridge, my first batch developed a faint off-smell. I had made too much. Solution: I now prepare smaller batches (enough for 7-10 days) and store them strictly in the refrigerator. Adding a few drops of natural preservatives like grapefruit seed extract (thoroughly researched for safety) can extend life, but for ultimate purity, I stick to mini-batches.
- Inconsistent Texture: My first straining attempt left tiny fibers in the toner, which felt gritty on my skin. Solution: I doubled down on filtration. Using two layers of fine cheesecloth or a coffee filter, and patiently letting gravity do most of the work (instead of pressing hard), yielded a perfectly smooth liquid.
- The Stickiness Factor: When I initially overdid the glycerin, the toner left a slightly tacky film. Solution: I found the sweet spot. For my skin type, a ratio of 1 teaspoon of glycerin to 1 cup of aloe juice was perfect. For oilier skin, it can be omitted entirely.
Frequently Asked Questions (From One Sensitive Skin Friend to Another)
How long does this homemade toner last? Without strong preservatives, it's perishable. Always store it in the refrigerator and use it within 7-10 days. Discard immediately if you notice any color change, separation, or unusual smell.
Can I use store-bought aloe vera gel instead? You can, but you must be an avid label reader. Choose a gel that lists Aloe Barbadensis Leaf Juice as the first ingredient, and is free from alcohol, fragrances, and artificial colors. Pure, organic gels are best. However, the freshness and control from a home harvest are unmatched for the most reactive skin.
Is this toner suitable for all sensitive skin types? While aloe is renowned for its gentleness, every individual's sensitivity is unique. I always recommend a patch test. Apply a small amount to your inner forearm or behind the ear for 24 hours to check for any adverse reaction before using it on your face.
Creating this aloe vera toner for sensitive skin transformed my skincare approach. It moved me from a passive consumer to an active participant in my skin's health. The two-week experiment proved that simplicity and purity can be powerfully effective. The process taught me patience, precision, and a deeper connection to the natural ingredients I use. If you have sensitive skin and a desire for clean, transparent skincare, this DIY project is more than a recipe—it's a rewarding step towards understanding and nurturing your skin's unique needs.