bluename
How to Renew Partial Soil to Restore Aloe Growth Vitality
To renew partial soil to restore aloe growth vitality, remove and replace the compacted upper and outer portion of the potting mix without unnecessarily disturbing healthy roots. Use a dry, fast-draining succulent mix, keep the crown above the soil line, and delay watering if any roots are injured. This approach can improve drainage, reduce fertilizer-salt buildup, and create better root aeration. Aloes are attractive, low-maintenance succulents, but their fleshy leaves and moisture-sensitive roots make deteriorated soil a common household growing problem.
When Partial Soil Renewal Is the Right Choice
Partial soil renewal is less disruptive than complete repotting. It works best when an aloe is growing slowly but remains structurally sound.
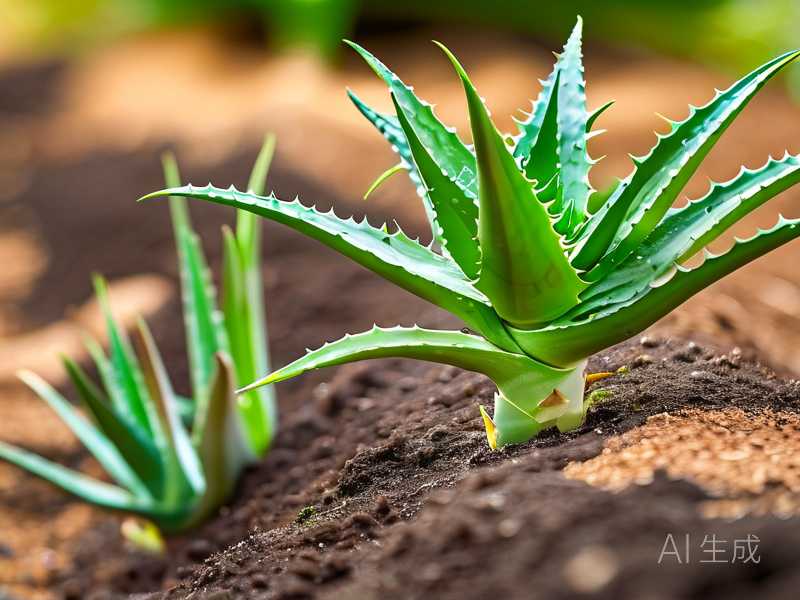
Consider refreshing part of the soil when:
- The surface has become hard, crusted, or slow to absorb water.
- Water runs down the gap between the soil and pot instead of soaking in evenly.
- A white mineral or fertilizer crust appears on the surface.
- The lower mix remains wet for too long.
- Growth has slowed even though light and temperature are suitable.
- The pot is still large enough and the roots are not severely crowded.
- The plant is stable, with firm central leaves and no foul smell from the soil.
Partial renewal will not solve every aloe problem. A full repot is safer if the mix smells sour, the base is soft, roots are black or mushy, pests are living in the soil, or the pot has no drainage hole. A severely root-bound aloe also needs more than a surface refresh.
The important thing to remember is that new soil cannot repair dead roots or permanently damaged leaves. It improves the growing environment so healthy roots and new leaves have a better chance to develop.
Why Old Potting Soil Can Restrict Aloe Growth
Aloe roots need both moisture and oxygen. Over time, organic components in potting soil break down into smaller particles. The mix then holds more water and contains fewer air spaces.
Several changes may occur:
- Fine particles settle around the roots and reduce aeration.
- Repeated fertilizing leaves soluble salts behind.
- Hard tap water may produce a mineral crust.
- Peat-based mixes may shrink when completely dry and resist rewetting.
- Decomposed soil may stay wet around the lower roots even when the surface looks dry.
These conditions can restrict root function before obvious rot develops. Partial soil replacement removes some of the most degraded material while avoiding the stress of stripping all the soil from a healthy root system.
How to Renew Partial Soil Around an Aloe
Choose a warm period when the plant is actively growing, usually spring or early summer. In Australia and other Southern Hemisphere locations, that may be September through December rather than March through June.
What You Will Need
- Succulent or cactus potting mix
- Pumice, coarse perlite, or fine horticultural grit
- A clean spoon, narrow scoop, or blunt wooden tool
- Clean pruning scissors
- Gloves, especially for aloes with toothed leaf margins
- A pot with an unobstructed drainage hole, if replacement is necessary
A practical refresh mix is two parts commercial cactus or succulent mix to one part pumice or coarse perlite. Adjust the blend according to local conditions. Use more mineral material in cool, humid homes or when growing in plastic pots. In very hot, dry climates, an excessively gritty mix may dry too rapidly.
Avoid using garden soil indoors. It compacts easily in containers and may introduce pests or disease organisms.
Step-by-Step Partial Soil Replacement
-
Let the existing mix become mostly dry.
Dry soil separates more easily and is less likely to smear against or suffocate the roots. -
Inspect the plant before starting.
Check the leaf bases, crown, drainage hole, and soil surface. If you find mushy tissue, a rotten smell, or collapsing roots, stop and perform a full repot instead. -
Remove loose surface material.
Gently scrape away approximately 1 to 2 inches, or 2.5 to 5 centimeters, of old soil. Work more shallowly near the stem because aloe roots may sit close to the surface. -
Refresh soil around the pot’s edge.
Use a narrow tool to loosen small sections between the root ball and container wall. Remove degraded soil a little at a time. Do not stab into the root mass or lever against the plant. -
Limit how much you remove.
For a routine refresh, replacing roughly one-quarter to one-third of the accessible soil is usually enough. Removing much more defeats the purpose of a low-disturbance treatment. -
Trim only clearly dead material.
If an exposed root is dry and hollow or black and mushy, cut it with sterilized scissors. Leave firm, pale, tan, or light-brown roots intact. -
Add fresh, dry potting mix.
Fill the open areas gradually. Tap the pot lightly to settle the mix rather than pressing it down firmly. -
Keep the crown exposed.
Do not bury the point where the leaves meet the stem. Soil trapped against the crown increases the risk of rot. -
Decide when to water.
If no roots were damaged and the plant genuinely needs water, irrigate thoroughly and let the pot drain. If roots were cut or broken, wait about three to five days before watering so damaged areas can dry. -
Return the aloe to suitable light gradually.
Keep it in bright, indirect light for several days. Do not place a newly disturbed plant directly into intense afternoon sun.
A Two-Week Aloe Recovery Monitoring Plan
Partial soil renewal does not normally produce dramatic visible growth in 14 days. Aloe leaves emerge slowly, and damaged leaves will not become perfect again. Use the following schedule as a monitoring plan rather than a guaranteed recovery timeline.
Day 0
Record the condition of:
- The central growing point
- Leaf firmness
- Soil moisture
- Pot weight
- Any yellow, translucent, or brown areas
- Drainage speed
Photograph the plant from the same angle you will use later.
Days 3–4
Check whether the plant remains stable in the pot. Mild temporary softness can occur after root disturbance, but rapid collapse is not normal.
If the mix is still wet, do not add more water. Confirm that the drainage hole is open and that no water remains in a saucer or decorative outer pot.
Day 7
Look for changes at the center rather than expecting old outer leaves to recover. Healthy signs include a firm crown and no expansion of discolored tissue.
Warning signs include:
- A spreading soft area at the base
- A sour smell
- Increasing translucency
- Soil that remains wet for an entire week in warm conditions
- New dark lesions around the crown
These symptoms justify removing the plant from its pot and inspecting the full root system.
Days 10–14
Check whether the soil now dries more evenly and accepts water without pooling. A stable crown and firm new central leaf are more meaningful than the appearance of old scars.
If leaves become thinner while the mix is completely dry, the aloe may need a thorough watering. If leaves become yellow, swollen, or translucent while the soil is damp, excess moisture is more likely than drought.
Light Requirements After a Soil Refresh
Aloes grow best in bright light. Indoors, place the plant close to a sunny south- or west-facing window in the Northern Hemisphere, or a north- or west-facing window in much of the Southern Hemisphere. An east-facing window can also provide useful gentler sun.
Aim for several hours of bright light each day. Direct morning sun is usually easier to manage than intense afternoon exposure through hot glass.
The RHS recommends bright growing conditions and free-draining compost for aloes. However, plants moved from dim indoor conditions must be acclimated gradually.
Increase direct sun over one to two weeks. Sudden exposure may cause pale, tan, or brown scorched patches. By contrast, insufficient light commonly produces stretched growth, leaning, weak leaves, and a loose rosette.
Red or bronze pigmentation can be a stress response to strong light, cold, or drought. It does not always mean the plant is dying, but it signals that growing conditions should be checked.
How to Water Aloe After Replacing Some Soil
Water according to soil condition, not a fixed calendar.
Insert a wooden skewer into the mix, feel through the drainage hole, or compare the pot’s weight when wet and dry. Water only after the mix has dried deeply. Then soak the entire root zone until excess water exits the drainage hole.
Do not give frequent small sips. They wet the surface without consistently hydrating the deeper roots and can encourage weak, shallow rooting.
Watering frequency changes with:
- Pot material: Unglazed terracotta dries faster than plastic or glazed ceramic.
- Pot size: Large volumes of soil stay wet longer.
- Soil composition: Fine, organic mixes retain more water than gritty mixes.
- Temperature: Warm conditions generally increase drying.
- Light: A brightly lit, actively growing aloe uses water faster.
- Season: Cool, low-light conditions slow water use.
- Ventilation: Moving air helps moisture evaporate.
Wrinkled, thinner leaves combined with completely dry soil may indicate thirst. Yellow, soft, translucent leaves in damp soil point more strongly toward overwatering or root damage.
Choosing Soil and a Pot for Long-Term Root Health
Aloe potting soil should drain quickly while holding a modest amount of moisture. A commercial succulent mix often benefits from added pumice or coarse perlite, particularly if the original product is fine and peat-heavy.
Choose a pot only 1 to 2 inches, or 2.5 to 5 centimeters, wider than the root mass. An oversized container surrounds the plant with unused wet soil.
Terracotta is useful in cool or humid homes because it allows faster evaporation. Plastic can work well in hot, dry environments, but watering must be more cautious. Regardless of material, at least one functional drainage hole is essential.
Complete repotting is appropriate when:
- Roots circle tightly around the inside of the pot.
- The plant repeatedly tips over.
- Water passes through without moistening the root ball.
- The soil remains wet and smells unpleasant.
- Root rot is present.
- Pups have crowded the parent plant.
- The current container has no drainage.
When repotting, avoid burying the aloe more deeply than it was growing before. Do not compress the new mix around the roots.
Fertilizer After Partial Soil Renewal
Do not fertilize immediately if roots were cut, rotted, or heavily disturbed. Fertilizer cannot repair damaged roots, and accumulated salts can draw moisture away from stressed tissue.
Wait until the aloe is stable and showing active growth. Then use a liquid houseplant or succulent fertilizer at no more than half the label strength. One or two light applications during the active growing period may be sufficient for an indoor aloe growing in fresh mix.
Reduce or stop feeding when:
- Growth slows during winter.
- The plant is heat-stressed.
- Roots are unhealthy.
- The soil is already showing a white salt crust.
- The aloe has recently been repotted.
- Light levels are too low to support active growth.
Possible fertilizer burn symptoms include brown root tips, sudden leaf-tip damage, and crusting on the soil. Nutrient deficiency is less common than light or root problems in household aloes. Weak growth should not automatically be treated with more fertilizer.
Seasonal Aloe Care in Different Climates
Use the plant’s growth and local weather rather than relying only on calendar dates. Spring occurs around March to May in the United States, Canada, and the United Kingdom, but around September to November in Australia.
Spring
As temperatures rise and daylight increases:
- Inspect roots, drainage, and soil structure.
- Renew partial soil or repot if needed.
- Remove fully dead outer leaves with clean tools.
- Increase watering gradually as the mix dries faster.
- Resume light feeding only after healthy growth appears.
- Acclimate indoor plants slowly before moving them outside.
Summer
Aloe often grows well in warm weather, but enclosed windows, patios, and balconies can become dangerously hot.
- Protect recently moved plants from abrupt midday or afternoon sun.
- Check moisture more often without watering automatically.
- Improve airflow around crowded pots.
- Keep containers off surfaces where rainwater collects.
- Inspect leaf joints for mealybugs and scale.
- Provide afternoon shade during extreme heat if leaves bleach or scorch.
Some aloes slow their growth during intense heat. If the soil stays wet because the plant is not actively using water, reduce irrigation.
Fall
As light and temperature decline:
- Allow longer drying intervals.
- Stop routine fertilizing.
- Remove dead plant debris from the pot.
- Check outdoor plants before bringing them inside.
- Isolate plants carrying insects.
- Move containers under cover in rainy climates.
Winter
Most commonly grown aloes are frost tender. Bring container plants indoors before freezing weather and preferably before temperatures remain below about 50°F, or 10°C, for extended periods.
Place the aloe in the brightest practical location, away from cold glass and heating vents. Water less often because cool, low-light soil dries slowly. Indoor heating may dry the air, but aloes do not need misting; extra water around the crown can encourage decay.
Common Aloe Problems After Soil Renewal
Root Rot
Symptoms: Soft lower leaves, a loose plant, dark roots, translucent tissue, or a foul smell.
Likely cause: Prolonged wetness, compacted soil, an oversized pot, or blocked drainage.
What to do: Remove the plant from the pot, cut away rotten roots and tissue, let cut areas dry, and repot in fresh, dry succulent mix. Delay watering for several days.
Mealybugs and Scale
Symptoms: White cottony clusters, sticky residue, or small brown raised bumps around leaf bases.
What to do: Isolate the plant. Remove visible pests with a cotton swab lightly moistened with isopropyl alcohol, avoiding saturation of the crown. Repeat inspections weekly and use a product labeled for indoor succulents if the infestation persists.
Brown or Bleached Patches
Likely cause: Sudden exposure to intense direct sunlight.
What to do: Move the aloe out of harsh afternoon sun and reintroduce stronger light gradually. Scorched tissue will not turn green again, but healthy new growth can continue.
Thin, Wrinkled Leaves
Check the soil before watering. If the mix is dry throughout and roots are healthy, water deeply. If the soil is damp, wrinkling may indicate that damaged roots cannot absorb water. Adding more water would make the problem worse.
Stalled Growth
Slow growth can result from low light, cold conditions, poor roots, compacted soil, or normal seasonal rest. Correct the limiting condition instead of applying fertilizer automatically.
Three Major Mistakes New Aloe Growers Make
1. Watering Before the Soil Has Dried
Overwatering is one of the most common indoor plant problems. Aloe roots lose access to oxygen when the mix stays saturated.
Look for damp soil combined with yellow, soft, or translucent leaves. Let the mix dry, empty the saucer, and inspect the roots if symptoms continue. Prevent recurrence by using a draining pot and checking moisture below the surface.
2. Choosing the Wrong Light Position
A dark shelf may produce stretched, weak growth, while an abrupt move into intense sun may scorch the leaves.
Place the plant close to a bright window and rotate it periodically. Increase direct sun gradually, especially after winter or after buying an aloe that was displayed indoors.
3. Using the Wrong Pot
A container without drainage or one much larger than the roots keeps excess moisture around the plant. A very small pot, however, may become unstable and dry unevenly.
Use a pot slightly wider than the root mass with a clear drainage hole. Match the pot material and soil blend to your climate and watering habits.
Frequently Asked Questions
Can I replace only the topsoil of an aloe plant?
Yes. Replacing the upper 1 to 2 inches can reduce crusting and improve water entry. For a more useful refresh, also remove small amounts of degraded soil around the pot’s edge, provided you can do so without tearing healthy roots.
Should I water an aloe immediately after changing part of the soil?
Water immediately only if the roots were not damaged, the old root ball is dry, and the plant needs moisture. If roots were cut or broken, wait approximately three to five days before watering. Always allow excess water to drain completely.
How long does an aloe take to recover after a soil refresh?
A stable plant may show improved hydration and firmer central growth over the following weeks, but recovery speed depends on light, temperature, root health, and season. Old damaged leaves will not repair themselves. Judge success by healthy new growth and more even soil drying.
Final Thoughts
Partial soil renewal is useful when an aloe’s mix has compacted or accumulated salts but the roots remain mostly healthy. Replace only the accessible degraded soil, preserve sound roots, use a gritty mix, and keep the crown dry and exposed. Most importantly, correct light and watering at the same time. Fresh soil can improve root conditions, but lasting vitality depends on the entire growing environment.
Aloe Care, Aloe Soil Renewal, Succulent Repotting, Aloe Root Health, Indoor Aloe Growing