How to ChooseAloe VeraPups for Propagation: A Step-by-Step Guide from a Plant Lover
There’s nothing more rewarding for a plant enthusiast than watching yourAloe Veraplant thrive and produce new baby plants, known as pups. But if you’ve ever tried to propagate these pups, you know the biggest hurdle isn’t the process itself—it’s choosing the right pup to begin with. Selecting one that’s too young or separating it incorrectly can lead to a failed propagation attempt and a lost plant. After years of trial and error with my own aloe collection, I’ve learned thathow to chooseAloe Verapups for propagationis the single most critical step for success. This guide will walk you through my exact process, including the two-week observation period that makes all the difference.
Understanding Aloe Vera Pups and Their Role

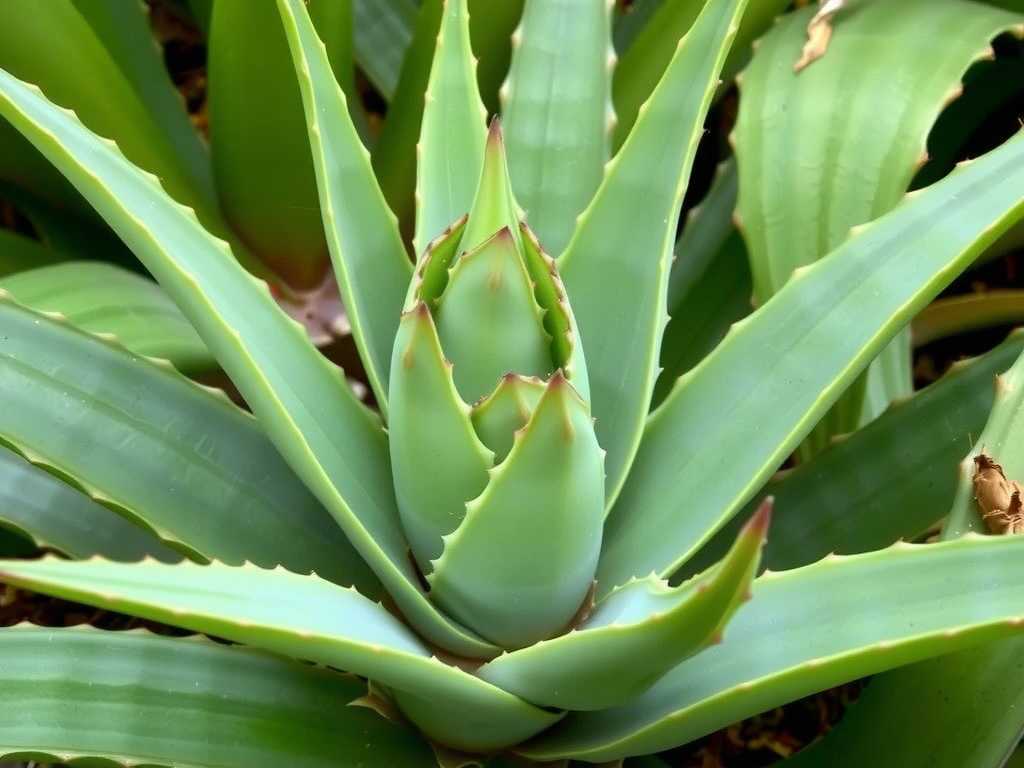
Aloe vera pups, also called offsets or suckers, are genetically identical clones that grow from the mother plant’s root system or stem base. They are the plant’s natural method of reproduction. For us plant lovers, they represent a free and sustainable way to expand our collection. However, not every tiny growth is ready for independence. The key is to identify pups that have developed their own root systems while still being connected to the mother. A study referenced by the Royal Horticultural Society (RHS) emphasizes that premature separation is a leading cause of propagation failure in succulents, as the offset lacks the resources to sustain itself.
My Step-by-Step Process for Selecting the Perfect Pup
I follow a meticulous, four-step checklist every time I plan to propagate. This isn’t a rushed job; patience here pays off in a healthy new plant.
Step 1: The Initial Health and Timing Check
I never consider propagation unless the mother plant is visibly healthy, mature, and has multiple pups. A stressed or diseased mother will produce weak offsets. I look for a plant that is at least two to three years old. The ideal time for this activity is during the active growing season, typically late spring or early summer, when recovery and root development are fastest.
Step 2: Assessing Pup Size and Development
This is where most beginners, including my past self, go wrong. Size is a crucial indicator. I ignore any pup that is less than one-fifth the size of the mother plant or smaller than my palm. A viable pup should have several sets of its own leaves, typically at least 3-4 inches tall. The leaves should be plump, firm, and show the characteristic aloe vera coloration, not pale or yellowish. A pup that’s too small simply doesn’t have enough stored energy and developed tissue to survive on its own.
Step 3: The Gentle Investigation for Roots
Now for the detective work. I gently brush away the soil from the base of the pup, where it connects to the mother plant. I’m looking for evidence of its own root system. I don’t need to see a massive root ball, but I should see white or light-brown root nubs or short roots emerging from the pup’s base. If I see only a smooth stem with no root initials, I carefully re-cover it with soil and mark it to check again in a month. According to the American Horticultural Society’s (AHS) propagation guidelines, an offset with pre-formed roots has a significantly higher survival rate.
Step 4: The Final Separation Decision
If a pup meets the size and root criteria, it’s a candidate. I assess its connection point. Is it attached by a thick, stem-like structure, or is it more loosely connected? A pup growing further out from the center with a discernible “neck” is usually easier and safer to remove. I make a mental note of this for the separation day.
The Separation and Potting: Handling with Care
With my champion pup selected, I prepare for surgery. I use a clean, sharp knife, sterilized with isopropyl alcohol. I water the mother plant lightly two days before to make the roots more flexible. On the day, I remove the entire plant from its pot to get a clear view. I locate the connective tissue between the mother and the pup and make a clean, swift cut. My goal is to ensure the pup retains as many of its nascent roots as possible. I then let both the pup’s wound and the mother’s cut callous over in a dry, shaded spot for 48 hours—this is non-negotiable to prevent rot.
For potting, I use a terracotta pot with excellent drainage and a commercial cactus/succulent mix. I plant the pup just deep enough to support itself and do not water it for the first week. This encourages the roots to seek out moisture and grow.
The Critical Two-Week Observation Period
This is where the real learning happens. I placed my newly potted pup on a bright windowsill with indirect light. Here’s my day-by-day log from my most recent successful propagation:
- Days 1-3:The outer one or two leaves showed slight softening and a subtle dullness in color. This is normal stress as the plant adjusts.
- Days 4-7:After the first week, I gave it a thorough but gentle bottom-watering. The central leaves remained firm and green. The outer leaves continued to look a little weary.
- Days 8-10:I noticed the first sign of success: the very center of the rosette showed a hint of vibrant new green growth. The plant had stopped diverting energy to the outer leaves and was focusing on new roots and center growth.
- Days 11-14:The plant stabilized. The outer leaves firmed up slightly, and the new central growth was more pronounced. A gentle tug on the plant met with slight resistance, indicating new root anchorage.
By the end of two weeks, the pup was clearly established and on its way to becoming an independent plant.
Common Pitfalls I’ve Faced and How I Solved Them
My journey wasn’t without casualties. Here are the big mistakes I made and how you can avoid them.
Pitfall 1: The Overeager Separation.I once separated a tiny, rootless pup because it looked cute. It slowly shriveled over three weeks despite my care.Solution:Enforce the size and root rules strictly. If in doubt, wait.
Pitfall 2: The Rot After Watering.After my first separation, I watered immediately, excited to “help” it grow. The cut end turned mushy and brown.Solution:The 48-hour callousing period is sacred. Never skip it.
Pitfall 3: Wrong Soil and Pot.Using regular potting soil in a plastic pot with no drainage led to soggy roots and a fatal rot.Solution:Invest in a gritty, fast-draining mix and always use a pot with a drainage hole. Terracotta is ideal as it wicks away excess moisture.
Pitfall 4: Too Much Sun Too Soon.Freshly potted pups are vulnerable. Direct sunlight scorched the leaves of one of my offsets, setting it back months.Solution:Provide bright, indirect light for the first 4-6 weeks before gradually introducing direct sun.
Frequently Asked Questions
How many pups should I leave on the mother plant?You don’t have to remove all pups. A crowded pot can stress the mother plant and limit growth. I generally thin the cluster, removing the largest, most mature pups for propagation and leaving one or two smaller ones if I want a fuller-looking mother plant.
Can I propagate a pup without any roots at all?It is possible but riskier and requires more skill. You would treat it like a stem cutting, allowing it to callous and then placing it on barely moist soil until roots develop. This process is slower and has a higher failure rate. I always recommend waiting for root nubs.
My separated pup’s leaves are curling in and thinning. What should I do?This is often a sign of underwateringafterthe initial rooting period. Once the pup is established (shows new growth), ensure you are watering deeply but infrequently, allowing the soil to dry completely between waterings. Check if the soil is hydrophobic and repot if necessary.
Choosing and propagating aloe vera pups is a blend of science and intuition. By carefully selecting a mature, rooted pup, handling it with patience during separation, and providing attentive post-care during the critical establishment phase, you dramatically increase your chances of success. Remember, the goal is a thriving independent plant, not just a quick separation. Watch for those signs of new growth in the center after two weeks—it’s the most rewarding confirmation that you’ve done it right. Happy propagating
发表评论