Aloe VeraPlant Aging: How to Maintain Vitality
I’ve been a plant enthusiast for over a decade, and nothing has taught me more about patience and observation than caring for my collection ofAloe Veraplants. Over the years, I’ve watched vibrant, plump specimens slowly lose their vigor, their leaves thinning and color fading—a clear sign ofAloe Veraplant aging. It’s a common, often heartbreaking, issue for indoor gardeners. We bring home a thriving plant, only to see it gradually decline, becoming leggy, pale, or simply stagnant. The good news? This aging process isn't a death sentence. With targeted care, you can restore vitality and encourage robust new growth. I recently embarked on a focused, two-week rescue mission for my oldest aloe, and the transformation was remarkable. Here’s my hands-on journey, complete with steps, results, and the inevitable pitfalls I navigated along the way.
Understanding the Signs of an Aging Aloe Vera
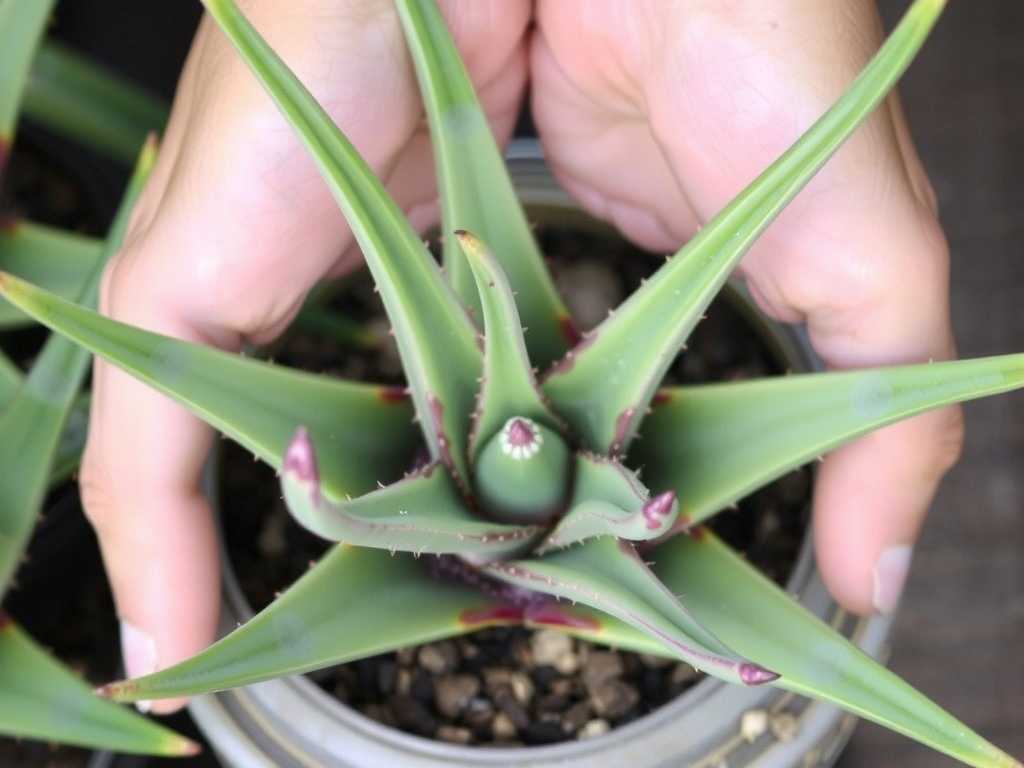
Before you can fix a problem, you must diagnose it correctly. An aging aloe vera doesn't just look old; it shows specific, treatable symptoms. My aloe, which I've named "Arthur," had become a textbook case. His lower leaves were consistently dry, papery, and curling inward. The once upright, compact rosette had started to sprawl, with the stem becoming visibly elongated and woody—a condition known as etiolation. Most tellingly, new growth at the center was achingly slow and smaller than previous leaves. He wasn't dying from a sudden disease, but slowly succumbing to cumulative suboptimal conditions. According to the Royal Horticultural Society (RHS), such symptoms often point to a combination of insufficient light, improper watering, and nutrient-depleted soil, not merely the passage of time. Recognizing this was my first step toward a solution.
My Two-Week Revival Plan: A Step-by-Step Guide
I decided to intervene with a structured plan, focusing on the three pillars of aloe health: light, water, and substrate. I committed to daily observations and weekly checkpoints.

Week 1: Assessment and Immediate Intervention
My first step was a thorough physical exam. I gently removed Arthur from his ceramic pot. The roots told a story the leaves only hinted at: they were congested, circling tightly in a dense ball, with a few tips appearing slightly brown and soft. The soil was exhausted, compacted, and drained poorly.
- Step 1: Repotting for a Fresh Start.I chose a new terracotta pot only one inch larger in diameter. Terracotta’s porosity is excellent forpreventing aloe vera root rot, a key risk with aging plants in moisture-retentive soil. I created a well-draining mix using two parts succulent/cactus soil, one part perlite, and a handful of coarse sand. After carefully loosening the root ball and trimming away any truly mushy roots with sterilized shears, I planted Arthur at the same depth he was before, backfilling with my new mix.
- Step 2: The Strategic Watering Pause.Contrary to instinct, I did not water him after repotting. The American Horticultural Society (AHS) advises allowing repotted succulents a few days to heal any root abrasions, which minimizes rot risk. I placed him in a spot with bright, indirect light and left him completely dry for five full days.
- Step 3: The First Soak and Light Adjustment.On day six, I gave Arthur his first deep watering. I placed the pot in a sink and soaked the soil until water ran freely from the drainage hole, then let it drain completely. This is the "soak and dry" method, crucial for aloe vera moisture control. I then moved him to his permanent new home: a south-east facing windowsill where he would receive several hours of gentle morning sun, avoiding the harsh afternoon rays that can scorch already-stressed leaves.
The First Week's Observations:By day seven, the most dramatic change was psychological—mine! Seeing Arthur in fresh soil and a proper pot was encouraging. Physically, the plant showed no decline, which was a win. The previously slightly-wilted outer leaves firmed up slightly, likely due to the humidity from the initial soil moisture. No new growth was visible yet, but I hadn't expected any.
Week 2: Consistency and Observation
This week was about discipline and watching for subtle signs.
- Step 4: Establishing a Monitoring Routine.I resisted the urge to water again. Instead, I used a simple wooden skewer to check soil moisture deep in the pot. The core principle formaintaining aloe vera vitalityis to water only when the soil is completely dry, which for my environment, took about 10-12 days after that first soak. I also gave the pot a quarter-turn every other day to ensure even light exposure and prevent further leaning.
- Step 5: Addressing the "Leggy" Growth.Arthur’s elongated stem was a permanent record of his past low-light life. While I couldn't reverse it, I could stabilize it. I added a layer of small, decorative pebbles on top of the soil. This served two purposes: it provided physical support for the top-heavy plant, and it helped keep the base of the stem dry, further preventing rot.
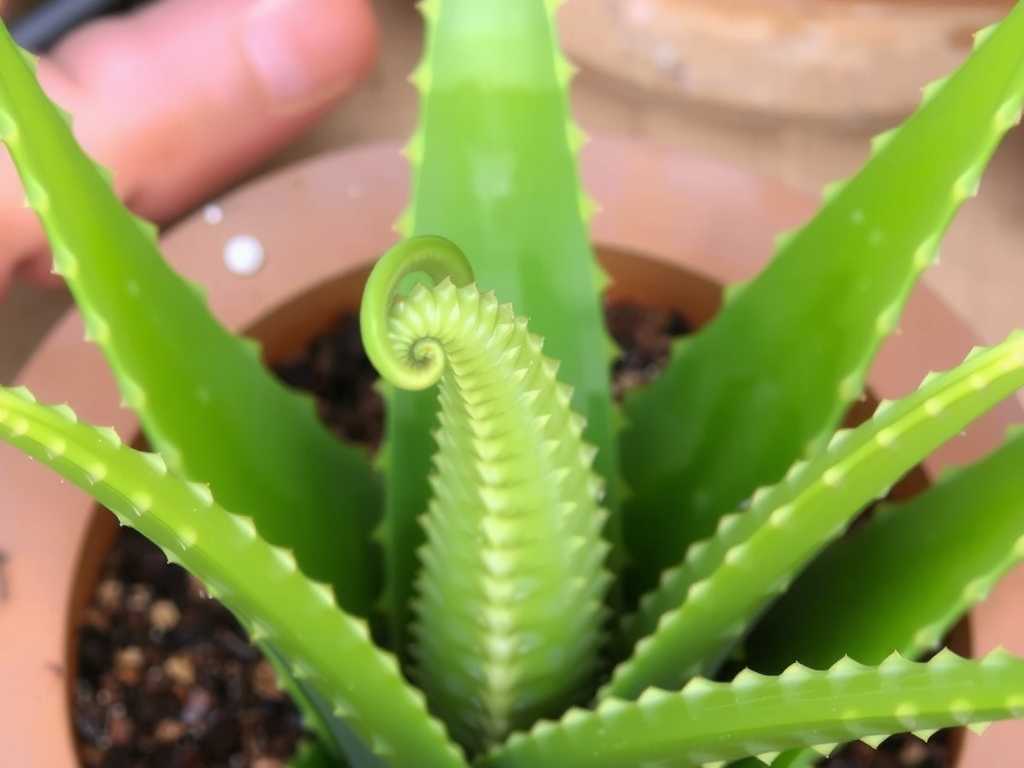
The Second Week's Results:The transformation began. By day 14, the center of the rosette, once tight and slow, showed clear activity. The tiny, emerging leaf had visibly plumped and deepened in color from pale green to a healthier grey-green. The overall posture of the plant improved; it looked more stable and less desperate. The older, damaged lower leaves continued their slow, natural decline, but the energy of the plant was now unmistakably focused on pushing out vigorous new growth.
The Pitfalls I Encountered (And How I Solved Them)
No plant rescue goes perfectly. Here’s where I stumbled and what I learned.
- The Overwatering Temptation:After repotting, the top inch of soil dried out quickly. My instinct was to give a little splash. This is a classic mistake. I stuck to the skewer test, confirming the deeper soil was still moist. Watering based on surface dryness would have undermined everything.Solution:Trust the tool, not your eyes. A moisture meter or simple skewer is non-negotiable.
- The "More Sun is Better" Fallacy:In my zeal, I initially placed Arthur in direct afternoon sun. Within two days, his leaves developed a reddish-brown tinge—a sign of sun stress. I moved him back to the gentler morning light location, and the stress coloration halted.Solution:Acclimate aging plants to increased light gradually. Morning sun or bright, filtered light is often ideal.
- Ignoring the Pot Material:I almost reused his old glazed ceramic pot. Its poor drainage was likely a contributing factor to his prior decline. Switching to terracotta was a game-changer for soil aeration.Solution:Always prioritize breathability and drainage over aesthetics when choosing a pot for succulents.
Sustaining Vitality Beyond the Rescue
My two-week intensive care jump-started Arthur’s recovery, butmaintaining aloe vera plant healthis a long-term commitment. Now, I follow a simple seasonal routine: deep but infrequent watering (only when bone dry), monthly feeding with a diluted, balanced fertilizer during the spring and summer growing season, and ensuring he gets his daily dose of bright, indirect light. I also wipe his leaves gently with a damp cloth every few months to remove dust, allowing him to photosynthesize efficiently. He may always bear the signs of his "youthful mistakes," but his new growth is strong, thick, and vibrant—a clear sign of restored vitality.
How often should I water my mature aloe vera plant?There is no universal schedule. The frequency depends entirely on your environment (light, temperature, humidity). The only reliable method is to check the soil. Water deeply only when the soil is completely dry all the way to the bottom of the pot. For most indoor settings, this can range from every 2-4 weeks.
Can I cut off the long, bare stem of my old aloe?Yes, you can perform a "beheading." Using a sterile knife, cut the stem several inches below the healthy rosette of leaves. Let the cut end callous over for several days in a dry, shaded place, then plant it in fresh, dry succulent mix. Do not water for at least a week to encourage new roots. The old base may also produce new offsets.
Why are the tips of my aloe vera leaves turning brown and dry?This is typically a sign of underwatering, low humidity, or a buildup of minerals and salts from tap water or fertilizer. Ensure you are watering deeply enough so that moisture reaches the entire root ball. Consider using filtered or rainwater, and flush the soil occasionally by running water through the pot for several minutes to leach out excess salts.

发表评论