Aloe VeraLeaf Thickness Changes: Causes and Fixes
Have you ever run your fingers over yourAloe Veraplant, expecting that familiar plump, firm resilience, only to find the leaves feeling thin, limp, or even hollow? That sinking feeling is all too real for us plant lovers. I’ve been there, staring at my once-thriving aloe, wondering where I went wrong. The change inAloe Veraleaf thicknessisn't just cosmetic; it's a direct message from your plant about its health and happiness.
Over years of nurturing these succulent companions, I’ve learned that leaf thinning is a complex puzzle. It can stem from watering habits, light exposure, or even the roots hidden beneath the soil. In this guide, I’ll walk you through the exact steps I took to diagnose and fix this issue, based on two weeks of focused observation and intervention on my own struggling plant. We’ll move from worry to understanding, and finally, to action.
Understanding Why Aloe Vera Leaves Lose Thickness
Before you can fix a problem, you need to speak the plant's language. A plump aloe leaf is a water reservoir. Thinning means that reservoir is being depleted faster than it's being refilled, or the system for storing water is compromised. It's rarely one single cause but a combination of factors.

From my experience and supported by resources from the Royal Horticultural Society (RHS), the primary culprits almost always circle back to moisture—either too much or too little—and energy production. Let's break down the most common reasons.
The Watering Dilemma: Overwatering vs. Underwatering
This is the classic paradox and the first place I look. Both extremes lead to thin leaves, but through completely different mechanisms.
Overwatering and Root RotI made this mistake early on. Thinking I was being generous, I watered my aloe on a weekly schedule. The leaves started to feel soft and less thick, and a yellowish tinge appeared. I assumed it was thirsty and watered more—a fatal error.
The fix required a full investigation. I gently tipped the plant out of its pot. The soil was soggy, and a few roots were dark brown and mushy—the telltale signs of root rot. Rotting roots can't absorb water or nutrients, so the plant draws on the reserves in its leaves, causing them to thin and collapse. The American Horticultural Society (AHA) notes that for succulents like aloe, "the fastest route to decline is consistently moist soil."
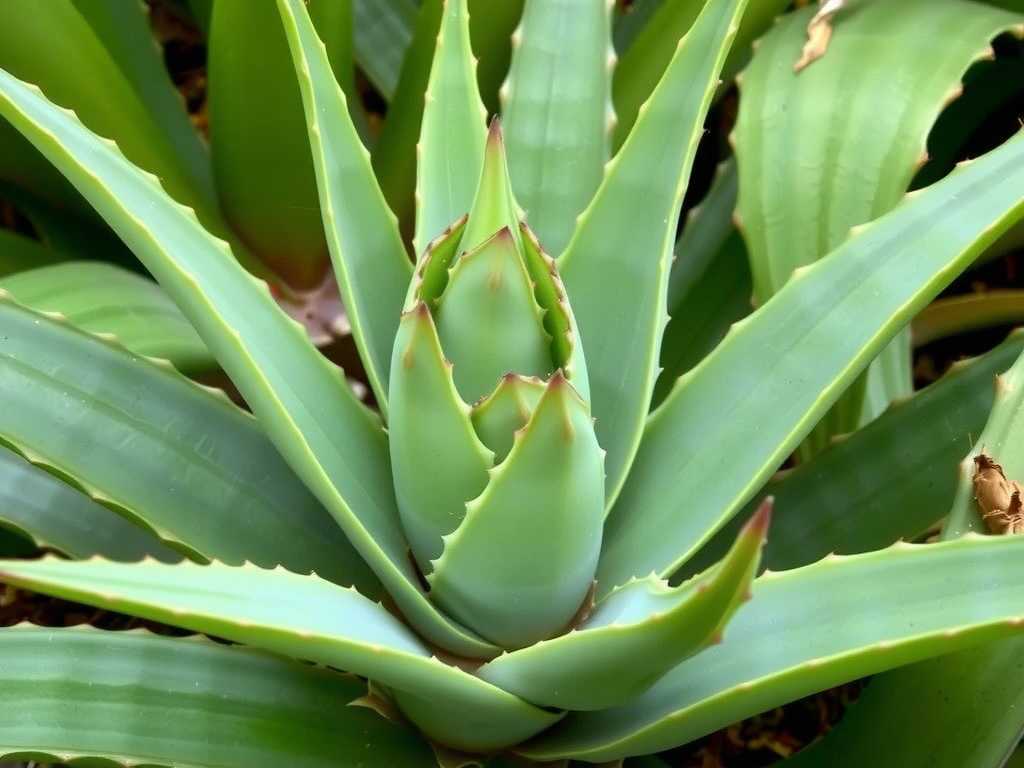
Underwatering and Chronic Drought StressOn the flip side, I’ve also neglected an aloe during a busy period. The leaves became thin, wrinkled, and curled inward. They felt papery. Here, the plant is simply using up all stored water to survive, with no replenishment.
The key is to observe thetexture. Underwatered leaves are dry and crispy-thin, while overwatered ones are mushy and translucent-thin.
Inadequate Light: The Silent Energy Thief
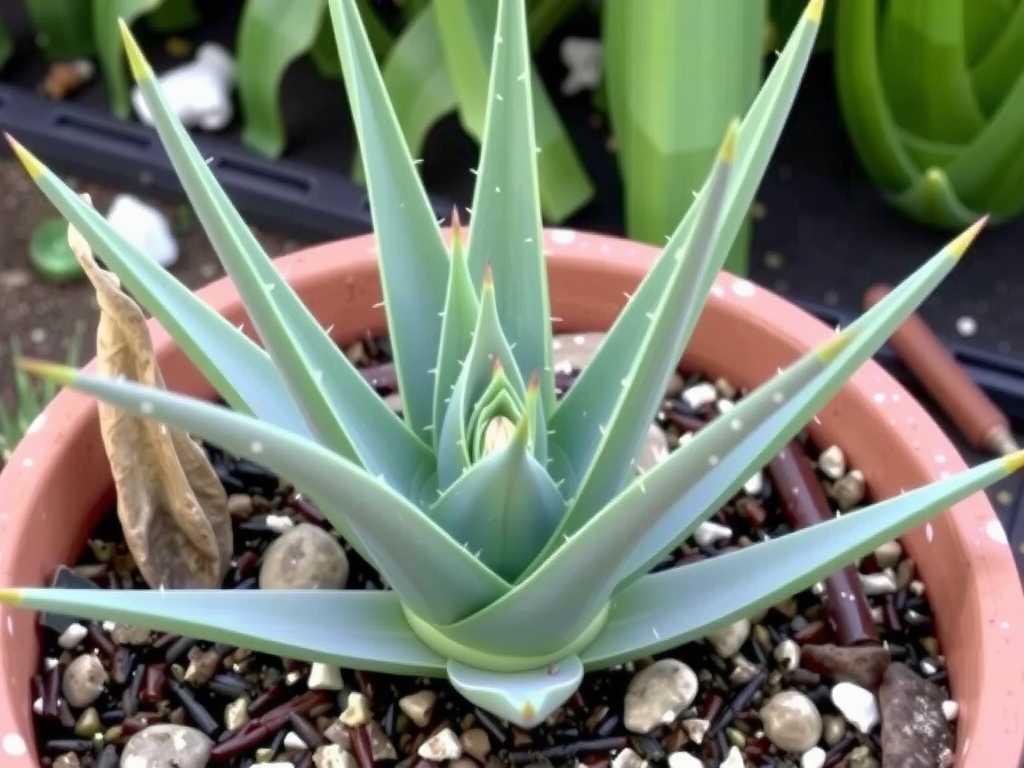
Aloe vera is a sun-loving plant. I once placed a beautiful aloe on a shelf for decor, far from a window. It survived but didn’t thrive. The new growth was stunted, and the leaves grew long, spindly, and thin—a condition called etiolation.
Without sufficient light, the plant can't perform photosynthesis efficiently. It lacks the energy to build robust, thick tissues. It stretches towards any light source, sacrificing leaf density for reach. The RHS emphasizes that indoor aloes need the brightest spot possible, ideally a south or west-facing window.
Pot-Bound Roots and Poor Soil
Sometimes, the issue is underground. Last year, I noticed an aloe that had been in the same pot for years was looking tired, with thinner leaves. Upon removal, I found a dense, tangled web of roots circling the pot—it was severely pot-bound.
When roots have no room to grow, they can't support the plant's needs for water and nutrients, leading to stunted growth and thin leaves. Similarly, using dense, water-retentive soil (like regular potting mix) suffocates roots and mimics overwatering conditions.
My 2-Week Rescue Plan: Step-by-Step Diagnosis and Recovery
When I noticed my favorite aloe vera's leaves becoming noticeably thinner, I committed to a 14-day rescue mission. Here is my exact process.
Days 1-2: The Assessment PhaseFirst, I stopped all automatic care. I placed the plant in a bright, indirect light spot (to avoid shocking it while stressed) and did not water it. I documented the starting point: leaf pliability, color, and soil moisture. I gently probed the base of the stem for softness.
Days 3-4: The Root InspectionThis is the most critical step. I carefully removed the plant from its pot. I shook off the old soil and inspected the roots. I found a mix of healthy, firm white roots and some that were brown and soft. Using sterilized scissors, I pruned away all the rotten parts. I let the root ball air dry and callous over for 24 hours—this is a non-negotiable step to prevent further rot.
Days 5-6: Repotting for SuccessI selected a new pot only one size larger than the root ball, with excellent drainage holes. I mixed a well-draining succulent/cactus soil (about 60%) with perlite (40%) for extra aeration. I repotted the aloe in this fresh mix, being careful not to bury the stem too deeply. I did not water it immediately.
Days 7-14: The Observation and Adjustment Period
- Week 1 (Days 7-10):I placed the repotted aloe in a location with bright, direct morning sunlight (about 4-6 hours). I resisted watering until day 10, when the soil was completely dry down to my second knuckle. I then gave it a thorough, deep watering until it ran out the drainage hole, ensuring the roots had access to moisture.
- Week 2 (Days 11-14):I maintained the "soak and dry" method. The most significant change I observed was a halt in the thinning. The leaves stopped feeling worse. By day 14, the outermost leaves, while not fully plump, had lost their papery feeling and showed a slight firmness returning at the base. New growth from the center appeared stable and green. This was my sign that thefixes for thinning aloe leaveswere taking hold.
Common Pitfalls I Encountered and How I Solved Them
The Pitfall: Watering on a Schedule.My old habit was "Water every Sunday." This ignores seasonal changes in light, temperature, and plant dormancy.
- The Solution:I adopted the "finger test." I now only water when the top 1-2 inches of soil is bone dry. In winter, this might mean watering only once a month.
The Pitfall: Misdiagnosing the Cause of Thin Leaves.I initially thought all thin leaves meant thirst. Attempting to "plump up" an overwatered aloe by giving it more water is catastrophic.
- The Solution:I learned to do the "root check" first. Feel the leaves and the stem base. Mushy + thin = overwatering/rot. Crispy + thin = underwatering. This simple touch test guides all next steps.
The Pitfall: Using the Wrong Soil.Regular potting soil holds too much moisture for aloe vera roots, creating a chronic risk of rot.
- The Solution:I now always make my own gritty mix. A bag of succulent soil and a bag of perlite or coarse sand have become my staples. This ensures excess water drains away rapidly, mimicking the aloe's natural arid environment.
Frequently Asked Questions
Can a thin aloe vera leaf become thick again?Yes, but with a caveat. Severely wrinkled, older outer leaves may never fully regain their original perfect plumpness. However, with corrected care, the plant will stop draining them, and they will stabilize. The real recovery is seen in the new growth from the center of the plant, which will emerge thick and healthy if the underlying issues are fixed.
How often should I water my aloe to maintain thick leaves?Throw away the calendar. The frequency depends entirely on your environment (light, humidity, temperature) and your pot/soil mix. The only reliable method is to check the soil moisture. For a typical indoor aloe in a well-draining mix during the growing season, a deep watering every 2-3 weeks is often sufficient. Always let the soil dry out completely between waterings.
Is fertilizer important for preventing thin aloe leaves?It's secondary. While nutrient deficiency can contribute to poor growth, most cases of thinning are due to water, light, or root issues. If those are correct, you can feed a diluted, balanced succulent fertilizer once at the start of the growing season (spring) and once in mid-summer. Over-fertilizing can harm the roots and exacerbate problems. Focus on the fundamentals first.
Watching your aloe vera's leaves change from firm to frail is a call to action, not a death sentence. The journey from thin, struggling leaves back to a robust, healthy plant hinges on understanding its simple needs: brilliant light, infrequent but deep watering, and a gritty home for its roots. My two-week experiment proved that patience and correct diagnosis are your best tools. Start by checking the roots, adjust the environment, and then wait. Your aloe’s return to thickness will be a slow but deeply rewarding testament to your attentive care.
发表评论