bluename
 So you want a fat, healthy aloe that actually pushes out pups and fills the pot. Here is the short answer. Stop using heavy potting soil straight from the bag. Mix it half and half with perlite or pumice. Use a pot that feels almost too small. Water deeply. Then leave it alone until the soil is bone dry. If your aloe is floppy, brown, or mushy right now, the real problem is usually the soil and pot holding too much water around the roots. Fix that first. Everything else gets easier.
Aloe vera is one of those plants that almost sells itself. It looks good on a sunny kitchen windowsill. It forgives a forgotten watering. It even gives you gel for burns and dry skin.
But here is what nobody tells you. Aloe is not a normal houseplant. It is a desert succulent. Its roots behave more like a cactus than a pothos. And most aloe problems start underground long before you see a yellow leaf.

I have kept aloes for about nine years now. I have also killed more than I like to admit. The first one rotted in six weeks. The second one turned pale and floppy. I only got consistent results after I stopped guessing and started matching the roots to the soil and the pot.
This guide covers exactly that. You will learn the right soil texture, how to pick a pot that works with your watering habits, and how to adjust care through all four seasons. I will also walk through the most common aloe failures and how to avoid them.
How to Optimize Soil and Pot Matching for Aloe Vigor
First, Understand What an Aloe Root Actually Wants
Most houseplants come from humid forests. Their roots expect moisture, decayed leaves, and dense organic matter.
Aloe comes from dry, rocky places. Think sandy slopes, cracked earth, and long periods with no rain. The roots have evolved to grab water fast when it appears, then dry out quickly.
This changes everything about how you pot it.
If you put aloe in dense potting mix, the roots sit in a wet blanket. They cannot breathe. Fungus moves in. The lower leaves get soft and translucent. Then the stem collapses. It can happen in less than two weeks in a warm house.
The key phrase I use with friends is simple. Aloe roots need air as much as water.
Once you accept that, soil and pot decisions become obvious.
The Best Soil Mix for Aloe Vigor
Why Standard Potting Mix Fails
I have tried cheap bagged soil. I have tried fancy organic mixes. I have tried cactus soil straight from the garden center. Some worked better than others. None worked perfectly on its own.
Standard potting soil holds too much water. It also compacts over time. After six months, the top looks dry but the bottom of the pot is a swamp.
Cactus mix is better. But many commercial cactus blends still break down too fast. They turn dusty and dense after a few waterings.
So I stopped relying on bags.
My Soil Recipe
Here is the mix I use now for every aloe in my house.
That is:
- 50% potting soil or cactus mix
- 25% perlite
- 25% coarse sand or pumice
If I only have two ingredients, I do:
- 50% cactus mix
- 50% perlite
This makes a gritty, loose blend. Water runs through it in seconds. The roots get a quick drink and then air returns.
For outdoor aloes in hot climates, I shift it slightly. I may use less perlite and a bit more organic matter. The sun and wind dry the pot faster outside.
For indoor aloes, especially in the UK or the northern US, I keep it leaner. Less organic matter means less chance of rot.
A Quick Drainage Test
You should try this once. It taught me more than any article.
Take your mixed soil. Fill a small pot. Pour water through it. Count how long it takes to drain.
Good aloe soil drains fast. You should see water coming out of the bottom almost immediately. If the water pools on top for more than a few seconds, the mix is too dense.
Add more perlite or pumice. Try again.
Pot Choice Changes Everything
Material: Terracotta vs Plastic vs Ceramic
I am going to be honest. I used to pick pots by color and shape. That was a mistake.
Terracotta is the best choice for indoor aloe. It breathes. Moisture escapes through the clay walls. This helps the soil dry evenly. It also forgives a slightly heavy-handed watering.
Plastic pots hold moisture for much longer. They can work if you are very careful with water. But they are risky for beginners. I use plastic only for small pups that I plan to repot soon.
Glazed ceramic looks nice. In practice, it behaves like plastic. The glaze seals the sides. Only a drainage hole saves it.
The pot material matters because it changes how often you can safely water. Terracotta gives you more room for error. Plastic takes that room away.
Size: Smaller Is Safer
This is the advice I wish someone had given me years ago.
Do not give aloe a big pot.
I know the logic. You want the roots to have space to grow. You do not want to repot every year. It seems kind.
But aloe does not think that way.
In a big pot, the soil takes a long time to dry. The roots sit in damp mix. The plant focuses on filling wet soil with weak root growth instead of pushing out firm leaves.
In a snug pot, the roots fill the space quickly. The soil dries fast. The plant feels secure and starts producing pups.
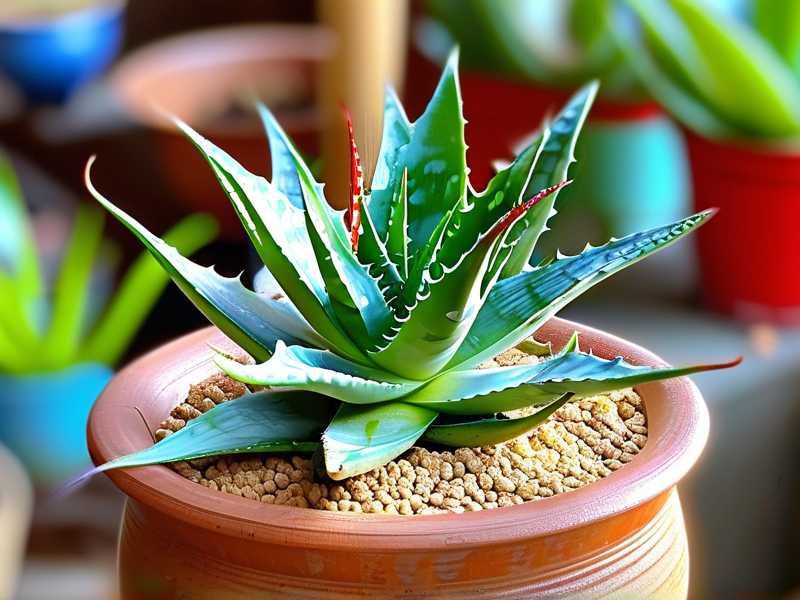
A good rule is to choose a pot only one to two inches wider than the root ball. If you are repotting a small aloe from a four-inch nursery pot, go to a five- or six-inch pot. Not a ten-inch pot.
Drainage Holes Are Non-Negotiable
I will say this clearly. No drainage hole, no aloe.
I have tried the whole gravel-in-the-bottom trick. It does not work the way people claim. Water still sits in the lower soil. The roots eventually reach it and rot.
One clean hole in the bottom is better than any fancy setup.
If you love a pot without a hole, use it as a cover pot. Keep the aloe in a plastic nursery pot inside it. Take the inner pot out to water. Let it drain fully. Then put it back.
Watering Aloe the Right Way
The Only Rule That Matters
90% of indoor plants die from overwatering. Aloe sits right at the top of that list.
The rule is simple. Let the soil dry completely between waterings. Then soak it thoroughly.
Not a little sip. Not a shot glass of water. A proper soak until water runs out of the bottom.
Then do not water again until the soil is dry all the way through. For me, that means every two to three weeks in summer, and once a month or less in winter.
How I Check the Soil
I do not trust moisture meters. I have owned two. Both gave inconsistent readings.
I use my finger. I push it into the soil up to the second knuckle. If I feel any coolness or moisture, I wait.
I also lift the pot. Wet soil is heavy. Dry soil is surprisingly light. After a few weeks, you learn the difference by feel.
For a clearer signal, you can use a wooden chopstick. Push it to the bottom of the pot. Leave it for a minute. Pull it out. If the wood looks dark or feels damp, skip watering.
The Soak-and-Dry Method in Action
Here is what a full watering looks like at my house.
I carry the aloe to the kitchen sink. I run room-temperature water through the soil slowly. I keep going until water flows out of the bottom for a few seconds. Then I leave the pot in the sink for ten or fifteen minutes to let excess water drain.
After that, I put it back in its saucer or cover pot. If water collects in the saucer later, I dump it. Never let an aloe sit in water.
Overwatering vs Underwatering
People confuse these two all the time.
Overwatered aloe has soft, mushy leaves. The lower leaves turn yellow or translucent. The stem may feel loose in the soil. Sometimes you get a sour smell.
Underwatered aloe has thin, curled leaves. The tips turn brown and crispy. The leaves look deflated but not mushy. The soil pulls away from the sides of the pot.
Both can cause brown tips. But the fix is different.
Overwatered? Stop watering. Move the plant to a brighter spot. If it is bad, unpot it and check the roots.
Underwatered? Soak it well. The leaves should plump up within a couple of days.
Light: The Missing Piece in Aloe Care
Best Light Indoors
Aloe loves bright light. A south or west-facing window is ideal in the northern hemisphere. In the UK or the northern US, that usually means the sunniest windowsill you have.
In Australia or the southern US, a bright east-facing window may be safer in summer. Too much hot afternoon sun can scorch the leaves.
Signs of Too Little Light
This is another mistake I made early on. I put my aloe on a dark shelf because it looked pretty.
The leaves stretched long and pale. They flopped outward. The center of the plant got weak. It stopped looking like a compact rosette and started looking like a green spider.
If your aloe is reaching toward the window or turning pale, it wants more sun. Move it gradually over a week so it does not burn.
Signs of Too Much Sun
Too much direct sun causes brown, dry patches on the leaves. The green may fade to a reddish or gray color. This is sun stress.
A little sun stress is not always bad. In fact, aloes often turn slightly reddish when grown outdoors in strong light. It can look attractive. But if the leaves feel thin or papery, it is too much.
The fix is simple. Pull the plant back from the glass. Use a sheer curtain. Or move it to a spot with bright but indirect light during the hottest hours.
Feeding Your Aloe Without Killing It
Less Fertilizer Than You Think
Aloe is not a heavy feeder. In the wild, it grows in poor soil. Too much fertilizer causes weak, floppy growth. The leaves get soft and the plant loses its shape.
I fertilize mine only a few times a year. Spring and early summer. That is enough.
What I Use
A balanced liquid fertilizer works. Something like a 10-10-10 or a cactus-specific formula. I dilute it to half the strength written on the label.
I water the plant first. Then I pour the diluted fertilizer through the soil. Never fertilize dry roots. It burns them.
I do not fertilize in late autumn or winter. The plant is resting. Forcing growth during short days produces pale, weak leaves.
When to Skip Fertilizer
Do not fertilize a sick plant. If your aloe is rotting, yellowing, or stressed, fertilizer makes it worse. Fix the root problem first.
Do not fertilize right after repotting. Fresh mix has enough nutrients. Give the plant at least a month to settle.
And never use slow-release granules in a tiny pot. They can release too much at once on a hot day.
Repotting Aloe: Timing and Technique
How Often
Aloe does not need frequent repotting. In fact, it prefers to be a little root-bound.
I repot mature aloes every two to three years. Sometimes longer if the plant still looks healthy.
Signs your aloe needs repotting:
- Roots growing out of the drainage hole
- The plant is top-heavy and falls over
- Water runs straight through and the soil no longer absorbs
- Pups are pushing against the pot sides
Best Time to Repot
Spring to early summer is best. The plant is actively growing. It recovers faster.
Avoid repotting in winter. The plant is semi-dormant. Damaged roots heal slowly, which invites rot.
My Repotting Process
Here is how I do it, step by step.
First, I do not water for a week before repotting. Dry soil comes out of the pot more easily.
I gently tip the pot sideways. I squeeze the sides if it is plastic. For terracotta, I run a knife around the inside edge. The root ball usually slides out with a little tug.
Then I shake off the old soil. I look at the roots. Healthy aloe roots are light tan or white. Any roots that are brown, black, or mushy get trimmed with clean scissors.
If I find rot, I cut away all the bad tissue. Then I let the plant sit on a towel for a day. The cut roots need to callus before they touch wet soil. This step saved more aloes than I can count.
Next, I fill the new pot about a third full with fresh mix. I hold the aloe in place at the same depth as before. Planting too deep causes stem rot. I fill around the roots, tapping the pot to settle the soil.
I do not water immediately. Wait three to five days. This gives any damaged roots time to heal. Then give it a good soak.
The new pot should be only one size up. Terracotta if possible.
Seasonal Aloe Care
Spring: Wake It Up Gently
Spring is the easiest season for aloe care. The days get longer. The plant wakes up.
I start watering more regularly around late March or April. Not daily. Just back to the soak-and-dry cycle every two to three weeks.
This is also the best time to:
- Repot
- Divide pups
- Start fertilizing lightly
- Prune damaged lower leaves
If you want to encourage pups, give the plant bright light and a little more root space in spring. Do not overwater. Let the roots chase the moisture.
Summer: Protect It From Heat and Wet
Summer makes aloe grow. But it also brings two risks. Hot glass and overwatering.
If your aloe sits on a windowsill, check the glass on a hot afternoon. If it is too hot for your hand, it is too hot for the leaves. Move the pot back a few inches.
I water more often in summer. But only when the soil is dry. In a heatwave, that may mean once a week. In a cool, cloudy stretch, it may stay dry for three weeks. Let the soil tell you.
For outdoor aloes, make sure the pot can drain freely. One heavy summer storm can kill an aloe sitting in a saucer full of water.
Pests are also more active in summer. Check the leaves every time you water. Mealybugs and scale love to hide where leaves meet the stem.
Autumn: Slow It Down
Autumn is about restraint.
I stop fertilizing by September. The plant does not need new growth now. It needs to harden off before winter.
I also start watering less. The days are shorter. The soil dries slower. I may water once every three to four weeks.
If your aloe spent summer outdoors, bring it inside before nights drop below 10°C or 50°F. Check the leaves and soil for pests first. I have brought ants and slugs inside more than once.
Winter: Keep It Dry and Cool
Winter is when most indoor aloes die. Not from cold. From wet soil and weak light.
My winter routine is simple.
Water once a month. Maybe less. If the leaves are plump and firm, I skip watering even longer.
Keep the plant in the brightest window you have. A cool room is fine. Aloe tolerates temperatures down to around 4°C or 40°F. But do not let it freeze.
No fertilizer from October to February. None.
If your house is very dry from heating, do not compensate by watering more. The soil should still dry fully. The air dryness is not the main issue for aloe. Wet roots are.
Common Aloe Diseases and Problems
Root Rot
This is the big one.
Root rot starts below the soil. By the time you see a soft, yellow lower leaf, the infection is already moving.
The first sign is often a slight lean. The stem feels loose. The smell from the drain hole is musty.
If you catch it early, unpot the plant. Cut away every dark, soft root. Let it dry for a day. Repot in dry, gritty mix. Wait a week before watering.
For my first aloe, I ignored the signs. I thought it just needed more water. The whole plant collapsed within days. That is when I learned that 90% of indoor plants die from overwatering. Aloe is not the exception.
Fungus Gnats
Small black flies around the soil. They breed in wet organic matter.
The fix is not pesticide. It is changing how you water. Let the top inch of soil dry completely. Fungus gnats cannot breed in dry mix.
If they persist, I put a thin layer of coarse sand or fine gravel on top of the soil. It breaks the life cycle.
Mealybugs
Little white cottony patches between the leaves. They suck sap and weaken the plant.
I treat small infestations with a cotton swab dipped in rubbing alcohol. Touch each bug directly. Check again every three days. I do this for two weeks. Then I inspect the plant carefully to make sure they are gone.
For larger outbreaks, insecticidal soap works. Apply in the evening so the leaves do not burn in the sun.
Brown Leaf Tips
Most people think this means the plant needs water. Sometimes it does. But brown tips often mean the air is very dry or the plant is root-bound.
If the soil is already moist, do not water. Trim the brown tip with clean scissors. Fix the environment instead of drowning the roots.
Yellow and Mushy Leaves
Overwatering. Almost always overwatering.
Stop watering. Move the plant somewhere bright and warm. If more leaves yellow over the next week, unpot and check for root rot.
Thin, Wrinkled Leaves
This is underwatering. Soak the pot thoroughly. The leaves should firm up in two or three days. If they do not, check the roots. They may have died from drought and can no longer take in water.
Three Fatal Mistakes Every New Aloe Owner Makes
I have made all three. So have most people I know who grow houseplants.
1. Watering Too Often
This is the most common aloe killer by far.
People treat aloe like a thirsty tropical plant. They water once a week on a schedule. Or they see dry topsoil and assume the whole pot is dry.
The result is root rot. By the time the leaves show it, the roots are already damaged.
The fix is simple. Let the soil dry completely. Then soak. Forget the calendar.
2. Wrong Light Exposure
Too little light makes an aloe weak and floppy. It will not die overnight. But it slowly loses shape. The leaves stretch and bend. The plant becomes fragile.
Too much harsh sun can also