bluename
 How to Refresh Planting Medium for Aging Aloe Recovery
If your aloe has been sitting in the same tired soil for years and now looks dull, droopy, or half-dead, the fastest fix usually isn’t more water or fertilizer. It’s refreshing the planting medium. I’ve brought back several aging aloes simply by changing the soil and correcting the root environment. In this guide, I’ll walk you through exactly how I refresh old potting mix, what I use, the mistakes I made, and what I observed over two weeks of recovery.
Aloe is one of those plants that feels nearly indestructible until it isn’t. You forget it for a month, and it’s fine. Then one spring you notice the leaves are thin, the base looks woody, and the soil has pulled away from the pot. That’s the classic sign of exhausted planting medium. The plant isn’t necessarily dying. It’s just living in dirt that no longer works.

The good news is that refreshing the medium is simple. You don’t need exotic ingredients. You need the right mix, a better pot, and a little patience. I’ll share the whole process from my own experience, including what went wrong when I tried shortcuts.
Aloe grows well indoors in the US, UK, Canada, and Australia. It handles neglect better than most succulents. But aging plants are different from young ones. Their stems get longer. Their roots get crowded. Their old soil often compacts into a brick. If you want the plant to recover, you have to reset the root zone.
The core keyword here is clear: refresh planting medium for aging aloe recovery. It’s not a fancy operation. It just means removing degraded soil and giving the roots a loose, gritty, breathable home again.
I’ve killed at least two aloes early on because I treated them like regular houseplants. One rotted from rich potting soil. Another slowly declined because I never changed the mix. I learned the hard way that aloe roots need air almost as much as they need water. Once the medium breaks down, air disappears. Then the roots suffocate, even if you’re watering carefully.
Let me walk you through the entire recovery process.
When to Refresh the Medium
You don’t need to repot aloe every year. In fact, mature aloes often bloom better when slightly root-bound. But there are clear signs that the soil is done.
I look for these clues. The soil surface looks gray and crusty. Water pools on top before draining. The pot feels unusually heavy after watering but the plant still looks thirsty. Roots are poking through the drainage holes. The lower leaves are yellowing or softening while the upper leaves stay small. The stem has become long and bare.
If I see two or three of these signs, I don’t wait. I refresh the medium.
For aging aloe recovery, timing matters. I prefer spring or early summer. The plant is waking up and can handle root disturbance better. I’ve done it in fall too, but recovery was slower. Winter is risky because the plant is semi-dormant and roots heal slowly in cool temperatures.
The Best Medium for Aloe
After trial and error, I settled on a simple mix.
I use about 50% succulent potting mix, 25% perlite, and 25% coarse sand or fine grit. Sometimes I swap the sand for pumice if I have it. The idea is to create a mix that drains fast but still holds a little moisture around the roots. Heavy garden soil is a death sentence. It compacts and holds water. Roots rot.
The RHS recommends using a very free-draining compost for succulents, and that has matched my experience. They emphasize that most succulent problems come from waterlogging, not underwatering. When I refreshed my aloe’s medium, I made sure the final mix fell apart easily in my hand. If it clumped like brownie batter, I added more grit.
The AHS has also published useful guidance on container growing. Their resource notes that drainage is critical for plants in pots. I keep that in mind every time I mix soil.
Choosing the Right Pot
I used to think any pot worked as long as it had a hole. That’s not true.
Unglazed terracotta is my favorite for aging aloes. It breathes. It wicks moisture away from the sides. Plastic pots hold water longer, which can be okay if you’re in a hot dry climate, but risky if you’re in the UK or a humid part of the US.
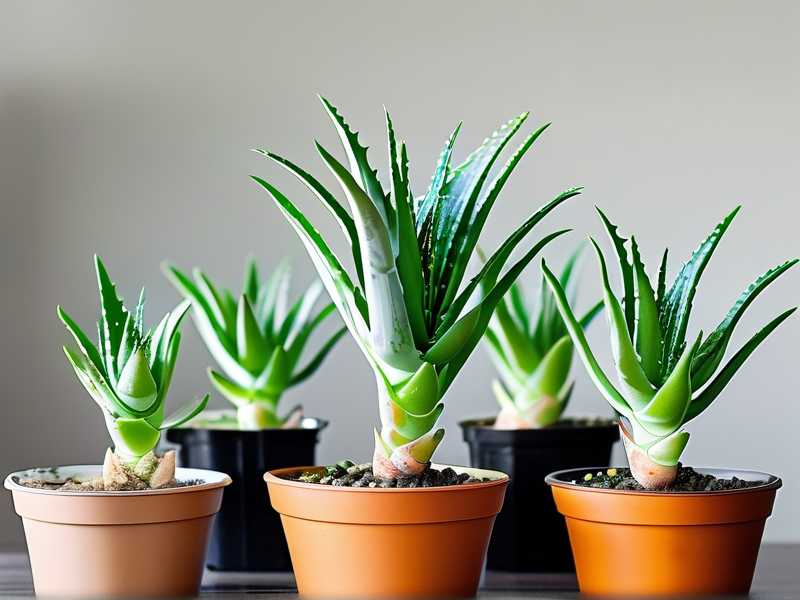
The pot should not be too large. When I move an aging aloe into a pot that’s only one or two sizes bigger, the roots establish faster. A huge pot holds too much unused soil, which stays wet and causes rot. I also check that the pot has at least one decent drainage hole. Not a tiny slit. A real hole.
My Step-by-Step Refresh Process
Here’s exactly what I did the last time I refreshed an aging aloe. It was a five-year-old plant in a six-inch plastic pot. The leaves were thin and curling inward. Some lower leaves had turned yellow and papery.
First, I stopped watering the plant for about five days. You want the root ball slightly dry, not sopping wet. It makes removal easier and reduces root tearing.
Then I removed the plant from the pot. I gently squeezed the sides and tilted it. The root ball came out in one dense block. The old soil was hard, gray, and smelled faintly musty. That smell told me a lot. Healthy medium should smell earthy, not sour.
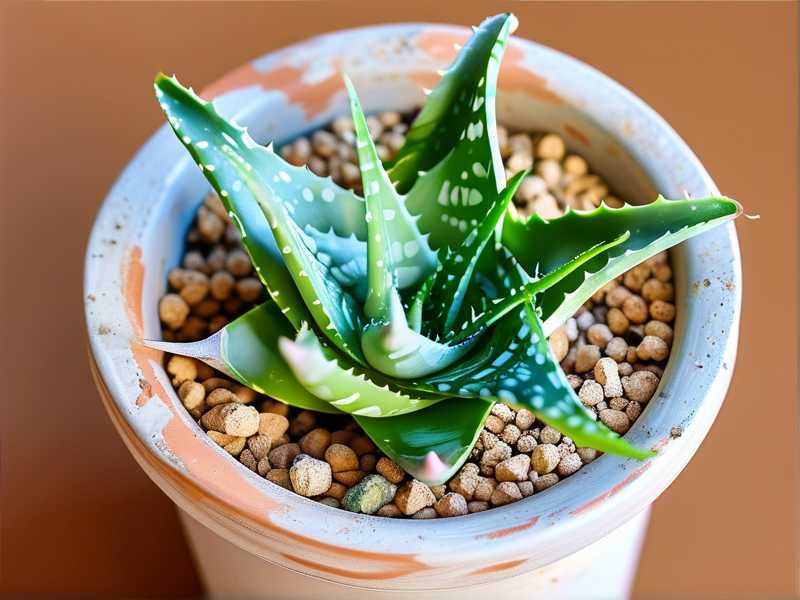
I used my fingers to break apart the old root ball. I shook off as much old soil as possible. Then I inspected the roots. Healthy aloe roots are pale and plump. Dead ones are dark, mushy, or hollow. I trimmed the dead roots with clean scissors. I also removed the oldest, driest leaves from the bottom.
This is where many people panic, thinking they’re hurting the plant. But removing dead tissue actually helps it focus energy on new growth.
Next, I prepared the new pot. I added a small piece of mesh over the drainage hole to keep soil from washing out. Nothing fancy. Then I added a layer of fresh mix to the bottom.
I centered the aloe at the same depth it was before. I didn’t bury the stem deeper, because that can cause stem rot. Then I filled around the roots with my gritty mix. I tapped the pot gently to settle the soil. I did not press down hard. Aloe roots like loose soil.
After repotting, I left the plant dry for four to five days. This is a crucial step. The roots need time to heal. Watering too soon introduces rot.
My Two-Week Observation
In the first few days after refreshing the medium, the aloe looked worse. A couple of older leaves wrinkled. The plant looked tired. I half expected that. I call it the recovery dip.
By day five, I gave the plant its first light watering. I didn’t soak it. Just enough to moisten the new mix around the roots.
Over the next week, I kept it in bright indirect light. Not direct hot sun. The plant needed to rebuild roots without stressing over heat.
By day ten, the center leaves looked a little plumper. The color shifted from pale yellow-green to a deeper green. The old wrinkled leaves didn’t bounce back, but they didn’t spread.
By day fourteen, I saw the first small signs of recovery. The newest leaf in the center had grown slightly. The plant felt firmer when I gently wiggled it. That’s a good sign. It means new roots were anchoring into the fresh medium.
I didn’t fertilize during those two weeks. Aging aloes need time to settle before you add nutrients.
Lighting After Repotting
I’ve learned that light can make or break recovery.
A freshly repotted aloe should not go into full afternoon sun immediately. The roots are tender. The leaves are already stressed. I keep the plant in bright shade or near an east-facing window. After about two weeks, I gradually move it back to brighter light.
In my experience, aloes want at least six hours of bright indirect light when grown indoors. Outdoors in the US and Australia, they love morning sun. But in places like Arizona or South Australia, harsh afternoon sun can scorch them. In the UK and Canada, winter light is weak, so a south-facing windowsill usually works best.
If the leaves turn reddish-brown after repotting, that’s stress. It can be sunburn or it can be temperature shock. I move the plant to softer light until it stabilizes.
Watering After a Soil Refresh
The biggest mistake after refreshing the medium is overwatering.
90% of indoor plants die from overwatering. Aloe is no exception. The new soil drains fast, but that doesn’t mean you should water often. The roots still need a dry period between drinks.
For the first month, I water only when the top two inches of soil are completely dry. In summer, that might be every ten days. In winter, it might be once a month or less. I use my finger to check. If it feels cool and damp, I wait.
I always water at the soil level, not over the leaves. Water collecting in the crown can cause rot. I pour slowly until water drains out the bottom, then I empty the saucer after about twenty minutes.
Common Problems After Refreshing
Sometimes things go wrong even with good intentions.
I once repotted an aloe into a mix that contained too much compost. It looked rich and dark. Within three weeks, the lower leaves went soft and translucent. The roots had started to rot. I had to unpot it again, trim the rot, and switch to a grittier mix. The plant survived, but it took two months to recover.
Another time I watered too soon. I thought a little drink would help it settle. Instead, the damaged roots couldn’t take up the water, and the soil stayed wet too long. The plant looked soggy and sad. Now I wait at least four days.
A third mistake was using a pot without a drainage hole. I thought a layer of gravel at the bottom would handle it. Wrong. Water pooled down there and caused a foul smell. The plant never really recovered until I moved it to a proper pot.
New Grower Mistakes to Avoid
There are three big ones I see again and again.
The first is overwatering. It’s the classic killer. Aloe stores water in its leaves. It doesn’t need frequent drinks. If the soil stays wet, the roots rot, and the plant collapses from the bottom up.
The second is light misplacement. People treat aloe like a low-light office plant. It tolerates low light for a while, but it slowly stretches and weakens. On the other hand, sudden harsh sun can scorch it. Gradual light changes are best.
The third is using the wrong pot. No drainage hole or a pot that’s far too big can hold too much water. A snug terracotta pot with a drainage hole is ideal.
Seasonal Care for Recovering Aloe
Spring is the best time for refreshing medium and repotting. The plant is naturally gearing up for growth. I do most of my soil refreshes in March or April, depending on the climate. In the UK and Canada, I wait until the days are noticeably longer and the plant isn’t sitting in a cold draft.
Summer brings stronger light and faster drying. I water a bit more often but still check the soil first. I keep recovering plants out of blazing afternoon sun. Good airflow helps prevent fungal issues. If the nights are warm, a sheltered spot on a porch can speed recovery.
Fall is a transition. I reduce water gradually. I stop fertilizing by mid-autumn. The goal is to help the plant slow down naturally. If I refreshed the medium in spring, the aloe should be well established by now.
Winter is the danger period. I keep aloe in a bright, cool room. I water very little. Cold, wet soil is a double threat. I never let the leaves touch cold window glass on frosty nights. If the plant is near a drafty door, I move it. Recovery slows in winter, but the plant should maintain its health.
Fertilizing After Refresh
I don’t fertilize right after changing the soil. Fresh mix has enough nutrients for the first season.
If I do feed, I use a balanced liquid fertilizer diluted to half strength. I only do this during spring and summer. Once a month is plenty. More than that can burn the roots. I never fertilize a stressed or recently repotted aloe. That just adds another layer of stress.
Honestly, aloe is a light feeder. I’ve had plants go two years without fertilizer and still grow fine, as long as the medium was refreshed.
Pests and Disease Checks
While I’m refreshing the medium, I always check for pests. Mealybugs like to hide in the leaf bases. They look like tiny white cotton fluffs. I dab them with a cotton swab dipped in diluted rubbing alcohol. That usually handles small infestations.
Spider mites can be a problem in dry indoor air. I look for fine webbing and stippled leaves. A shower with lukewarm water knocks them off. For bad cases, I use insecticidal soap.
Fungal gnats can show up if the old soil stayed wet. Fresh gritty mix and drier watering usually solve the problem. I also avoid decorative top dressings that trap moisture.
When Aging Means More Than Soil
Sometimes an aging aloe needs more than fresh medium. If the stem is long and bare with a small rosette at the top, you may need to behead and root it. I’ve done this before. It sounds drastic, but aloes root easily from cuttings.
I cut the healthy top rosette with a clean knife, leaving about two inches of stem. Then I let the cut end dry for two or three days until it forms a callus. After that, I plant it in dry gritty mix and wait a week before watering. New roots usually form within a few weeks.
But you don’t always need to go that far. If the plant still has good roots and just looks tired, refreshing the medium is enough.
How to Avoid Future Medium Breakdown
After I refresh the soil, I try to prevent it from breaking down quickly again. I avoid overhead watering that compacts the surface. I don’t press the soil down during future waterings. I occasionally loosen the top layer with a wooden skewer if it crusts over.
I also repot or refresh every two to three years. Even if the plant isn’t root-bound, old organic matter breaks down. In a pot, there’s no earthworm activity or natural soil turnover. You are the ecosystem.
For long-term aloe recovery, soil refresh is not a one-time fix. It’s part of a cycle. Fresh medium, careful water, proper light, and a sensible pot size all work together.
What I’d Tell a Friend Who’s Worried About Their Old Aloe
Don’t panic. Aloe is tough. It can look nearly dead and still come back. Remove it from the old pot. Check the roots. Cut away anything mushy. Put it in a gritty, fast-draining mix. Keep it dry for a few days. Give it bright but gentle light. Then wait.
In my experience, recovery is slow but steady. The first week is the hardest. The plant may look sad. That’s normal. You’re not failing. You’re just watching the plant rebuild its root system.
I’ve refreshed the medium on old aloes many times now. Some bounced back in two weeks. Others took a month. A couple didn’t make it because the rot had gone too deep. But the process is always the same, and it works more often than not.
If you’re in the US, UK, Canada, or Australia, you can grow a healthy old aloe indoors with just a few adjustments. You don’t need a greenhouse. You don’t need special equipment. You need a gritty mix, a good pot, and the discipline to water less.
Frequently Asked Questions
How long after refreshing the medium should I wait to water my aloe?
I wait four to five days. This gives damaged roots time to heal. When I water, I do it lightly the first time. After that, I wait until the top two inches of soil are dry.
Can I reuse the old potting mix for aloe?
I don’t recommend it. Old mix breaks down, compacts, and may contain salt buildup or pathogens. If you must reuse it, sift out the fine particles and add at least 50% fresh gritty material. But for a struggling aging aloe, fresh medium is better.
Why is my aloe turning brown after repotting?
Brown or reddish leaves can be stress. It might be too much direct sun, dry air, or temperature change. I move the plant to bright indirect light and avoid watering too often. If only the oldest leaves are browning, that can be normal as the plant sheds old growth.
Refreshing the planting medium is the single best thing I do for aging aloes. It resets the root zone, improves airflow, and gives the plant a reason to grow again. The key is to match the new soil to what aloe actually wants, not what looks rich and dark. A loose, gritty mix in a breathable pot with a dry recovery period is the formula that works for me.