bluename
 If you’ve just touched the top of your aloe pot and it feels like a dry brick, you’re not alone. I’ve been there more times than I want to admit. The good news is you can fix dry and crumbly aloe pot soil issues without throwing the whole plant away. Most of the time, the aloe itself is still alive. The soil is just compacted, hydrophobic, or exhausted. In my own collection, I’ve rescued aloes from rock-hard potting mix, and I’ll walk you through exactly what I did. This guide covers rehydrating, repotting, watering habits, and preventing the problem from coming back.
Aloe plants are often sold as “unkillable.” That’s only half true. They handle neglect beautifully. What they don’t handle is soil that turns into concrete. The plant can survive, but the roots stop working properly. Once water runs straight down the sides of the pot without soaking in, you have a problem. Fixing it isn’t complicated, but it does require a little patience and the right technique.
My First Encounter with Crumbly Aloe Soil
A few years ago, I bought a beautiful aloe vera from a local nursery. It sat on my kitchen windowsill for months. I watered it on schedule. Then one day, I noticed the leaves looked slightly deflated even though I had watered two days earlier.
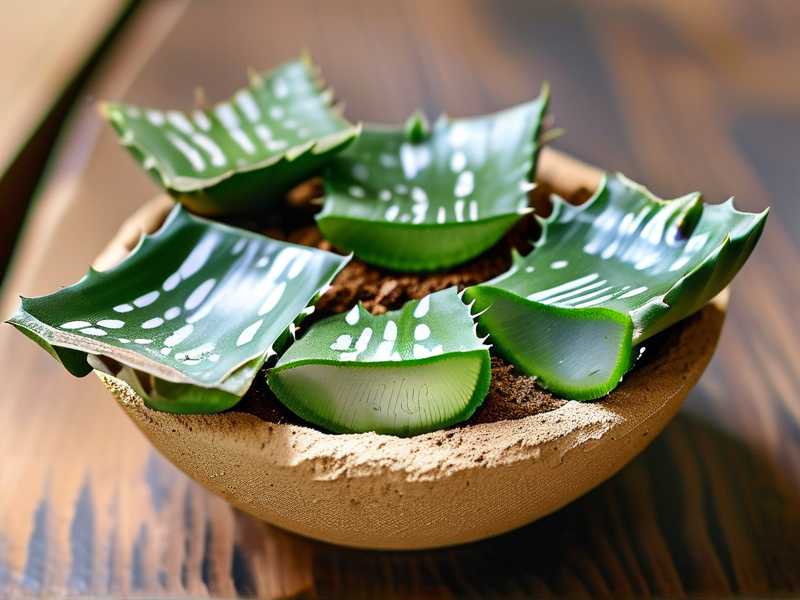
I poked my finger into the pot. Rock solid. The soil had pulled away from the edges. Water was running through the gap and out the drainage hole. None of it was reaching the roots.
I tried scraping the surface. It came off in dusty chunks. That’s when I learned a simple truth. Potting soil high in peat moss eventually becomes hydrophobic if it dries out completely.
I didn’t repot right away that first time. Instead, I tried watering from the top repeatedly. Big mistake. The root ball stayed bone dry while the outer edge got soggy.
Why Aloe Pot Soil Turns Dry and Crumbly
Peat Moss Dries Out
Most commercial houseplant mixes contain a lot of peat. Peat is great at holding water when it’s damp. But once it dries completely, it shrinks and stops absorbing moisture.
I’ve noticed this happens faster in terracotta pots and in rooms with low humidity. The top layer forms a crust. The rest of the mix becomes dusty and loose.
Minerals Build Up
Tap water contains minerals. Over time, those minerals accumulate in the soil. The mix starts to look pale and crusty on top. It feels gritty and compact.
I once used very hard tap water for a year. The aloe survived, but the top inch of soil looked like pale sand. Water beaded up and sat there.
Wrong Soil Mix
Aloe needs a fast-draining mix. If it’s planted in dense garden soil or heavy compost, the structure breaks down. It might stay wet too long at first, then dry into a brick.
The real issue is that regular potting soil breaks down over time. After a year or two, it loses its air pockets. Compaction follows. Then drying. Then crumbling.
My Two-Week Fix for Dry and Crumbly Aloe Pot Soil
I want to share the exact method I used on a badly affected aloe. This isn’t theory. It worked for me over two weeks of careful observation.
Week One: Rehydrate Without Drowning
Step 1: Check the Leaves First
Before touching the soil, I checked the aloe leaves. If they’re plump but the soil is hard, the plant is still okay. If they’re thin, curled, or yellowing at the base, you need to act faster.
My plant had slightly thin leaves but no rot. Good sign.
Step 2: Bottom Watering
I filled a clean basin with room temperature water. I placed the entire pot inside. The water came up about halfway.
Then I waited.
After 30 minutes, the top of the soil still looked dry. That told me the mix was severely hydrophobic. I left it for another hour.
By the end of two hours, the surface finally looked darker. The pot felt heavier.
I removed it and let it drain fully.
Step 3: Repeat After Three Days
I checked the soil daily. It wasn’t wet. It was still crumbly in places. So three days later, I bottom watered again. This time, the soil absorbed water within 45 minutes.
Progress.
What I Noticed Over Week One
- Leaves became slightly firmer.
- Soil no longer pulled away from the pot edge as much.
- The top crust softened, but some areas stayed hard.
- No signs of rot. Drainage was still good.
I wasn’t done. Bottom watering helped, but the soil structure was still poor.
Week Two: Repot with a Better Mix
After week one, I decided to repot. The old soil was too far gone. Rehydrating helped temporarily, but it would dry into concrete again.
Step 1: Remove the Plant
I watered lightly the day before. This made it easier to slide the root ball out. I used a chopstick to loosen the edges.
The plant came out without much resistance.
Step 2: Loosen the Root Ball
I gently removed as much old soil as possible. A lot of it fell away in dry chunks. I used my fingers to tease out the roots. Some roots looked brown and thin. I trimmed those with clean scissors.
The healthy roots were creamy white or light yellow.
Step 3: Use a Chunky Aloe Soil Mix
I mixed my own:
- 2 parts succulent and cactus mix
- 1 part perlite
- 1 part coarse sand or pumice
No peat-heavy standard mix. No garden soil.
I wanted water to flow through easily. Aloe roots need air. They don’t like sitting in damp peat.
Step 4: Repot and Wait
I used a pot only slightly larger than the root ball. It had a drainage hole. I filled around the roots, pressed lightly, and did not water immediately.
I waited two days. Then I watered lightly from the top until water came out the bottom.
Over the next week, I checked the soil every morning. It stayed airy and slightly moist. Not crumbly. Not soggy.
Two weeks in, the aloe looked noticeably better. Leaves were firmer. The soil didn’t form a crust.
The Three Deadly Mistakes New Aloe Owners Make
I’ve talked to a lot of houseplant beginners. These are the issues that come up again and again. I’ve made every one of them myself.
1. Watering Too Often
90% of indoor plants die from overwatering. That’s not a random statistic. It’s a real pattern. Aloe stores water in its leaves. It doesn’t need frequent drinks.
If the soil is dry and crumbly, your instinct might be to water more. Don’t. Hydrate slowly. Then adjust your schedule.
2. Wrong Light Position
Aloe needs bright light. But too much direct afternoon sun can stress a plant that’s already struggling. I once moved a dehydrated aloe to full sun, thinking it would “dry out” the soil faster. That just made the leaves turn reddish and thin.
Place it in bright, indirect light while you fix the soil. Then slowly move it to a sunnier spot.
3. Using the Wrong Pot
Oversized pots hold too much soil. That soil stays wet too long. Then it dries unevenly and becomes compacted. Terracotta is my favorite for aloe because it breathes.
Plastic pots can work. Just be extra careful with water. No drainage hole? That’s a one-way ticket to rot.
My Best Aloe Soil Mix
Over the years, I’ve settled on a simple recipe. I don’t measure with perfect precision. I go by feel.
- 50% succulent or cactus mix
- 25% perlite or pumice
- 25% coarse sand or fine gravel
This creates the texture I aim for. It should feel loose and gritty in your hand. When you squeeze it, it should not form a tight ball. It should fall apart.
I stay away from fine sand. It clogs the mix. I also avoid moisture-retaining crystals unless I’m going away for a month.
The RHS advises free-draining compost for arid-climate succulents like aloe. Their guidance supports avoiding dense loam or pure peat mixes.
Choosing the Right Pot
I always look for drainage holes. Then I think about material.
Terracotta
Terracotta is porous. It lets moisture escape. That’s ideal for aloe. It also helps prevent crumbly soil from staying too dry for too long because you can see and feel moisture changes on the pot itself.
Glazed Ceramic
Beautiful, but holds moisture longer. I’ve used glazed pots with a chunky mix and had no problems. Just water less.
Plastic
Lightweight and cheap. But it doesn’t breathe. I only use plastic for small aloe pups that I’m growing out. I’m very careful not to overwater.
The AHS also notes that container choice affects root health in dry-climate plants. Their general guidance for succulents aligns with avoiding waterlogged media.
How to Water Aloe the Right Way
Simple rule. Water deeply, then let the soil dry completely before watering again.
I don’t water on a strict seven-day schedule. I check the soil. Here’s what I do.
Probe the Soil
I push my finger into the top two inches. If it feels dry and loose, I check deeper. I sometimes use a wooden skewer. If it comes out clean, the soil is dry.
Water Slowly
When I water, I pour slowly around the base. I let it soak in. If the soil is mildly hydrophobic, I pause and water in stages.
Bottom Water Monthly
Once a month, I bottom water for about 30 minutes. This helps keep the soil evenly hydrated. It reduces the chance of dry pockets forming.
Adjust by Season
In summer, I might water every 10 to 14 days depending on heat and light. In winter, every three to four weeks. Sometimes longer.
Aloe Light and Temperature Needs
Best Light
Aloe does best in bright, indirect light or gentle morning sun. A south or west windowsill works if you protect it from intense afternoon rays in summer.
I keep mine in an east-facing window. It gets direct morning sun for a few hours. That seems perfect.
Too Much Light
If leaves turn orange, brown, or wrinkled, the plant is stressed. Move it back from the glass.
Too Little Light
Leaves become pale and stretched. They may flop outward. The soil also stays wet longer because the plant isn’t actively using water.
This creates a cycle. Low light leads to slow drying. Then people water less. Then the soil dries too much and becomes crumbly. It’s all connected.
When to Repot Aloe
I repot my aloes every two to three years. Not because they always need more space. But because the soil breaks down.
If you see any of these signs, it’s time:
- Soil is hard or crusty even after watering.
- Water runs straight through.
- Roots are poking out of the drainage hole.
- The pot feels unusually heavy or light.
- Leaves are losing color despite good light.
I avoid repotting in winter unless absolutely necessary. Spring and early summer are ideal.
How I Fix Mildly Crumbly Soil Without Repotting
Sometimes you can’t repot right away. Maybe it’s winter. Maybe you don’t have fresh soil. I’ve used a temporary rescue method.
Surface Loosening
I take a chopstick or small fork. I gently break up the top inch of soil. I don’t stab deep. I work around the edges and across the surface.
Top Dressing
Then I sprinkle a thin layer of fresh succulent mix or worm castings. I don’t bury the plant’s stem.
Water with a Slow Soak
I place the pot in a basin and bottom water. The loosened surface helps water penetrate.
This works for mild cases. For severe cases, repotting is better.
Preventing Dry and Crumbly Soil in the Future
Here’s what I do now to keep my aloe soil from degenerating.
Avoid Letting It Go Bone Dry for Long Periods
Yes, aloe likes dry soil. But I don’t let it sit bone dry for months. Eventually, that damages the mix. I check weekly.
Water Thoroughly When I Do Water
Small sips create hard, salty top layers. I water until it drains. This pushes built-up minerals out.
Flush the Soil Occasionally
Every few months, I run water through the pot for an extra minute. This helps reduce mineral crust.
Keep an Eye on Humidity
In very dry indoor air, peat-heavy mixes degrade faster. You can add a little more coir or compost to slow drying. But not too much. Aloe doesn’t like rich soil.
Common Aloe Problems Beyond Soil
Yellowing Leaves
Usually overwatering or poor drainage. I check the roots. If they’re brown and mushy, I trim and repot.
Brown Tips
Could be low humidity, fertilizer burn, or inconsistent watering. I don’t cut them. I adjust care first.
Soft, Mushy Leaves
This is rot. Remove the plant from the pot immediately. Check the roots. Cut away anything dark or slimy. Let the plant callous for a day, then repot in dry, gritty mix.
Red or Purple Leaves
Sun stress or cold. Move the plant to a gentler spot.
Pests
Mealybugs and scale are the usual suspects. I use a cotton swab dipped in rubbing alcohol. For bigger infestations, I rinse the plant and use insecticidal soap.
My Real-Life Mistake with Aloe Fertilizer
I once fed my aloe with a strong liquid fertilizer in summer. I thought it would boost growth. Instead, the leaves developed brown spots. The soil became crusty from excess salts.
I flushed the pot with water three times. Then I didn’t fertilize for six months. The plant recovered.
Now I use a diluted succulent fertilizer at half strength. I feed only once in spring and maybe once in midsummer if the plant looks pale. Less is safer.
A Step-by-Step Recovery Plan
If your aloe pot soil is dry and crumbly right now, here’s my simple plan.
Day 1
- Check leaves and roots if possible.
- If soil is slightly moist underneath, top dress and loosen.
- If bone dry, bottom water for one to two hours.
Day 2
- Let the pot drain completely.
- Place in bright, indirect light.
- Do not fertilize.
Day 3 to Day 7
- Check soil daily.
- If still hard in spots, repeat bottom watering once.
- Observe leaf firmness.
- Don’t repot yet if the plant looks stressed.
Day 8 to Day 14
- If soil still crumbles or water runs through too fast, repot.
- Use my chunky mix.
- Trim dead roots.
- Water lightly after two days.
- Keep out of harsh sun for one week.
By the end of two weeks, most aloes bounce back.
Frequently Asked Questions
Can I reuse dry, crumbly aloe soil?
I don’t recommend it for aloe. You can rehydrate it and mix it with fresh perlite or pumice. But old compacted soil has little life left. I prefer starting fresh.
How often should I bottom water aloe?
I bottom water once a month during the growing season. In winter, I water from the top lightly. Bottom watering helps prevent hydrophobic pockets. But leaving the pot in water too long can cause rot.
Why is my aloe soil hard on top but wet below?
That’s a layering issue. The top crust forms from mineral buildup, peat dust, or surface compaction. The lower layer may stay damp. I break up the top crust gently and use a skewer to aerate without stabbing roots. Then I adjust my watering technique.
Fixing dry and crumbly aloe pot soil isn’t hard once you understand what’s happening. The soil isn’t evil. It’s just worn out. Rehydrate slowly. Repot if you need to. Use a gritty mix. And don’t love your aloe to death with water.
I’ve brought back aloes that looked ready for the compost bin. In most cases, they just needed better soil and a gentler watering routine. Once you get the pot mix right, everything else falls into place. The leaves firm up. The color deepens. The plant starts to look like it actually enjoys living in your home.