bluename
 If your aloe is turning brown, curling inward, or the inner gel has gone mushy and translucent, stop fertilizing immediately and flush the soil with clean water. This is how you avoid fertilizer concentration damage to aloe roots—and honestly, it’s one of the most common ways home gardeners accidentally kill an otherwise bulletproof plant.
Aloe vera is famous for being forgiving. It shrugs off missed waterings, thrives in dry indoor air, and asks for very little. But its roots are surprisingly sensitive to salt buildup and strong chemical feeds. I learned this the hard way years ago with a beautiful, fat-leaved aloe I’d grown from a tiny pup. One overly enthusiastic dose of liquid cactus fertilizer turned half its roots into brown string within ten days. The plant survived, but only after emergency surgery and a long recovery on my kitchen counter.
What follows is everything I wish someone had told me before I reached for that bottle of fertilizer.
How to Avoid Fertilizer Concentration Damage to Aloe Roots
If you grow aloe at home—on a sunny windowsill in Chicago, under grow lights in Manchester, on a shaded balcony in Vancouver, or in a dry indoor room in Texas—you need to understand one thing clearly.
Aloe stores water and nutrients in its thick leaves. Its root system evolved to grab short pulses of moisture from gritty, fast-draining soils in arid climates. It did not evolve to sit in nutrient-rich, constantly damp potting mix. That mismatch causes most problems.
And here’s the thing most guides gloss over: fertilizer damage in aloe is often silent for the first week or two. The leaves still look fine. Maybe a little duller. Then one morning you notice the base feels soft. Or the tips are turning reddish brown. By the time there’s visible collapse, the roots are already burned.
My goal here is to help you spot that shift early, fix it, and prevent it from happening again. I’ll share what I actually do with my own collection of aloes—some in terracotta, some in plastic nursery pots, some indoors year-round, some outside from late spring to early autumn.
Why Aloe Roots React So Strongly to Fertilizer
Most popular houseplant fertilizers are designed for fast-growing tropical foliage plants. Pothos, monstera, philodendron—they’ll soak up a standard dose without blinking.
Aloe roots don’t work that way.
They’re shallow, fibrous, and comparatively slow to absorb minerals. When you apply a full-strength liquid fertilizer, the dissolved salts sit in the soil. If the soil is even slightly too damp or too dense, those salts pull water out of the root cells through osmosis. The roots desiccate from the inside. They turn brown or black, lose their firmness, and stop taking up water. The plant then dehydrates even though the soil feels moist.
That’s why overfertilized aloe often looks wilted or thirsty. Gardeners think it needs more water. They water again. The damaged roots can’t handle it. Then rot sets in.
The Royal Horticultural Society points out that succulents and cacti need very lean growing conditions and warns against feeding plants under stress, especially when temperatures are cool or light levels are low. That advice applies perfectly to aloe. It’s not just about amount—timing and plant condition matter just as much.
The First Signs of Fertilizer Concentration Damage
Before I give you the full prevention plan, you need to know what early damage looks like. Catching it in the first three to five days makes a huge difference.
Here’s what I’ve observed across multiple aloe plants over the years, including one bad case I accidentally caused with a slow-release granular fertilizer mixed into fresh potting soil.
- Leaf tips turn reddish, tan, or crispy brown, sometimes within 48 hours.
- The inner gel starts turning slightly cloudy or watery near the base of older leaves.
- Leaves curl inward along their length, almost like a boat folding up.
- The plant feels loose in the pot because the roots are shrinking.
- New growth stops completely, even in spring or summer.
- A white, crusty residue appears on the soil surface, pot rim, or drainage hole.
- The base of the stem softens, looking slightly water-soaked without any change in watering.
If you see two or more of these together, act fast. Assume fertilizer burn until proven otherwise.
What I Did When I Burned My Aloe (And What Actually Worked)
I want to be completely honest here: my first instinct was wrong.
Years ago, I gave my largest aloe a dose of liquid seaweed plus a general-purpose houseplant feed. Mixed slightly stronger than the label said, because I thought “a little extra won’t hurt.” Within four days, the lower leaves looked dull and slightly deflated. I assumed underwatering. I watered more. Three days later, the base of one leaf went translucent and collapsed.
That’s when I finally unpotted the plant.
The roots were dark brown, fragile, and smelled faintly sour. Healthy aloe roots are firm, pale tan or white, and smell earthy—not rotten.
Here’s the recovery routine I used. I kept notes because I didn’t want to repeat the mistake.
Day 1
I rinsed all the old soil off the roots with room-temperature tap water. Then I trimmed away every root that felt hollow, mushy, or black using scissors sterilized with rubbing alcohol. I removed the two worst affected leaves at the base with a clean cut. Then I let the whole plant sit on a paper towel in bright indirect light, no soil, no water.
Day 2
The cut ends had dried slightly. I mixed fresh potting medium—roughly 50 percent cactus mix and 50 percent perlite—and potted the aloe into a clean terracotta pot just big enough for the remaining root mass. I did not water.
Day 4
First light watering. Not a soak. Just enough to settle the mix around the roots.
Week 2
The plant started pushing out a tiny new leaf from the center. The remaining older leaves firmed up slightly. It wasn’t pretty, but it was clearly alive.
Week 6
New root growth was visible at the drainage hole. I resumed normal watering.
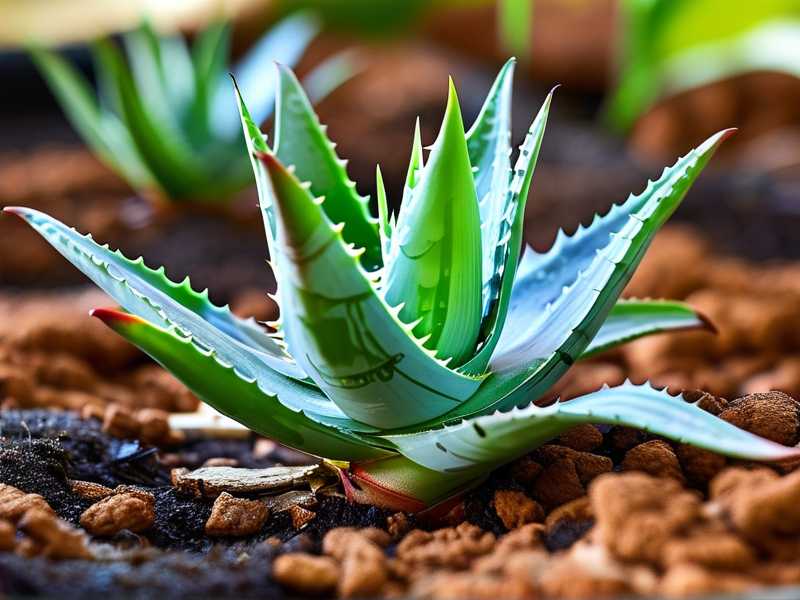
That experience taught me more than any label ever did. Aloe can recover from fertilizer damage if you remove the source, keep the plant dry and warm, and stop fussing with it. But prevention is far better.
The Biggest Mistakes to Avoid
1. Feeding Too Often
Aloe doesn’t need a monthly feeding schedule. That’s for hungry leafy plants. I feed my aloes only two or three times per year, always during warm weather when they’re actively growing.
2. Applying Fertilizer to Dry Soil
This is a huge one. If the root zone is bone dry and you pour liquid fertilizer in, the roots absorb the concentrated salts too quickly. Always water lightly first with plain water, then feed the next day—or at least a few hours later.
3. Using Slow-Release Granules in Small Pots
Those tiny pellets release salts every time you water. In a small pot with a small root system, the concentration can build up fast, especially indoors where there’s no rain to flush the soil.
My Current Feeding Routine for Aloe
Yes, I do still fertilize my aloes. But now I treat feeding as a gentle supplement, not a growth booster.
Between late spring and late summer, I feed at most twice. Usually once in June and once in early August. I skip feeding entirely in fall and winter. My aloes rest during those months, and pushing nutrients at them in low light only stresses the roots.
I use a liquid cactus and succulent fertilizer. Most brands are formulated at about a 1-1-2 or 2-1-2 NPK ratio, which is far gentler than standard houseplant formulas. I dilute it to half or even quarter strength.
Here’s a practical example. My current fertilizer label says one teaspoon per gallon for indoor succulents. I use one quarter teaspoon per gallon. That’s quarter strength. It looks almost too weak. It’s exactly right for aloe.
I water the plant normally with plain water first. The next morning, I pour the diluted fertilizer slowly over the soil surface until it runs out the bottom. Then I let the pot drain completely. I never let the pot sit in a saucer of fertilizer water.
After feeding, I watch the plant for five to seven days. If the leaves look slightly puffier and greener without any tip browning, I know the dose was safe. If anything looks off—even slightly—I flush the pot with plain water.
How to Flush Fertilizer Salts Out of Aloe Soil
If you’ve overfed your aloe or you see white crust on the soil surface, flushing is your first line of defense.
Take the plant to a sink or outdoors. Slowly pour clean, room-temperature water through the soil. Use about three to five times the volume of the pot. For example, a six-inch pot holds roughly one quart of soil, so I’d run at least three quarts of water through it.
Pour slowly, let it drain, then repeat. Then tilt the pot and let it drain completely. Move the plant somewhere warm with gentle airflow. Do not water again until the top half of the soil is thoroughly dry.
I’ve done this twice on two different plants. Both recovered. One lost two lower leaves but went on to produce pups the following spring.
The American Horticultural Society recommends similar leaching techniques for container plants suffering from salt buildup, particularly when growing media have been repeatedly fed with synthetic fertilizers. It works, but only if you catch the problem before the roots have turned fully mushy.
Types of Fertilizer to Use—and Avoid
What I Use Now
- Liquid cactus and succulent fertilizer, diluted to quarter or half strength
- Seaweed extract, very dilute, twice per growing season at most
- Worm castings, sprinkled lightly on the soil surface in spring, no more than a thin layer
What I No Longer Use on Aloe
- All-purpose houseplant fertilizer at full strength
- Granular slow-release pellets, especially in pots under eight inches
- Fertilizer spikes, which create concentrated salt pockets right next to the roots
- Homemade compost teas, which vary too much in strength for my comfort
You don’t need a lot of products. Honestly, many aloe plants do fine with no fertilizer at all for years if they’re repotted into fresh cactus mix every two or three years. The fresh mix itself contains enough nutrients for such a slow-growing plant.
How Fertilizer Burn Connects to Watering and Soil
Here’s something I didn’t understand at first: overwatering makes fertilizer damage far worse.
Wet, dense soil keeps dissolved salts in constant contact with the roots. The roots stay soft and vulnerable. A dose of fertilizer that would be fine in gritty, fast-draining mix becomes dangerous in heavy potting soil.
That’s why the same plant can tolerate a weak feed in June but collapse from an identical dose in October. Light, temperature, and soil moisture all change how the roots respond.
New Gardener Mistakes I Made Early On
Watering Too Often
I thought aloe needed a consistent weekly schedule. I ended up with root rot on my very first plant. 90% of indoor plants die from overwatering, and aloe is a perfect example. The soil should dry almost completely between waterings. In winter, I water my indoor aloes every three to five weeks, sometimes less.
Giving Too Much Direct Hot Sun After a Dry Spell
Aloe loves bright light, but plants kept indoors all winter will scorch if moved into full summer sun without hardening off. I burned the outer leaves of one plant badly on a single cloudless afternoon. The leaves bleached white, then turned brown and papery. Gradually increase sun exposure over ten to fourteen days.
Choosing the Wrong Pot
My first aloe went into a large glazed ceramic pot with no drainage hole. I thought it looked nicer. The soil stayed damp for weeks. The roots rotted, and by the time I repotted, only three tiny root nubs remained. Aloe wants a pot with a drainage hole and a size only slightly larger than the root ball. Terracotta is ideal because it breathes.
Quiz: Is Your Aloe Suffering from Fertilizer Concentration Damage?
Answer these five questions quickly.
- Have you fed your aloe in the past two weeks?
- Is the leaf tip turning brown or red without any recent increase in sunlight?
- Does the soil surface show white mineral crust?
- Are the lower leaves soft, loose, or translucent at the base?
- Has new growth stalled despite warm temperatures?
If you answered yes to two or more, flush the soil and hold off on fertilizer for at least two months. Watch the center of the plant. New growth from the middle is the best sign of recovery.
Step-by-Step Preventative Plan
Step 1: Repot in Gritty Mix Every Two to Three Years
I use a simple mix. Two parts cactus and succulent potting mix. One part perlite or pumice. Sometimes I add a handful of coarse sand if the mix looks too peaty.
Fresh mix resets salt levels and gives the roots a clean start. It also lets me inspect the roots for hidden rot.
Step 2: Match Pot Size to Root Mass
Oversized pots hold too much moisture and too much fertilizer. The aloe’s root system should fill about two-thirds of the pot. When repotting, go up one pot size at most.
Step 3: Feed Only During Active Growth
In most of the US, UK, Canada, and Australia, aloe grows actively from mid-spring through late summer. That’s the window for feeding—if you feed at all. Fall and winter are rest periods.
Step 4: Always Dilute More Than the Label Suggests
Half strength is safe. Quarter strength is safer. Aloe won’t sulk from a weak feed. It will sulk from a strong one.
Step 5: Water Before Feeding
Never pour fertilizer onto dry roots. Plain water first, feed the next day.
Step 6: Flush the Pot a Few Times Each Summer
Even without fertilizer, tap water contains dissolved minerals. I flush my indoor aloes once in midsummer by running rainwater or filtered water through the pot. It keeps the soil from developing that salty crust.
What the Experts Say
The RHS emphasizes that cacti and succulents should be planted in very free-draining compost and fed sparingly, if at all, during the growing season. They advise against feeding plants when they’re cold, stressed, or recently repotted.
The AHS reinforces that container plants in soilless mixes are especially prone to salt buildup because the mix itself offers little buffering capacity. Leaching with fresh water is one of their recommended corrective measures.
Neither organization suggests heavy feeding for desert succulents. That matches my experience exactly.
A Simple Seasonal Plan to Avoid Fertilizer Concentration Damage
Spring
- Watch for new green growth at the center.
- If the plant looks healthy, apply a very diluted cactus fertilizer once.
- Repot if the plant is rootbound or the mix looks compacted.
- Do not feed at the same time as repotting. Fresh mix has enough nutrients for two or three months.
Summer
- Keep the plant in bright indirect or gentle morning sun.
- In very hot weather, avoid feeding entirely if temperatures exceed 90°F for multiple days.
- Flush the soil once or twice with plain water, especially if you use tap water.
- Feed at most once more in early August if growth is strong.
Autumn
- Stop feeding completely.
- Reduce watering gradually.
- Bring outdoor plants inside before nighttime temperatures drop below 50°F.
- Check the roots and lower leaves for any hidden damage from summer.
Winter
- No fertilizer at all.
- Water sparingly, only when the soil is completely dry several inches down.
- Keep the plant in the brightest available window.
- Watch for signs of cold damage, which can look similar to fertilizer burn—soft, translucent leaf bases.
How I Monitor My Aloe After Feeding
I don’t use a complicated system. After each feeding, I take a quick photo of the plant on my phone. I compare it five days later. If the leaves look fuller or unchanged, good. If tips start browning, I flush the soil.
I also touch the base of the outer leaves gently. Healthy aloe leaves feel firm and slightly springy. A fertilizer-damaged leaf feels softer, almost like a water balloon. That change often happens before visible browning.
Can Aloe Recover from Severe Fertilizer Burn?
Sometimes. Not always.
If more than half the root system has turned black and mushy, survival odds drop sharply. But aloe has one big advantage: you can cut the top off a healthy leaf and root it as a cutting, though success rates are lower than for many other succulents.
I once rescued a badly burned aloe by removing every damaged root, cutting off the soft leaf bases, and rerooting the remaining stem in pure perlite. It took nearly two months, but it eventually pushed out three new roots and a tiny new leaf. It’s now a compact, slow-growing plant on my bathroom windowsill.
The key is patience. Don’t water heavily. Don’t add rooting hormone. Don’t move it around the house every day. Bright shade, warm air, dry medium, and time.
A Cautionary Note on Tap Water
Here’s something people rarely connect to root health: hard tap water can worsen fertilizer salt buildup.
In my area, the municipal water leaves mineral deposits on soil surfaces after a few months. If I then add liquid fertilizer on top of that, the root zone gets saltier than I intended.
Now I use rainwater when I can collect it, or I let tap water sit overnight and occasionally flush the pot through with filtered water. It makes a visible difference in the crust that forms on terracotta rims.
Quick Reference Table: Safe Feeding at a Glance
| Season | Feed | Dilution | Watering | Notes |
|---|---|---|---|---|
| Spring | Optional once | Quarter to half strength | Moderate | Only if active growth visible |
| Summer | Optional once or twice | Quarter strength | Allow top half to dry | Avoid feeding in heatwaves |
| Autumn | None | — | Reduce | Prepare for rest period |
| Winter | None | — | Minimal | Keep dry and bright |
Three Things I Now Never Do
- Never feed a newly repotted aloe for at least three months.
- Never feed a plant that shows any sign of stress—pests, cold damage, sunburn, or root disturbance.
- Never use fertilizer in winter, even if the plant sits in a warm room. Indoor light levels are simply too low for active nutrient uptake.
These rules came from losing plants, not from reading product labels. Aloe is tough, but its roots are the weakest link.