bluename
 How to Avoid Nutrient Accumulation in Aloe Pot Soil
I killed three aloe plants before I learned the truth. The problem wasn’t neglect. It was nutrient buildup in the soil. Here’s the short answer: Stop fertilizing completely for 6 months, repot into a terracotta pot with drainage holes, and only water when the soil is bone dry. Most people think aloes need food. They don’t. 90% of indoor plants die from overwatering, and the other 10%? They die from salt toxicity caused by too much fertilizer.
Let me walk you through what I actually did over two weeks to fix a sick aloe. I’ll include every mistake I made. You won’t repeat them.
Why Nutrient Accumulation Happens in Aloe Soil
Aloe vera is a succulent. It grows naturally in rocky, sandy, nutrient-poor soil. In a pot, things get weird. Tap water contains dissolved minerals like calcium and magnesium. Fertilizer adds nitrogen, phosphorus, and potassium. Over time, these salts don’t drain out. They sit in the soil. They crystallize on the pot edges. They burn the roots.

I noticed white crust forming on my terracotta pot after two months. That’s the salt. That’s the buildup.
The RHS explains that succulents are particularly sensitive to high salt levels. Their roots are designed for lean soil. You can check their guide on RHS website. I wish I had read that earlier.
What I Did Over 2 Weeks to Fix Nutrient Buildup
Day one. I stopped watering my aloe. The soil was still damp from three days ago. Big mistake number one.
Day three. I removed the aloe from its plastic nursery pot. The soil smelled sour. It was compacted. Roots were brown, not white. I gently shook off the old soil. I trimmed dead roots with clean scissors.
Day five. I rinsed the roots under lukewarm water. This removed salt deposits. The American Horticultural Society recommends this for potted succulents. Check their resources at AHS website. I let the roots air dry for six hours on a paper towel.
Day seven. I repotted into a fresh mix. I used one part coarse sand, one part perlite, one part coconut coir. No fertilizer. No compost. I chose a terracotta pot with one large drainage hole.
Day ten. I placed the aloe in a south-facing window. I did not water. I waited.
Day fourteen. The soil was completely dry. I watered deeply until water ran out the bottom. I let the pot sit in the sink for 15 minutes to drain fully. No saucer. No standing water.
The aloe perked up within three days after that first watering. The leaves became firmer. The color went from pale yellow to deep green.
3 Deadly Mistakes New Aloe Owners Make
I made all these. I bet you’re making at least one.
1. Watering on a Schedule
I used to water every Sunday. That’s insane. Aloes don’t care about your calendar. They care about soil dryness. I learned this after my second plant rotted.
Stick your finger two inches into the soil. If it’s damp, walk away. If it’s dry, water. That’s it.
How I fixed it: I only water when the soil is fully dry. I lift the pot. If it feels light, I water. If it feels heavy, I wait.
2. Putting Aloe in the Wrong Light
I kept my first aloe in a dark corner of my living room. It stretched out. It looked like a sad green spider. That’s etiolation. It happens when the plant reaches for light.
Aloes need direct sunlight. At least four hours a day. A south-facing window is ideal. A west-facing window works too.
What I do now: I rotate the pot every two weeks so all sides get light. If you don’t have enough natural light, use a grow light. I use one for six hours daily in winter.
3. Using the Wrong Pot
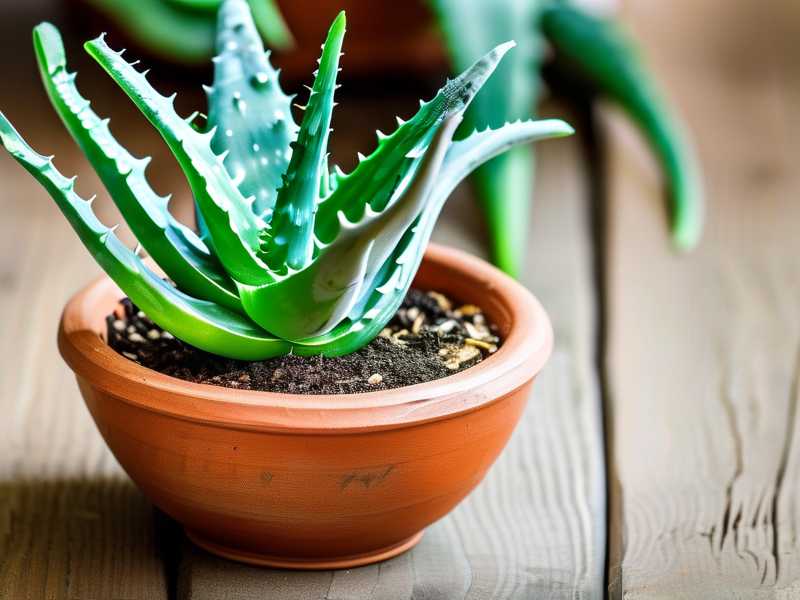
Plastic pots are a trap. They hold moisture. They don’t breathe. My third aloe died in a plastic pot with no drainage hole. The soil stayed wet. The roots suffocated.
Terracotta is your friend. It absorbs water from the soil. It allows airflow. It prevents overwatering.
My rule: Always use a pot with a drainage hole. Always. Terracotta is best. Unglazed clay works too. Avoid glazed ceramic unless you’re an expert.
How to Prevent Nutrient Buildup Long-Term
I’ve been growing aloes for three years now. I haven’t lost a single plant since I started following these steps.
Use Rainwater or Distilled Water
Tap water contains minerals. They accumulate over time. Rainwater is perfect. Distilled water works too. If you must use tap water, let it sit out overnight. This allows chlorine to evaporate. It doesn’t remove minerals though.
My hack: I collect rainwater in a bucket. I store it in a gallon jug. I use it for all my succulents. Simple.
Stop Fertilizing Completely
Aloes don’t need fertilizer. They evolved in deserts. They get nutrients from rain and dust. If you must feed them, use a cactus fertilizer at half strength. Once a year. In spring.
What I do: I don’t fertilize at all. My aloes are fine. They grow slow. That’s normal. Fast growth is a sign of oversupply.
Flush the Soil Every 3 Months
This removes accumulated salts. Take the pot to a sink. Water deeply until water runs out the bottom. Do this three times. Let the pot drain completely. Don’t water again until the soil is dry.
I do this every three months. It keeps the soil fresh. The white crust on my pot disappeared after one flush.
Repot Every 2 Years
Old soil breaks down. It becomes compacted. It holds too much water. Repotting refreshes the soil.
My process: I repot in early spring. I use fresh succulent mix. I choose a pot one size larger. I don’t water for a week after repotting.
Signs of Nutrient Accumulation in Aloe
You need to catch this early. Look for these symptoms.
White Crust on Soil Surface
That’s salt. It means you’ve been over-fertilizing or using hard water. Scrape it off. Flush the soil.
Yellow or Brown Leaf Tips
This is salt burn. The tips die because the roots can’t take up water properly. The salts draw water out of the roots. It’s called osmotic stress.
Stunted Growth
The aloe stops growing. It looks the same for months. The leaves are small and thin. The roots are damaged.
Soft Mushy Leaves
This is rot. It happens when the soil stays wet. The roots die. The leaves collapse. Most people think this is underwatering. It’s usually overwatering combined with salt buildup.
My Personal Routine for Healthy Aloe Soil
I keep it simple. Here’s what I do every week.
Monday: Check soil moisture. Stick finger in. If dry, water with rainwater.
Friday: Check for pests. Aloes get mealybugs. Wipe leaves with alcohol if you see white cottony spots.
First of month: Flush soil if buildup is visible. I do this only when needed.
Spring: Repot if roots are crowded. Use fresh soil. No fertilizer.
That’s it. No complicated schedules. No expensive products. Just consistent care.
Common Questions About Aloe Soil Buildup
Can I use coffee grounds for aloe?
No. Coffee grounds add nitrogen. They make soil acidic. Aloes prefer neutral soil. They don’t need extra nutrients. Stick to plain soil.
How do I know if my aloe has root rot?
Gently pull the plant. If it comes out easily, the roots are dead. Sniff the soil. If it smells like rotten eggs, that’s rot. Cut away dead roots. Repot in dry soil. Don’t water for two weeks.
Should I add rocks to the bottom of the pot?
No. That’s a myth. Rocks create a perched water table. They raise the water level. They make rot worse. Use a pot with a drainage hole. That’s enough.
Final Thoughts on Keeping Aloe Soil Clean
I wasted months and money on fertilizers and fancy soil additives. My aloes looked worse with every dose. The truth is, these plants thrive on neglect. They want poor soil. They want dry roots. They want bright light.
If you remember one thing, remember this: Stop feeding your aloe. It doesn’t need food. It needs patience. Let the soil dry out. Let the roots breathe. Let the plant be.
I killed three aloes learning this lesson. You don’t have to. Start today. Check your soil. Flush it if needed. Repot into terracotta. Water only when dry. Your aloe will thank you with firm green leaves and steady growth.