 bluename
 How I Fixed My Balcony Aloe’s Soil After Nearly Killing It (Twice)
If you’re wondering how to adjust soil formula for balcony cultivated aloe, the short answer is this: use about 50–60% inorganic grit like perlite, pumice, or coarse sand, and only 40–50% organic matter such as cactus mix or compost. The mix has to drain fast. That’s it.
But getting there took me a while. I killed one aloe with soggy peat. I nearly killed another with pure garden soil. Balcony conditions make everything trickier. Wind, heat, cold pots, rain splash, direct sun. This guide is everything I learned the messy way.

I grow aloe on a small apartment balcony. Some in terracotta. Some in plastic. Some against a wall. Some on a railing shelf. Same plant, totally different soil behavior. That’s why a one-size recipe never worked for me.
Most advice online ignores balcony reality. So I’ll walk you through what actually worked, what didn’t, and how I adjusted my own formula pot by pot.
Why Aloe Soil Fails on a Balcony
Aloe vera is a succulent. It stores water in its leaves. Its roots are shallow and hate sitting in moisture. When you grow it on a balcony, the pot gets hotter during the day and cooler at night. That changes how fast the soil dries.
I used to think any cactus mix was fine. It wasn’t. Many bagged cactus mixes still hold too much water. Especially on a north-facing or shaded balcony. Or during a rainy week. Or in a plastic pot with one drain hole.
The soil stays wet. Roots suffocate. Then fungus moves in. You see yellowing, soft leaves, a musty smell. The plant folds.
According to the Royal Horticultural Society (RHS), succulents need sharply draining soil and should never stand in water. I wished I’d read that before my first aloe turned to mush.
The American Horticultural Society (AHS) also stresses that container plants need different soil than garden beds. Especially on hard surfaces like balconies where reflected heat speeds up drying in summer but rain exposure can saturate pots in winter.
So balcony aloe soil is about balance. Fast drainage. A little moisture retention. Enough air around the roots. Let’s break that down.
The Mix I Actually Use Now
I’ll give you my base recipe first. Then I’ll explain how I adjust it.
My standard balcony aloe mix:
- 2 parts cactus or succulent potting mix
- 1 part perlite
- 1 part coarse sand or poultry grit
- A handful of small bark chips, optional
That’s roughly 50% organic, 50% inorganic. Sometimes I push the inorganic part higher for plastic pots or rainy seasons.
For me, perlite alone is not enough. I’ve tried. It floats to the top, breaks down, and doesn’t help much at the bottom of the pot. Coarse sand or crushed granite is better. Pumice is even better if you can find it.
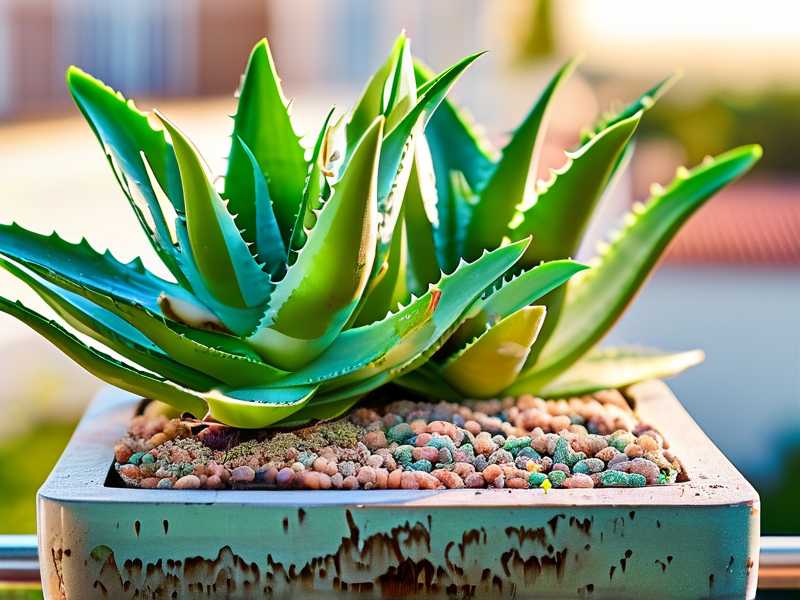
I once used fine beach sand. Big mistake. It compacted like concrete. The plant stopped growing and the soil became hydrophobic. Water just ran around the edges. I had to soak the whole pot in a bucket to re-wet it.
So if you’re buying sand, go for coarse builder’s sand or poultry grit. Not play sand. Not fine sand.
How to Adjust the Formula Based on Your Balcony
This is the part that took me two years to understand. Same plant. Same city. Different balconies. Different soil needs.
My balcony faces southeast. It gets strong morning sun and gets very hot by noon. In summer the railing area can hit 40°C or more. My plastic pots dry fast. But my terracotta pots against the wall stay cooler and damp longer.
So I adjust.
For hot, windy, sunny balconies, I use slightly more organic matter. Maybe 55% cactus mix and 45% grit. That holds just enough water so I’m not watering every day.
For shaded, humid, or rainy balconies, I flip it. More grit. Maybe 40% organic and 60% inorganic. That prevents wet roots during cool spells.
I learned this the hard way with a pot by my balcony door. It got almost no direct sun. I used my standard mix. The plant turned yellow and soft within three weeks. I repotted it with more perlite and sand. Two weeks later, new growth was firm and green.
So the base formula is a starting point. You have to watch the plant and adjust.
Pot Choice Changes Everything
I’ll say it plainly. The pot matters as much as the soil.
My first mistake was a cute glazed ceramic pot with one small hole. My second mistake was a deep plastic pot. Both held water too long.
Now I stick to terracotta or unglazed clay for most aloe. The walls breathe. Moisture evaporates through the sides. That’s really helpful on a balcony where air circulation is good.
If I use plastic, I choose wide shallow pots. Not tall narrow ones. Aloe roots spread sideways. Deep pots leave wet soil at the bottom where roots never reach.
And I check drain holes. One hole is not enough. I drill extra holes if needed. Or I use a layer of gravel, but honestly gravel doesn’t help much. Drain holes do.
The pot size matters too. Aloe likes being snug. A pot that’s too big holds too much soil and water. I keep my aloe in pots just slightly larger than the root ball.
The Repotting Process I Follow
Repotting aloe sounds scary but it’s simple. I do it every two years. Sometimes sooner if the soil has compacted or the plant has outgrown the pot.
My process:
I water the plant a day before. Not too much. Just enough to soften the roots.
I gently slide it out of the pot. I tap the sides. If it’s stuck, I run a knife around the edge.
I shake off old soil. I check for black or mushy roots. Those get cut with clean scissors.
I let the plant sit in shade for a few hours. This lets any broken roots callus over. Planting immediately can lead to rot.
Then I fill the new pot about one third with my adjusted mix. I position the plant. Then I fill around it, pressing lightly.
I wait a week before watering. This is crucial. The roots need time to heal.
I used to water right after repotting. I lost two plants that way. Now I wait. It feels wrong at first. But aloe can go weeks without water.
Two weeks after repotting, I water lightly. After that, I resume normal care.
Light on the Balcony and How It Affects Soil
Light and soil are connected. More sun means the soil dries faster. Less sun means slower drying.
Aloe loves bright light. But not always full afternoon sun on a blazing balcony. That can scorch the leaves. Especially after repotting.
I keep my aloe in a spot with morning sun and filtered afternoon light. In peak summer, I move some pots behind a sheer curtain or under a taller plant.
If your aloe gets leggy and pale, it needs more light. If it turns brown or orange, it’s stressed from too much direct sun.
I noticed that when my aloe got too much sun, the soil surface would bake hard. Water beaded up and ran off. I fixed it by top-dressing with small pebbles. That slowed evaporation and kept the top layer from crusting.
So if your soil is drying too fast or repelling water, check your light situation. Adjust the pot location before changing the whole mix.
Watering Guide Based on Soil and Balcony Conditions
Here’s the rule I follow now. Water deeply. Then wait until the soil is completely dry.
Not just the top inch. All the way down.
I check with my finger. Sometimes with a wooden skewer. If it comes out clean, the soil is dry. If it has moist bits, I wait.
In summer, I water maybe every 5 to 7 days. In winter, every 3 to 4 weeks. Sometimes less.
If it rains and the balcony gets wet, I skip watering even longer. I also move pots away from open railings during long rainy spells.
90% of indoor plants die from overwatering. And on a balcony, it’s even easier to overdo it. Rain plus shade plus plastic pot equals dead aloe.
I once left my aloe out during a three-day drizzle. The soil was soaked. The lower leaves turned clear and mushy. I pulled the plant out, cut the rotten roots, let it dry for two days, and repotted in fresh gritty mix. It survived. But barely.
Now I treat rain like watering. If rain falls, I don’t water that week.
Fertilizing Without Burning the Roots
Aloe doesn’t need much food. But a little feeding in spring and summer helps.
I use a diluted liquid fertilizer made for succulents. Half strength. Once a month from April to August.
I never fertilize in winter. The plant isn’t growing. The unused nutrients can build up in the soil and damage roots.
I also avoid fertilizing right after repotting. Fresh soil has enough nutrients for a few months.
One year I overfed my aloe. The leaf tips turned brown. The soil got crusty. I flushed the pot with plain water several times. The plant recovered after about three weeks.
So if you’re unsure, skip feeding. Aloe grows fine in lean soil.
Seasonal Care and Soil Adjustments
Spring is the best time to adjust soil formula for balcony cultivated aloe. The plant wakes up. Roots start growing. Repotting and soil refresh work well now.
I usually repot in early spring if needed. I also top up the soil surface with a little fresh mix. That alone can make the plant push new growth.
In summer I check the soil moisture more often. Hot wind dries pots fast. But I still don’t water until the soil is dry. I also watch for ants and aphids. Stressed aloe attracts pests.
Autumn is when I pull back on watering. I stop fertilizing by late September. If the soil stays damp from cool nights, I might add a top layer of dry grit to help the surface dry faster.
Winter is the danger season. On a balcony, aloe can handle cool temps but not freezing. If temperatures drop below 5°C, I bring pots inside or against a warm wall. I stop watering almost completely. Dry soil insulates roots better than wet soil.
I lost a pot one winter because I watered in November and a frost hit. The soil froze. The roots died. The pot cracked. Lesson learned.
Common Problems I’ve Seen and Fixed
Yellow leaves usually mean too much water. Or poor drainage. I check the soil first.
Brown crispy tips usually mean too much sun or too much fertilizer. I move the plant or flush the soil.
Soft mushy leaves near the base mean rot. I remove the plant, trim bad roots, and repot in dry gritty mix.
Wrinkled leaves mean the plant is thirsty. But I still check the soil before watering. Sometimes wrinkled leaves happen because the roots are too damaged to take up water. In that case, watering makes it worse.
Fungus gnats show up when soil stays too wet. I let the soil dry completely and top-dress with sand. That breaks their life cycle.
Mealybugs sometimes hide in the leaf joints. I wipe them with a cotton swab dipped in rubbing alcohol. Then I isolate the plant on the other side of the balcony.
Three Deadly Mistakes I Made as a Beginner
- Overwatering
I thought aloe needed weekly water like other plants. I didn’t check the soil. I just watered on a schedule. That killed my first plant in under two months.
Now I never water on schedule. I water on soil dryness.
- Wrong Light
I moved a healthy aloe from bright shade to full afternoon sun in June. In three days the leaves turned pale and soft. Sunburn.
Aloe likes bright light but needs gradual adjustment. And on hot balconies, filtered afternoon light is safer.
- Wrong Pot
I planted aloe in a big deep plastic pot with one drain hole. The soil at the bottom stayed wet for weeks. The roots rotted while the top looked dry.
Now I use wide shallow terracotta pots with extra drain holes. I’d rather water slightly more often than deal with rot.
Small Details That Made a Big Difference
I top-dress all my aloe pots with small pebbles or coarse sand. It stops the soil from splashing onto the leaves during rain. It also keeps the crown dry, which prevents rot.
I avoid misting aloe. Some people mist succulents but I’ve found it causes fungal issues on a balcony with poor airflow.
I rotate my pots every couple of weeks. Aloe leans toward the light. Rotating keeps it growing straight.
I also keep a few extra plastic saucers under pots but I empty them after rain or watering. Standing water in saucers is a silent killer.
One more thing. I always wear gloves when repotting aloe. The edges are sharp. And the gel stains. Not a big deal but worth knowing.
Frequently Asked Questions
How do I know if my balcony aloe soil is too dense?
Pick up the pot. If it feels heavy days after watering, the soil is holding too much moisture. Also, if water pools on the surface instead of soaking in, the mix is too compacted. Repot with more grit.
Can I use regular potting soil for aloe?
You can, but only if you add at least half perlite or coarse sand. Regular potting soil stays wet too long. It’s the fastest way to root rot on a balcony. I’ve tried it. I won’t do it again.
How often should I repot balcony aloe?
Every two years is a good rhythm. Or when the soil becomes compacted, the pot cracks, or the plant stops growing despite good light. Spring is the safest time. Let the roots heal for a week before watering.
If you’re growing aloe on a balcony, the soil is your foundation. Get it right and the plant mostly takes care of itself. Get it wrong and no amount of sunlight or fertilizer will save it.
Start with the base mix. Then adjust for your sun, wind, rain, and pot type. Watch the plant for two weeks. Dry soil, firm leaves, and slow steady growth mean you’re on track.
It took me a few dead plants and many adjustments to find what works. But once I stopped fighting the balcony environment and started matching the soil to it, my aloe finally thrived. Yours can too.





