 bluename
 If you have ever watched a tiny aloe seedling turn yellow, droop, or collapse within days of bringing it home, the problem usually is not neglect. It is too much water leaving the pot too slowly. Learning how to prevent excessive drainage for small aloe seedlings might sound backward. Most growers fear poor drainage. But with very young aloes in gritty mixes and oversized pots, water can rush through so fast that roots dry out between watering sessions. Then beginners panic, water again, and create cycles of stress. I have killed more than one tray of aloe pups this way before I understood what was actually happening.
Small aloe seedlings are different from mature aloe plants. Their roots are thin, short, and easily shocked. The right moisture balance matters more than a strict watering schedule. You want drainage, yes, but controlled drainage. Not a dry desert channel through the pot. Not a swamp at the bottom. Something in between.
I have grown aloe vera, Aloe aristata, and a few hybrid dwarf aloes on a windowsill, under grow lights, and outdoors in summer. The lessons were consistent. Once I learned how to keep moisture around young roots without suffocating them, the seedlings stopped collapsing. They started fattening up within about two weeks.

This is the full process I use now. Every step comes from real mistakes, real repotting sessions, and close observation.
Understanding Small Aloe Seedling Root Systems
Small aloe seedlings do not have the thick water-storing roots that mature aloes develop. Their roots are fine, pale, and easily damaged. They need consistent access to small amounts of moisture. But they also need oxygen.
The goal is not maximum drainage. The goal is balanced drainage.
The RHS notes that many succulents rot because water lingers in the root zone. That is true. But the opposite issue gets less attention. In a very gritty mix inside a terracotta pot, a seedling can dry out completely within 48 hours. The roots desiccate. Then the plant looks thirsty. Then you water again. Then the surface looks dry in a day. Then you water again. Eventually the stressed roots fail.
Simple as that. The cycle looks like rot, but it starts with roots being bone dry between drinks.
How to Prevent Excessive Drainage for Small Aloe Seedlings: The Core Approach
I use three simple changes to stop water from running through too fast:
- Use a smaller pot.
- Add a modest amount of organic matter to the gritty mix.
- Water in small passes rather than one heavy pour.
These three adjustments keep the root zone slightly moist for a day or two, which is exactly what young aloes want.
For me, the biggest fix was pot size. A two-inch seedling in a six-inch pot is a beginner trap. The large soil volume holds water unevenly. The edges dry fast. The center stays soggy. Roots cannot colonize the space quickly enough. Water finds channels and exits before roots can drink. It is frustrating to watch.
I have also tested this with clear nursery pots. You can actually see water racing down the sides of a too-dry, too-gritty mix while the center remains dusty. That visual changed how I water.
Selecting the Right Pot for Young Aloe Seedlings
The pot is part of the watering system. It controls how fast moisture leaves.
Pot Size
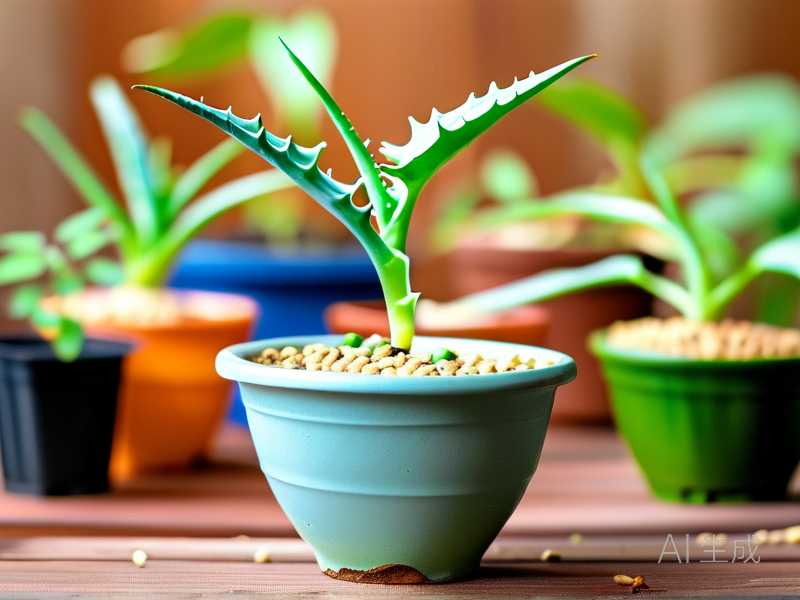
Keep the pot small. For a seedling with a root ball the size of a walnut, use a pot no more than one to two inches wider. I start most aloe pups in 2.5 to 3 inch plastic nursery pots. They fit on bright shelves and dry evenly.
Large pots seem like a time-saver. They are not. Aloe seedlings grow slowly. They cannot use the extra soil volume. Too much soil means too much water retention in some spots and too much evaporation in others.
Material
Plastic pots are more forgiving for very small aloes. Terracotta wicks moisture away fast. That is helpful for mature plants in humid climates. For seedlings in a gritty mix, terracotta can create excessive dryness.
I still use terracotta sometimes. But only after roots are established and only in warm, bright conditions.
Drainage Holes
Drainage holes are non-negotiable. But the number and size matter. A huge hole at the bottom of a tiny pot can let water pour out before the mix absorbs it. If the pot only has one giant opening, I place a small piece of fiberglass window screen or a coffee filter over it. Not gravel. Gravel at the bottom of small pots creates a perched water table, which is the opposite of what people expect.
Choosing the Right Soil Mix
Most commercial cactus mixes are too chunky for seedlings straight out of the bag. They contain large perlite bits, bark, and sand. Water moves through them almost instantly. That is okay for a mature jade plant. Not for a two-month-old aloe.
My basic seedling mix looks like this:
- 2 parts cactus and succulent soil
- 1 part fine coco coir or sifted peat-free compost
- 1 part small pumice or fine perlite
I do not use coarse builder’s sand. Fine sand can clog the mix. Pumice is better because it holds a little moisture inside its pores while still allowing airflow.
The organic portion slows down drainage just enough. In a small pot, this mix stays lightly damp for about two to three days after a modest watering. Then it gradually dries.
That window gives young roots time to drink.
A Quick pH and Nutrient Note
Aloe seedlings are not heavy feeders. The organic matter in the mix provides enough early nutrients. I avoid rich compost. Too much nitrogen makes seedlings soft and floppy. They stretch and lose their compact shape.
Watering Guide for Small Aloe Seedlings
90% of indoor plants die from overwatering. But with tiny aloes, problem watering often looks different. It is not always a swamp. Sometimes it is frequent shallow watering after fast drainage. The roots stay stressed. The base of the seedling darkens. People call it rot, but it starts with unstable moisture.
I water small aloe seedlings based on pot weight and leaf feel, not a schedule.
When to Water
I lift the pot. If it feels very light, I check the soil surface. If the leaves look slightly less plump and the top half inch is dry, I give a small drink.
In bright indoor conditions, that usually means every five to seven days. In winter, every ten to fourteen days. Outdoors in summer, it can be every three to four days.
How to Water
I do not flood the pot from a height. A heavy stream channels through the mix and out the bottom. Instead, I use a squeeze bottle or a small watering can with a narrow spout. I wet the surface slowly in a circle around the seedling.
I add a little water. I wait ten seconds. I add a little more. This allows the organic components to absorb moisture. With the right mix, a small pot will take about one to two tablespoons of water per watering session.
You will see a tiny bit of runoff. That is fine. If water pours out immediately and the pot still feels light afterward, the mix is too dry or too gritty. In that case, I bottom-water once to reset the moisture level.
Bottom Watering for Compacted or Overly Dry Mix
Sometimes the mix becomes hydrophobic. Water beads up and rolls off. I fill a shallow tray with about half an inch of water. I set the seedling pot in it for five to ten minutes. The soil wicks moisture upward. I remove the pot before it becomes saturated.
I learned this after losing a tray of aloe pups that looked wet on top but were dust-dry around the roots.
Common Mistakes That Cause Excessive Drainage and Root Failure
Many guides focus on rot. But for small aloe seedlings, these mistakes are just as common.
1. Using a Too-Gritty Mix
Straight pumice, perlite, and sand are great for some succulents. They are not ideal for tiny aloes. The roots dry out too quickly. I tried a pure mineral mix once because I had read it prevented rot. The seedlings did not rot. They just shriveled and died within ten days.
2. Choosing an Oversized Pot
Large pots hold more water in places roots cannot reach. They also dry unevenly. You cannot judge moisture by touching the surface. The top may be dry while the bottom is wet. Or the sides may be dry while the root ball stays soggy.
3. Watering on a Fixed Schedule
Aloe seedlings use more water when they are actively growing in bright light. They use less in cool or dim conditions. A weekly schedule without checking the pot leads to problems. I water by feel now.
Lighting and Its Effect on Moisture Levels
Light and water are connected. The more bright light a seedling receives, the faster it uses water. But too much direct sun can heat the pot and dry the surface quickly.
Young aloe seedlings do best in bright indirect light. Some morning sun is okay. Hot afternoon sun through a window can scorch leaves and bake the root zone.
I keep my seedlings about six to twelve inches from a bright east or west window. If I use grow lights, they run twelve to fourteen hours a day at moderate intensity.
The AHS emphasizes matching water to light and temperature conditions. That advice is especially important for small succulents. A seedling on a dark shelf needs very little water. A seedling under bright grow lights will dry faster, but not instantly if the mix is right.
Signs of Light Problems
Too much light: leaves turn reddish or brown, feel warm, or develop thin papery patches. Too little light: leaves stretch, flatten, or turn pale. The plant leans toward the window.
I have seen aloe seedlings stretch within one week in low light. Once stretched, they do not shrink back. You have to wait for new compact growth.
Seasonal Care for Small Aloe Seedlings
Aloe seedlings respond to seasonal changes even indoors. Adjusting care through the year prevents both overwatering and excessive drainage stress.
Spring Care
Spring is the best time to repot and refresh soil. I repot only if roots fill the current pot. I do not move seedlings into large pots too early.
In spring, I water a little more often as daylight increases. I also start a very diluted fertilizer routine if seedlings are actively growing. A balanced liquid fertilizer at quarter strength once every four weeks is enough.
Summer Care
Heat speeds up evaporation. But small pots can also overheat on a windowsill. I move seedlings back from hot glass in the afternoon.
Outdoors, I keep them in bright shade or under a shade cloth. Direct outdoor sun can kill a windowsill-grown seedling in one day. I harden them off over a week.
In summer, I check pots daily. The mix can dry fast. But I still water in small amounts rather than soaking the pot.
Fall Care
I reduce water gradually as temperatures cool. I stop fertilizing by early fall. I also inspect for stretched growth and remove any dead leaves.
Fall is a good time to evaluate root health. If a seedling has grown well over summer, I may move it up one pot size. Just one size. Nothing dramatic.
Winter Care
Winter is the danger season for many indoor succulents, but small aloes can also dry out near heating vents. I keep seedlings away from radiators and forced-air vents.
I water very lightly in winter, just enough to keep roots from fully desiccating. The mix should dry almost completely between waterings, but not stay dry for weeks.
If the room is cold, below 50°F, I hold off on water entirely. Cold wet soil is deadly for aloe roots.
Fertilizing Small Aloe Seedlings Without Damaging Roots
Less is more. Small aloe seedlings do not need much fertilizer. The organic matter in the mix often carries them through the first few months.
When I do fertilize, I use a liquid succulent fertilizer or a balanced houseplant fertilizer. I dilute it to one-quarter of the label strength. I apply it only when the seedling is actively growing and only after a light watering. Never on dry roots.
I made the mistake of fertilizing a slightly thirsty aloe pup once. Within two days, the leaf tips turned brown. The roots could not handle the salts. I flushed the pot with plain water and did not fertilize again for two months.
Repotting Small Aloe Seedlings
Repotting is stressful. I repot only when necessary.
Signs a seedling needs repotting:
- Roots growing through drainage holes
- The pot dries out within a day despite normal watering
- Growth slows and the plant looks crowded
- The soil surface develops a crust
When I repot, I use dry or barely damp mix. I disturb the roots as little as possible. I place the seedling at the same depth it was growing before. Then I wait two or three days before watering to let damaged roots callus.
I used to water immediately after repotting. That caused several aloe pups to collapse at the base. Now I wait. The difference is clear.
Pests and Problems That Mimic Watering Issues
Sometimes the problem is not watering at all. Pests and disease can make a seedling look overwatered or underwatered.
Fungus Gnats
Fungus gnats thrive in consistently moist organic mixes. If you see tiny black flies around the seedlings, reduce watering frequency. Let the surface dry. Sticky traps help. A thin layer of horticultural sand or fine pumice on top can discourage egg laying.
Mealybugs
Mealybugs look like tiny cotton tufts at the base of leaves. I remove them with a cotton swab dipped in 70% isopropyl alcohol. Repeat every few days until gone. A bad infestation can weaken a seedling and make it look dehydrated even when the soil is fine.
Root Mealybugs
These are harder to spot. If a seedling declines despite good care, I gently remove it from the pot and inspect the roots. Root mealybugs appear as white fuzzy patches. I wash the roots, remove affected parts, and repot in fresh mix. Then I treat with a diluted neem drench if needed.
Yellowing Lower Leaves
One yellow lower leaf is not a crisis. Aloe seedlings shed older leaves as they grow. If several leaves yellow at once, check the soil moisture. Soggy soil plus yellow leaves suggests overwatering. Bone-dry soil plus wrinkled leaves suggests underwatering.
Brown, Mushy Base
This is stem rot. It usually follows prolonged wet conditions. If only one seedling is affected, remove it and adjust watering. If caught early, you can cut above the rot and reroot. But with very small seedlings, success is low. I focus on preventing it.
How I Fixed My Own Seedling Drainage Problems
I remember one tray of Aloe vera seedlings I started from seed. I used a commercial cactus mix with extra perlite. The pots were small, but the mix was very open. Water ran through in seconds. I assumed this was good. The seedlings sprouted, then stalled. Then their tips shriveled.
I checked the roots. They were nearly dry, brown at the tips, and not growing. The mix was not holding water long enough for the seedlings to absorb it.
I repotted them into a small batch of my current mix with a bit of coco coir. I moved them into slightly deeper nursery pots. Then I watered in tiny amounts every four to five days.
Within two weeks, the surviving seedlings firmed up. New root tips appeared. The leaves turned from pale green to a deeper, healthier green. I did not change the light. I did not fertilize. I only changed how fast water moved through the root zone.
That two-week observation taught me more than any general succulent guide.
My Exact Weekly Routine for Small Aloe Seedlings
Here is what I do most weeks:
Day 1: Check all seedling pots. Lift each one. Note the weight. Day 3: Check the soil surface. If dry, water lightly with a squeeze bottle. Day 5: Rotate pots a quarter turn so seedlings grow evenly. Day 7: Check leaf firmness and look for pests.
I do not water all seedlings at the same time. Each pot drains and dries slightly differently.
In summer, I may check daily. In winter, I may only check twice a week.
A Note on Humidity and Airflow
Small aloe seedlings do not need high humidity. But extremely dry air, especially near heating systems, can stress them.
I keep a small fan running in my indoor plant area. Not pointed directly at the seedlings, just enough to move air. This helps the surface dry between waterings and reduces fungus issues.
If your home is very dry in winter, do not mist aloe seedlings. Misting does not help succulents and can encourage leaf rot. Instead, group plants together or use a humidity tray nearby. But even that is optional.
The Three Deadly Mistakes I Still See
If I could sit down with every new aloe grower, I would repeat these three warnings:
- Don’t water on a schedule. Check the pot.
- Don’t use a huge pot. Keep it snug.
- Don’t use pure gritty mix for tiny seedlings. Add a little organic matter.
I have made all three mistakes. Some plants survived. Many did not. The ones that thrived were the ones I treated less like desert cacti and more like young plants with delicate roots.
Why Preventing Excessive Drainage Matters More for Seedlings Than Mature Aloes
Mature aloe plants can tolerate long dry periods. Their thick leaves hold water. Their roots are substantial. A seedling has no reserves. A few days of completely dry roots can kill it. A few days of soggy roots can also kill it.
The balance is narrow. That is why pot size, mix texture, and watering technique matter so much.
When I stopped obsessing over “perfect drainage” and started focusing on “controlled drainage,” my success rate improved fast. Seedlings that used to collapse within a month now survive for years.
Frequently Asked Questions About Small Aloe Seedling Care
How often should I water a small aloe seedling?
I water when the pot feels light and the top half inch of soil is dry. In bright indoor conditions, that is often every five to seven days. In cool or dim conditions, it may be every ten days or more. I never follow a strict schedule.
Can I use regular potting soil for aloe seedlings?
Regular potting soil alone holds too much water for aloe roots. I mix it with fine pumice or perlite and a little cactus mix. The result should be light but not so gritty that water runs through instantly. A 50/50 mix of potting soil and pumice can work if you water carefully.
Why are my aloe seedlings turning brown at the base?
A brown, soft base usually means too much moisture around the stem. It can also happen after watering immediately following repotting. I let the soil dry more between waterings and keep water off the stem. If the base is firm but brown, it may be normal corking or slight sun stress.
The trick with small aloe seedlings is to stop thinking in extremes. They are not





