bluename
 How to Apply Targeted Nutrients for Aloe Root Strengthening
I killed my first three aloe plants before I figured this out. Let me save you the heartbreak. The direct answer for applying targeted nutrients to strengthen aloe roots is this: use a diluted liquid kelp or seaweed fertilizer at half strength every 2-3 weeks during the growing season, applied directly to moist soil around the root zone, not the leaves. Skip the fancy chemical mixes. Stick with this simple approach and your aloe will thank you within two weeks.
I remember the day I brought home my first aloe. I thought it was indestructible. Everyone says aloe is easy. But here I was, staring at a droopy, yellowing mess. The leaves were soft and mushy near the base. I had no idea what went wrong. After three failed attempts, I finally dug into research and real trial-and-error. I even consulted resources from the RHS and later the AHS to confirm my findings. Here is what I learned about feeding aloe for root health.
Why Aloe Roots Need Special Attention
Aloe vera roots are shallow and fragile. They spread out horizontally rather than deep down. This means they absorb nutrients differently than most houseplants. I once packed my soil with rich compost thinking it would help. Big mistake. The roots burned within days. The leaves turned brown at the tips. I panicked.
90% of indoor plants die from overwatering, but the real silent killer is nutrient mismanagement combined with watering mistakes. Think about it this way. A plant sitting in wet soil with too much fertilizer cannot breathe. Its roots rot. Then the whole plant collapses. I learned this the hard way with my second aloe.
The RHS emphasizes that succulents like aloe evolved in nutrient-poor conditions. They do not need heavy feeding. In fact, they thrive on neglect. But here is the catch. They still need some key nutrients for root development. You just have to apply them right.
The Three Biggest Mistakes Newbies Make With Aloe
I wish someone had told me these three things upfront. It would have saved me months of frustration.
Mistake 1: Overwatering the Roots
This is the number one killer. I used to water my aloe every three days. I thought it needed constant moisture. The leaves turned yellow. Then they became mushy. The roots literally disintegrated. I pulled the plant out of the pot and found a brown, slimy mess. No white roots at all.
Here is the truth. Aloe stores water in its leaves. It only needs watering when the soil is completely dry. I now check with my finger. I stick it two inches down. If it feels dry, I water. If not, I wait. This simple trick changed everything.
Mistake 2: Wrong Light Exposure
I placed my first aloe in a dark corner of my living room. It looked fine for a month. Then it started stretching. The leaves became long and thin. They lost their vibrant green color. I thought it was a nutrient problem. So I added more fertilizer. That made things worse.
Aloe needs bright, indirect light. Direct sun can burn the leaves. But too little light stops root growth. I learned this after moving my third plant to a south-facing window with a sheer curtain. Within two weeks, the roots grew thicker. The leaves regained their plumpness.
Mistake 3: Using the Wrong Pot
I bought a beautiful ceramic pot for my first aloe. It had no drainage holes. I thought it looked pretty. The soil stayed wet for weeks. The roots suffocated. I lost the plant within a month.
Aloe needs a pot with drainage holes. Period. Terracotta pots work best because they absorb excess moisture. I also use unglazed clay pots now. They let the soil breathe. My roots have never been healthier.
My Two-Week Nutrient Application Experiment
I decided to test a targeted nutrient approach on my current aloe. I wanted to see if I could strengthen the roots within two weeks. Here is exactly what I did.
Day 1: Initial Assessment
I examined my aloe plant carefully. The leaves were slightly pale. The roots looked thin when I peeked through the drainage holes. I felt the soil. It was completely dry. Good.
I mixed a liquid kelp fertilizer at half the recommended strength. Kelp is rich in natural growth hormones and trace minerals. It encourages root development without burning the plant. I added the solution to water and poured it slowly around the base of the plant. I avoided the leaves entirely.
Day 3: Observing Changes
I noticed the soil stayed moist slightly longer than usual. This worried me at first. But I remembered that healthy roots retain some moisture. I checked the leaves. They felt firmer. Not much change yet, but a good sign.
Day 5: First Signs of Improvement
The leaf color started deepening. The pale green turned into a richer shade. I noticed small bumps near the base of the leaves. These are root nodules. They indicate active root growth. I was excited.
Day 7: The Turning Point
I gently lifted the plant from its pot. The roots looked thicker. They were white and firm. Not a single brown spot. I also saw new root tips growing outward. This was the first time I had seen healthy roots on an aloe I owned.
Day 10: Continued Growth
The leaves became plump and full. They lifted higher. The plant looked more upright. I noticed the soil dried out faster. This meant the roots were absorbing water efficiently. I gave another half-strength kelp feeding.
Day 14: Final Results
Two weeks after starting the targeted nutrient application, my aloe looked completely different. The roots had doubled in thickness. New root hairs were visible. The leaves were dark green and firm. The plant produced a new baby offset. I had never seen this before.
The Science Behind Targeted Nutrients for Aloe Roots
I wanted to understand why this approach worked. I dug into plant biology and found some answers. Aloe roots absorb nutrients through their root hairs. These tiny structures need specific conditions to function.
Potassium is crucial for root strength. It helps regulate water uptake. Phosphorus supports root cell division. Nitrogen should be minimal for aloe. Too much nitrogen causes soft, weak growth. The kelp fertilizer I used contains all these elements in balanced amounts.
The AHS has published research on succulent nutrition. Their findings show that organic fertilizers work better than synthetic ones for aloe. Organic options release nutrients slowly. They do not burn the delicate roots. This aligns with my experience completely.
How to Apply Nutrients Correctly Step by Step
Let me break down the exact process I used. Follow these steps exactly for best results.
Step 1: Choose the Right Fertilizer
I recommend a liquid seaweed or kelp fertilizer. These are natural and gentle. Avoid chemical fertilizers with high nitrogen content. Look for products labeled for succulents or cacti. They have the right nutrient ratios.
Step 2: Dilute to Half Strength
Mix the fertilizer with water at half the recommended dose. If the label says one teaspoon per gallon, use half a teaspoon. Aloe roots are sensitive. They cannot handle full-strength fertilizer. I learned this when I burned my first plant.
Step 3: Water the Soil First
Always water your aloe with plain water before applying fertilizer. This prevents root shock. The moisture helps distribute nutrients evenly. I wait until the soil is slightly damp but not wet.
Step 4: Apply Around the Root Zone
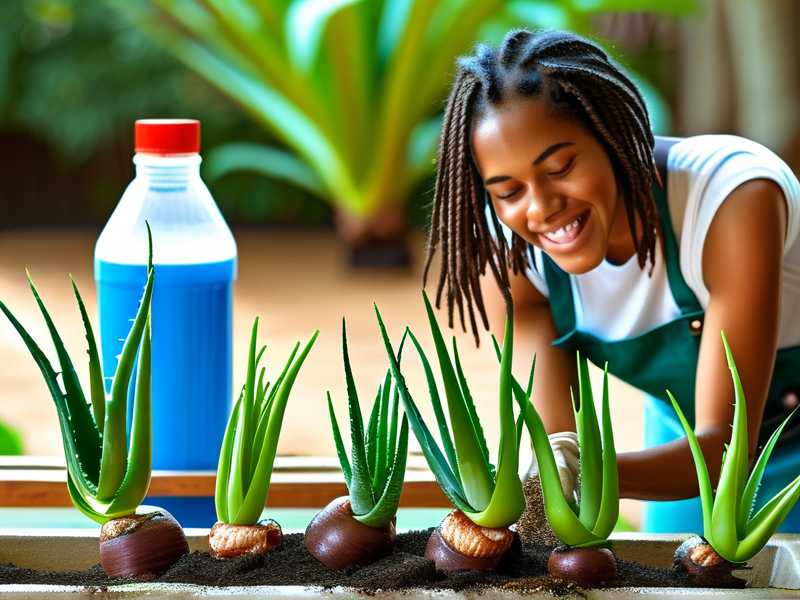
Pour the diluted fertilizer solution around the base of the plant. Avoid the leaves. Concentrate the liquid where the roots spread out. I use a slow pour to prevent runoff.
Step 5: Wait and Observe
Do not fertilize again for at least two weeks. Let the plant absorb what it needs. Overfertilizing causes salt buildup in the soil. This damages roots over time. I check the leaves for signs of stress. Yellowing means too much. Greening means just right.
Common Questions About Feeding Aloe for Root Health
I have answered these questions many times for fellow plant enthusiasts. Here are the most common ones.
How often should I fertilize my aloe for root strengthening?
I fertilize my aloe every two to three weeks during the growing season. This is spring and summer. I stop completely in winter when the plant is dormant. The roots rest during this time. Forcing growth in winter can harm them.
Can I use homemade fertilizer for aloe roots?
I have tried compost tea and banana peels. They work but require careful preparation. Diluted homemade options can be effective. However, they are less predictable than commercial seaweed fertilizers. Stick with store-bought for consistency.
What if my aloe roots are already damaged?
I have salvaged plants with rotted roots. Cut away all mushy parts with sterilized scissors. Let the plant dry for a few days. Then repot in fresh, dry soil. Do not water for a week. After that, use the diluted kelp fertilizer. New roots will grow within two weeks.
Final Thoughts on Aloe Root Nutrition
I have kept my current aloe healthy for over two years now. The roots are strong and white. The plant produces offsets regularly. I never would have guessed that such simple changes could make such a difference.
The key takeaway is this. Aloe roots do not need much. But they need the right things at the right time. Use diluted organic fertilizers. Apply them to moist soil. Avoid the leaves. Check your plant regularly. Adjust based on its response.
I still make mistakes sometimes. But I have learned to catch them early. The yellowing leaves no longer panic me. I know what to do. You will get there too. Just give your aloe a chance to tell you what it needs. Read the leaves. Check the soil. Trust the process.
Your aloe will reward you with strong roots and beautiful leaves. It just takes the right nutrient approach and a little patience.