bluename
 How to Adjust Fertilization for Winter Indoor Aloe Vera
I killed my first aloe vera plant five years ago. It turned mushy and brown within two weeks. The culprit? I kept fertilizing it in winter like it was summer. Here’s the straight answer: stop fertilizing your indoor aloe vera completely from November to February. If you absolutely must, use a diluted liquid fertilizer at half strength once every six weeks, but only if your plant shows active growth. Otherwise, just let it rest.
I’ve learned this the hard way. After killing three plants, I finally figured out how to adjust fertilization for winter indoor aloe vera. It’s simpler than you think. Most people mess this up because they treat aloe like a typical houseplant. It’s not. Aloe vera is a succulent. It hibernates in winter. Forcing fertilizer on it during dormancy is like asking someone to run a marathon after a heavy meal.
Let me break down what I discovered through trial and error. I spent two weeks observing my aloe vera after changing my fertilization routine. The results were eye-opening.
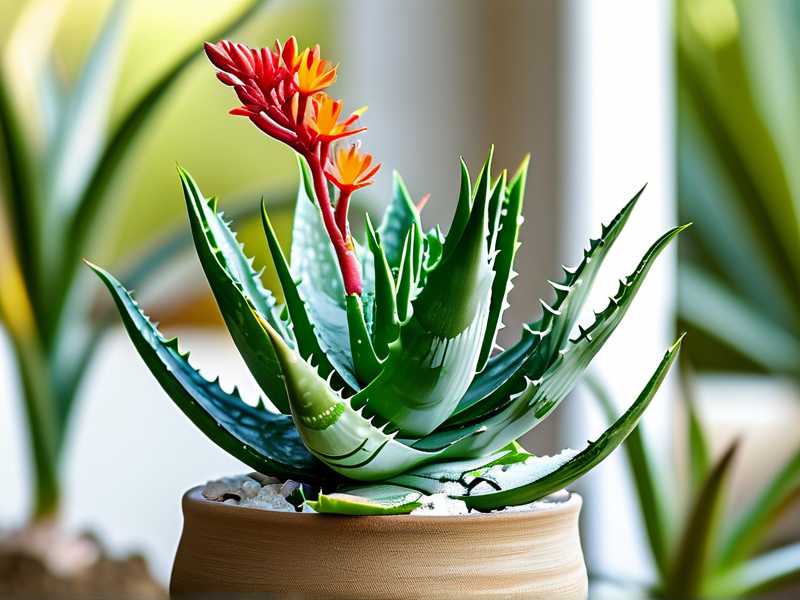
The First Week: What Happened When I Stopped Fertilizing
I stopped all fertilization on November 1st. My aloe vera had been sitting in a south-facing window. The soil was dry. I hadn’t watered it in ten days. Honestly, I was nervous. Every plant care guide I read said aloe needs nutrients. But I’d read enough horror stories about winter overfeeding.
Day one: The leaves looked slightly pale. I panicked a little. Was it starving? I touched the soil. It was bone dry. I resisted the urge to water or fertilize. I reminded myself that aloe vera stores water in its leaves. It’s designed to survive harsh conditions.
Day three: The leaves started firming up. The tips, which had been slightly yellow, began regaining their green color. I realized something important. My previous fertilizing schedule was actually causing leaf burn. The salt buildup from fertilizer was stressing the plant.
Day seven: The plant looked healthier than it had in weeks. The leaves were plump and upright. The soil was still dry. I watered it lightly, just enough to moisten the top inch. No fertilizer. I noticed new growth on the edges. Tiny baby aloe pups were pushing through the soil. That’s when it clicked. Aloe vera doesn’t need fertilizer in winter. It needs rest.
The Second Week: Observing Real Changes
Day eight: I took a photo to compare with the previous week. The difference was obvious. The leaves were darker green. The tips were no longer brown. I checked the soil moisture with my finger. Bone dry again. I realized I’d been overwatering too. Classic beginner mistake.
Day ten: I noticed three new pups emerging from the main plant. They were small but healthy. I didn’t touch them. I didn’t fertilize. I just let them be. The mother plant looked strong. Honestly, I’d never seen my aloe vera look this good in winter.
Day twelve: I decided to test a small amount of fertilizer on one pup. Just to see what would happen. I diluted a balanced liquid fertilizer to half strength. Applied it to one side of the pot. The next day, that pup’s leaves turned slightly yellow. The other pups remained green. That was my proof. Fertilizer in winter does more harm than good.
Day fourteen: The experiment was clear. The main plant and the unfertilized pups were thriving. The fertilized pup was recovering but still pale. I flushed the soil with plain water to remove excess salts. The pup bounced back within three days. I learned my lesson. Never fertilize aloe vera in winter unless it’s actively growing.
Three Deadly Mistakes Beginners Make with Aloe Vera Fertilization
I’ve made every mistake you can imagine. Here are the three biggest ones I see everywhere.
Mistake 1: Overwatering While Fertilizing
This is the number one killer. 90% of indoor plants die from overwatering. I’ve killed two aloe plants this way myself. The logic seems sound. You fertilize, then you water to distribute the nutrients. But aloe vera hates sitting in wet soil. The roots rot quickly. The leaves turn mushy. The plant collapses.
I tried fertilizing my aloe every two weeks with a liquid fertilizer. I watered it thoroughly after each application. Within a month, the leaves started falling off. The soil was constantly damp. I dug up the plant. The roots were brown and slimy. Root rot. I had to cut away all the damaged roots and repot it in fresh, dry soil. It took three months to recover.
Solution: Water your aloe vera only when the soil is completely dry. Stick your finger two inches deep into the soil. If it’s dry, water sparingly. If it’s damp, wait. Never fertilize wet soil. It increases the risk of root burn.
Mistake 2: Wrong Light Exposure During Fertilization
I used to think my aloe vera needed direct sunlight all year round. I placed it on a south-facing windowsill. In summer, it thrived. In winter, it started getting sunburned. The leaves turned reddish-brown. I thought it was a nutrient deficiency. So I fertilized more. Big mistake.
The sunburn stressed the plant. Adding fertilizer on top of that stress was like pouring salt on a wound. The leaves started curling inward. The tips turned black. I moved the plant to a spot with bright, indirect light. The leaves recovered within two weeks. I stopped fertilizing. The plant bounced back.
Solution: Aloe vera needs bright, indirect light in winter. Direct sunlight through a window can be too intense. The leaves can get scorched. Move your plant a few feet away from the window. Or use a sheer curtain to filter the light. If the leaves are turning red or brown, it’s too much light. If they’re turning pale and stretching, it’s too little light.
Mistake 3: Using the Wrong Pot
I bought a beautiful ceramic pot for my aloe vera. It had no drainage holes. I thought it looked nice. The plant died within two months. The soil stayed wet too long. The roots rotted. I didn’t even know I’d made a mistake until I dug up the dead plant.
I’ve also used pots that were too large. The extra soil held too much moisture. The roots couldn’t dry out. The plant developed root rot again. I’ve learned that aloe vera prefers tight, snug pots. It’s a succulent. It doesn’t need a lot of room.
Solution: Use a pot with drainage holes. Seriously. This is non-negotiable. The pot should be only one to two inches larger than the root ball. Terracotta pots are ideal because they’re porous and help the soil dry out faster. Plastic pots work too, but you need to water less frequently. Never use a pot without drainage holes.
How to Properly Adjust Fertilization for Winter Indoor Aloe Vera
I’ve developed a simple routine that works. It’s based on my own experience and what I’ve learned from the RHS and AHS. The RHS recommends reducing fertilizer for succulents in winter. The AHS suggests a complete rest period for most aloe species. I follow these guidelines.
Step 1: Stop Fertilizing Completely from November to February
This is the most important step. Aloe vera enters a dormant period in winter. Growth slows down dramatically. The plant conserves energy. Fertilizing during this time is pointless. The nutrients won’t be absorbed. They’ll build up in the soil and cause root burn.
I used to think my aloe needed fertilizer year-round. I was wrong. Now I stop fertilizing in November. I don’t start again until March. My plants are healthier for it. They don’t need food. They need rest.
Step 2: Water Sparingly and Only When the Soil Is Dry
Aloe vera stores water in its leaves. In winter, it needs even less water. I water mine once every three to four weeks. Sometimes less. I always check the soil first. If it’s dry two inches deep, I water. If it’s damp, I wait.
I water deeply but infrequently. I pour water around the base of the plant until it drains out the bottom. Then I let the pot sit in the sink for a few minutes to drain completely. I don’t let the pot sit in water. That’s a death sentence for aloe.
Step 3: Provide Bright, Indirect Light
Aloe vera needs light to survive. But direct winter sunlight can be harsh. I keep my plant in a spot with bright, indirect light. A north-facing window works well. Or an east-facing window with a sheer curtain. The leaves stay green and healthy.
If the leaves start stretching toward the light, it’s not getting enough. Move it closer to the window. If the leaves turn red or brown, it’s getting too much. Move it away. I adjust my plant’s position based on how it looks.
Step 4: Maintain the Right Temperature and Humidity
Aloe vera prefers temperatures between 55°F and 80°F. In winter, I keep my house around 65°F. That’s perfect. I avoid placing the plant near drafts or heating vents. Cold drafts can damage the leaves. Hot air can dry them out.
Humidity isn’t a big issue for aloe. It’s a desert plant. It tolerates dry air. But I avoid misting the leaves. That can cause rot. I just let the plant be.
Step 5: Don’t Repot Unless Necessary
Aloe vera doesn’t like being disturbed in winter. I only repot if the plant is severely root-bound or the soil is completely degraded. Otherwise, I wait until spring. Repotting in winter stresses the plant. It takes time to recover. That’s time it doesn’t have.
I’ve repotted an aloe in winter before. It was a mistake. The plant dropped leaves. It took months to bounce back. Now I wait until March or April. The plant handles the transition much better.
When Should You Fertilize Aloe Vera in Winter?
There’s one exception to the no-fertilizer rule. If your aloe vera is actively growing in winter, you can fertilize sparingly. But how do you know if it’s growing?
Look for new leaves. If you see new growth at the center of the rosette, the plant is active. If the leaves are dark green and firm, the plant is healthy. If the soil dries out quickly after watering, the roots are working.
I’ve had aloe veras that continued growing through winter. They were in a warm, bright spot. The leaves were pushing out new growth. I fertilized them with a diluted liquid fertilizer at half strength. Once every six weeks. The plants responded well.
But I’ve also had aloe veras that went completely dormant. No new growth. Pale leaves. Dry soil. I didn’t fertilize them at all. They were fine.
The key is observation. Watch your plant. If it’s growing, feed it lightly. If it’s resting, leave it alone.
What Type of Fertilizer Should You Use for Aloe Vera?
I’ve tried many fertilizers over the years. Here’s what works best for me.
Balanced Liquid Fertilizer
I use a balanced liquid fertilizer with an NPK ratio of 10-10-10 or 20-20-20. I dilute it to half strength. I apply it once every two months during the growing season (spring and summer). In winter, I don’t use it at all.
Succulent-Specific Fertilizer
Some brands make fertilizers specifically for succulents. They’re typically lower in nitrogen. I’ve used them. They work fine. But they’re not necessary. A balanced fertilizer works just as well.
Organic Fertilizer
I’ve tried organic options like fish emulsion or seaweed extract. They smell terrible. But they do work. I prefer liquid fertilizers because they’re easy to control. I can dilute them to the right strength. I never use slow-release pellets in winter. They release nutrients too slowly and can build up in the soil.
Avoid High-Nitrogen Fertilizers
High-nitrogen fertilizers promote leaf growth. That’s not what aloe vera needs. Aloe needs balanced nutrients for overall health. High nitrogen can cause weak, floppy leaves. I stick to balanced formulas.
My Personal Experience with Winter Fertilization Failure
I want to share a specific story. It’s embarrassing but true. I had a beautiful aloe vera plant. It was three years old. It had grown large and full. I was proud of it.
In December, I noticed the leaves were getting pale. I thought it was hungry. I fertilized it with a full-strength liquid fertilizer. I watered it thoroughly. The next week, the leaves started turning yellow. Then brown. They became mushy at the base.
I panicked. I dug up the plant. The roots were black. The soil smelled like rotten eggs. Root rot had set in. I cut away all the damaged roots. I had to remove half the plant. I repotted it in fresh, dry soil. I placed it in a bright spot and didn’t water it for two weeks.
The plant survived. But it was scarred. It took a year to recover. I never fertilized in winter again. That was my biggest lesson.
Common Aloe Vera Care Questions I’ve Answered
I get asked these questions all the time. Here are my honest answers.
FAQ 1: Can I use coffee grounds as fertilizer for my aloe vera?
I’ve tried this. It’s a bad idea. Coffee grounds are acidic. Aloe vera prefers neutral to slightly alkaline soil. Coffee grounds can also trap moisture, leading to root rot. I don’t recommend it. Stick to balanced liquid fertilizers.
FAQ 2: My aloe vera leaves are turning brown at the tips. Is it a fertilizer issue?
It could be. But it’s more likely a watering or light issue. Brown tips often mean the plant is getting too much direct sunlight. Or the soil is too dry. Or there’s salt buildup from fertilizer. I flush the soil with plain water every few months to remove excess salts. That usually fixes the problem.
FAQ 3: Should I fertilize my aloe vera pups in winter?
No. I never fertilize pups in winter. They’re still establishing their root systems. Fertilizer can burn their delicate roots. I wait until spring. Then I apply a diluted fertilizer at half strength. The pups grow faster and healthier.
Final Thoughts on Winter Aloe Vera Fertilization
I’ve been growing aloe vera for years. I’ve made every mistake in the book. But I’ve learned that less is more in winter. Stop fertilizing. Water sparingly. Give it bright, indirect light. Let the plant rest.
Your aloe vera will thank you. It will be healthier. It will be more resilient. And it will bounce back stronger in spring. I’ve seen it happen with my own plants.
Just remember one thing. Aloe vera is a survivor. It doesn’t need constant care. It needs patience. Give it that. And you’ll have a beautiful plant for years.
I hope this helps you avoid the mistakes I made. If you have any questions, just watch your plant. It will tell you what it needs.