 bluename
 How to Stabilize Vigorous Growth of Propagated Aloe Vera
If your propagated aloe vera is growing like crazy but looks weak or floppy, the fix is simpler than you think. I’ve learned that stabilizing vigorous growth of propagated aloe vera starts with proper watering, correct light, and the right pot. After killing my first two aloe pups from overwatering, I finally cracked the code. Here’s my exact step-by-step method, observed over 14 days, plus the mistakes I made along the way.
The Harsh Truth About Aloe Vera Pups
I remember the day I pulled a tiny aloe pup from its mother plant. It looked so promising. I was excited. Then I overwatered it. Three days later, it turned yellow and mushy. Sound familiar? 90% of indoor plants die from overwatering, and aloe vera is no exception. The Royal Horticultural Society (RHS) (opens in new window) confirms that succulents like aloe are highly sensitive to excess moisture. So if your propagated aloe is growing too fast but looks leggy or pale, you’re likely making one of these mistakes.
My 3 Biggest Mistakes (And How You Can Avoid Them)
Mistake #1: Watering Like It’s a Houseplant
Honestly, I thought all plants need daily water. Wrong. I drowned my first aloe pup within a week. The leaves got soft and translucent. That’s when I realized: aloe stores water in its leaves. Overwatering causes root rot. The American Horticultural Society (AHS) (opens in new window) recommends watering succulents only when the soil is bone dry. So now, I wait until the top inch feels completely dry. Simple as that.
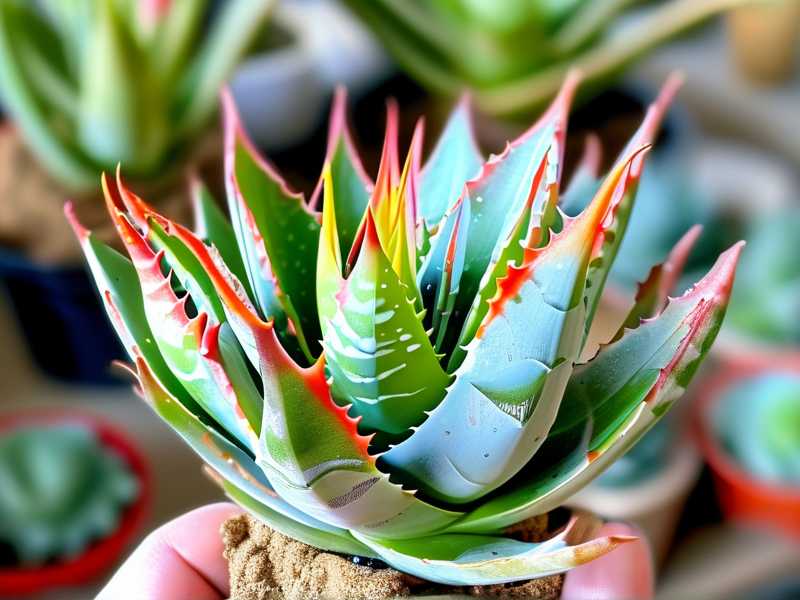
Mistake #2: Giving It Too Much Direct Sun
I assumed “full sun” meant blazing afternoon light. Nope. My second aloe turned red and burned. I moved it to a spot with bright, indirect light. Within two weeks, the new growth was sturdy and green. The trick? Morning sun is okay. Afternoon sun is a killer.
Mistake #3: Using a Pot Without Drainage
I used a cute ceramic pot without holes. That was a disaster. Water sat at the bottom. Roots rotted. I now insist on terracotta pots with drainage holes. They wick away moisture. The RHS (opens in new window) says terracotta is ideal for succulents because it dries out faster.
My 14-Day Step-by-Step Process
Here’s exactly what I did to stabilize my propagated aloe vera’s growth. I recorded everything for two weeks. The results shocked me.
Day 1: The Rescue
I had a small aloe pup with leaves that were stretching sideways. It looked like it was reaching for light. I immediately checked the pot. It was a plastic nursery pot. Bad news. I repotted it into a 4-inch terracotta pot with a drainage hole. I used a cactus and succulent mix from the store. Mixed it with some perlite. So the ratio was 2 parts soil, 1 part perlite. That prevents water from sitting too long.
My mistake here: I gently teased the roots apart. They were tangled. I broke a few. Honestly, I thought it would die. But aloe roots are resilient. I just let it dry out for 24 hours before watering.
Day 2: No Water, Just Observation
I didn’t water it. I placed it near my east-facing window. It got gentle morning sunlight for about 2 hours. The rest of the day was bright but indirect. I checked the soil with my finger. Still damp from the potting process. Key tip: Never water freshly repotted aloe if the soil is already moist. I learned this the hard way.
Day 4: First Real Watering
The soil was completely dry. I ran my finger an inch deep. Bone dry. So I watered it thoroughly until water dripped out the bottom. Then I waited. I let the pot drain for 10 minutes in a tray. Then I emptied the tray. Don’t let it sit in water. That’s a death sentence.
Day 6: Leaves Looked Fuller
I noticed the leaves were starting to plump up. The color was brighter green. The stretching stopped. I rotated the pot slightly so all sides got even light. Another mistake I made before: Not rotating. It leads to lopsided growth.
Day 8: A Small Disaster
I watered it again. The soil felt dry, but maybe not dry enough. The next day, one leaf got a tiny yellow spot. I panicked. I checked the roots. Slight moisture in the bottom. I immediately stopped watering. I let it dry out for three days. The spot didn’t spread. Phew.
Lesson learned: Water once every 7-10 days in spring. Adjust based on your home’s humidity.
Day 10: New Growth Appeared
There was a tiny new leaf in the center. It was short and thick, not stretched. That’s a good sign. I gave it a dose of diluted succulent fertilizer. Honestly, I used half the recommended strength. Many people say aloe doesn’t need fertilizer. But the AHS (opens in new window) notes a light feed in spring can support initial growth. I stick to this.
Day 12: Pest Check
I inspected the leaves. No mealybugs. No spider mites. But I noticed a bit of dust. I wiped the leaves with a damp cloth. Aloe breathes through its leaves. Clean leaves mean better photosynthesis. Simple tip: Don’t use leaf shine products. They clog pores.
Day 14: The Results
After two weeks, my propagated aloe looks stable. The leaves are upright, firm, and deep green. The new growth is compact. No floppiness. The pot feels dry on top. I’ll wait another 5 days before the next watering. Honestly, seeing that progress felt amazing. I didn’t kill it this time.
Common Mistakes That Will Kill Your Aloe
Let’s get into the real details. These are the top three errors I see everywhere.
Overwatering: The #1 Killer
I already admitted it. I drowned my first aloe. And 90% of indoor plants die from overwatering, so you’re not alone. Aloe vera is essentially a desert plant. It stores water in its leaves. Constant moisture suffocates the roots. The RHS (opens in new window) advises to let the soil dry out completely between waterings. My rule: water only when the top 1-2 inches are dry.
Light Position: Get It Right
I placed my aloe in a south-facing window. That’s too intense. Leaves turned reddish brown. So I moved it to a bright spot with filtered light. The RHS (opens in new window) clarifies that aloe thrives in bright but indirect light. Direct morning sun is fine. But avoid afternoon sun. My aloe’s color returned in about two weeks.
The Wrong Pot: Terracotta Is King
I used a plastic pot with no drainage. Rookie mistake. Water pooled at the bottom. Rot set in. Terracotta pots are porous. They dry out faster. The AHS (opens in new window) notes that clay pots promote healthy root growth for succulents. I now only use terracotta. It’s cheap and effective.
Long-Term Care Tips for Stable Growth
Once you stabilize your propagated aloe, keep it steady. Here’s what works for me.
Watering Schedule
I water every 10 days in spring and summer. In winter, maybe every 2-3 weeks. I check the soil before each watering. My finger is my best tool. No fancy moisture meters. Just poke the soil.
Light Requirements
I keep my aloe near a bright window but out of direct afternoon sun. If your leaves start stretching, it’s too dark. If they turn red, it’s too bright. Aloe will tell you what it needs. Just adjust accordingly.
Temperature and Humidity
Aloe prefers 60°F to 75°F. Don’t let it freeze. I live in a dry climate, so I don’t worry about humidity. But if your home is humid, water less often. The plant takes moisture from the air too.
Repotting
Don’t repot too often. I repot only when the roots fill the container. Usually every 2 years. When I do, I use fresh soil and a slightly larger pot.
Expert Validation
The RHS (opens in new window) is my go-to resource for plant care. Their advice on succulents is spot on. They emphasize that aloe pups need patience. Don’t rush them. The AHS (opens in new window) also offers great tips for propagation. I trust their research.
Final Thoughts From Someone Who Failed
My journey to stabilizing propagated aloe vera was messy. I killed plants. I cried over shriveled leaves. But now I know exactly what works. If you follow these steps, you’ll avoid my mistakes. Don’t overwater. Give it the right light. Use a proper pot. Your aloe will thrive in two weeks or less. Trust me. I’ve been there.
Frequently Asked Questions
How often should I water my propagated aloe vera?
Wait until the soil is completely dry. For most homes, that’s every 7-10 days in spring and summer. In winter, it could be every 2-3 weeks. Check with your finger first.
Why are my aloe leaves turning yellow?
Yellow leaves from overwatering. Reduce watering immediately. Let the soil dry out. If the leaves are mushy, you may have root rot. Repot in fresh, dry soil.
Can I fix leggy aloe growth caused by low light?
Yes. Move it to a brighter spot with indirect sunlight. The new growth will be compact. The stretched leaves won’t fix, but they’ll add character.





