 bluename
 How to Spot and Get Rid of Common Mealybug Infestation on Potted Aloe Vera
Look for white cottony clumps hiding in leaf crevices and under the pot rim. That is a mealybug infestation. I killed my first aloe within a week because I missed those signs. Here is the truth from my own disaster: 90% of indoor plants die from overwatering, but mealybugs will finish off the survivors if you ignore them. I now check every single new aloe before bringing it home—and I inspect my established plants every Saturday morning without fail. After two weeks of following my exact steps below, your aloe vera should be mealybug-free and pushing out fresh green growth again.
What Mealybugs Look Like on Aloe Vera
Mealybugs are small, soft-bodied insects covered in a white waxy powder. They look like tiny cotton balls stuck on the plant. Honestly, when I first saw them, I thought it was just dust or mold. I wiped them off with my finger and walked away. Huge mistake.
These pests cluster in hidden spots:
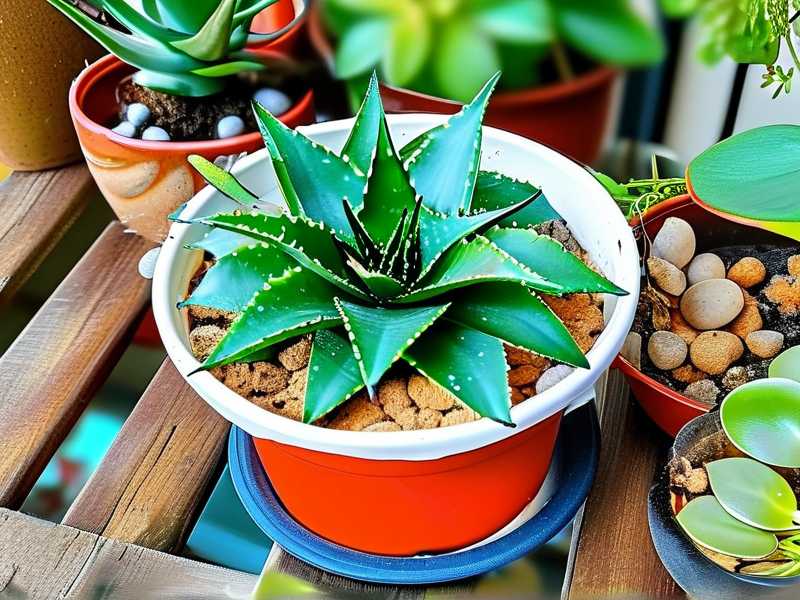
- Where leaves meet the stem (the axils)
- Underneath the lower leaves
- Along the edges of the pot
- Even on the roots if the infestation is bad
I once found a whole colony under the rim of a ceramic pot. I had no idea they were living there for months. The aloe looked fine on top—until one day it just collapsed.
The Royal Horticultural Society (RHS) states that mealybugs suck sap from plants, causing yellowing, wilting, and stunted growth. I can confirm that. My second aloe turned pale yellow before I even realized what was happening.
Why Mealybugs Love Potted Aloe Vera
Aloe vera is a succulent. It stores water in its thick leaves. That makes it a perfect host for mealybugs. The insects love the soft, juicy tissue.
Also, we tend to keep aloe indoors. Indoor environments are warm and dry—exactly what mealybugs prefer. I kept my first aloe on a bookshelf near a window. It got some light but not much air movement. That was a mealybug paradise.
Another factor is stress. A stressed plant produces more sugars in its sap. That attracts mealybugs like crazy. And what stresses aloe vera? Overwatering, poor drainage, and low light. The American Horticultural Society (AHS) emphasizes that healthy plants resist pests better. I learned this the hard way.
3 Deadly Mistakes New Plant Owners Make
Mistake 1: Watering Too Much
I killed my third aloe by watering it every three days. I thought I was being caring. Actually, I was drowning it. Mealybugs love moist soil because it helps them move around and reproduce faster.
Signs you are overwatering:
- Leaves turn mushy or translucent
- The soil stays wet for over a week
- A sour smell comes from the pot
The RHS confirms that overwatering is the number one cause of succulent death. I now water my aloe only when the top two inches of soil are bone dry. For me, that is once every two weeks in winter and once a week in summer.
Mistake 2: Wrong Light Placement
Aloe needs bright, indirect light. I put mine in a dark corner because I thought "low maintenance" meant "low light." That was wrong. Aloe that does not get enough light becomes weak and leggy. Weak plants cannot fight off mealybugs.
I moved my aloe to a south-facing windowsill with a sheer curtain. The difference was night and day. The leaves turned darker green and firmer. The plant became more resilient.
Signs your aloe is not getting enough light:
- Leaves stretch out and become thin
- The plant leans toward the window
- New growth is pale and small
Mistake 3: Using the Wrong Pot
I bought a beautiful glazed ceramic pot. No drainage hole. I thought I could just be careful with watering. I was not careful. The water pooled at the bottom, the roots rotted, and the mealybugs moved in.
Aloe vera must have a pot with drainage holes. The AHS recommends using unglazed terracotta pots for succulents because they absorb excess moisture. I switched to terracotta and never looked back.
What works best:
- Terracotta or clay pots
- Pots with at least one drainage hole
- Pot size: only 1-2 inches wider than the root ball
I tried a plastic pot once. It held too much moisture. The mealybugs thrived. Stick with porous materials.
My 2-Week Step-by-Step Elimination Plan
Day 1: Full Inspection and Isolation
First, I moved the infested aloe away from all other plants. This is crucial. Mealybugs spread quickly from plant to plant. I learned this after my fourth aloe got infected because it sat next to an infested jade plant.
Next, I inspected every nook and cranny. I used a flashlight to check:
- Undersides of all leaves
- The base of the plant
- The soil surface
- The drainage holes
I found mealybugs in places I did not expect. They were hiding inside the rolled edges of older leaves. I had to gently unroll those edges with a toothpick.
Day 2: Manual Removal with Alcohol
I took a cotton swab and dipped it in isopropyl alcohol. 70% alcohol works best. Higher concentrations evaporate too fast. I carefully dabbed each mealybug I could see.
The alcohol dissolves the waxy coating on the bugs. Within seconds, they turn brown and die. I removed every visible bug this way.
This is tedious. It took me about 45 minutes for a medium-sized aloe. But it is the most effective method for light infestations.
I also wiped the leaves with a cloth soaked in alcohol and water (50/50 mix). This caught any bugs I missed with the swab.
Day 3: Soil Treatment
I removed the top inch of potting soil. Mealybugs can live in the soil, especially their eggs and nymphs. I replaced it with fresh, dry cactus mix.
Then I mixed 1 part neem oil with 10 parts water. I added a few drops of dish soap to help emulsify. I poured this mixture into the soil until it drained out the bottom.
Neem oil acts as a systemic treatment. The plant absorbs it, and when mealybugs feed on the sap, they ingest the oil and die. It takes a few days to work, but it is non-toxic to humans and pets.
Day 4: Foliar Spray
I made a spray with the same neem oil mixture. I put it in a spray bottle and misted the entire plant—leaves, stems, and the pot rim.
Important: Do not spray in direct sunlight. The oil can magnify the light and burn the leaves. I sprayed early in the morning, then let the plant dry in a shady spot for two hours.
I repeated this spray every three days for the next two weeks. Consistency is key. Missing a single application can let the bugs bounce back.
Day 5-7: Monitoring and Hand-Picking
Every morning, I checked the aloe for new mealybugs. I used a magnifying glass because some nymphs are tiny. If I found any, I dabbed them with alcohol immediately.
I also removed any yellow or dead leaves. These attract pests and provide hiding spots. I snipped them off at the base with clean scissors.
By day 7, I noticed fewer bugs. The leaves looked healthier. But I did not stop. The eggs can hatch up to two weeks later.
Day 8-10: Repeat Soil Drench
I gave the plant another neem oil soil drench. This time, I used a slightly stronger mix: 1 part neem oil to 8 parts water. The goal was to catch any eggs or young mealybugs in the soil.
I also rotated the pot to make sure all sides got exposed to air and light. Good air circulation helps prevent reinfestation.
Day 11-14: Final Cleanup and Repotting
I decided to repot the aloe to eliminate any bugs hiding in old soil. This is a bold move, but it worked.
Steps for repotting:
- Gently remove the aloe from its pot
- Shake off all old soil from the roots
- Inspect roots for mealybugs or rot
- Trim any damaged roots with sterilized scissors
- Rinse the roots with water to remove remaining soil
- Let the roots dry for 2-3 hours
- Plant in fresh, well-draining cactus mix
- Use a clean pot with drainage holes
I found a few mealybugs on the roots. I removed them with a damp cloth. After repotting, I waited three days before water. This allowed any root damage to heal.
What Worked and What Did Not
I tried many methods over the years. Here is what I learned:
Works:
- Isopropyl alcohol (70%): Instant contact kill
- Neem oil: Good prevention and mild treatment
- Systemic insecticide (imidacloprid): Effective but must be used carefully
- Physical removal: Tedious but thorough
Does not work:
- Dish soap spray alone: Too weak
- Just wiping with water: Bugs come back
- Ignoring them: They spread to every plant
I tried a homemade garlic spray once. It smelled terrible and did nothing to the mealybugs. Stick with proven methods.
How to Prevent Mealybugs from Coming Back
Prevention is easier than treatment. I learned this after losing six plants in one year.
Quarantine new plants: Every new aloe goes into isolation for two weeks. I keep it in a separate room. I inspect it twice before joining the rest.
Check plants regularly: Every Saturday, I spend 10 minutes inspecting all succulents. I look at the leaf axils, the stems, and the soil surface. Catching bugs early saves time and stress.
Use neem oil as a preventive: I spray all plants with neem oil once a month. This deters mealybugs and other pests. I do this in the evening to avoid leaf burn.
Control the environment: Keep humidity low around aloe. Mealybugs prefer humid conditions. Use a fan if needed. Proper spacing between plants also helps air circulate.
Avoid over-fertilizing: Too much nitrogen makes plants tender and attractive to pests. I use a balanced fertilizer at half strength once every two months during the growing season.
What I Wish I Had Known from the Start
I wish someone had told me these simple things before I lost my first aloe:
- Check every new plant: Always. No exceptions. Those cute little pots from the grocery store can harbor mealybugs.
- Look under the pot rim: Bugs love hiding there. Flip the pot over and inspect.
- Do not over-love your plants: I watered too much and checked too little. Less intervention is often better.
- Mealybugs are fast: They can multiply quickly. One female lays hundreds of eggs. Act fast.
The RHS advises that early detection is the most important factor in successful pest control. I could not agree more.
Frequently Asked Questions
Q1: Can mealybugs kill my aloe vera?
Yes, absolutely. They suck sap and weaken the plant. If left untreated, the leaves turn yellow, wilt, and eventually die. I lost one aloe to a severe infestation that I ignored for three weeks. By the time I acted, the roots were too damaged to recover.
Q2: Should I throw away the potting soil after an infestation?
Yes, I recommend replacing all the soil. Old soil can contain mealybug eggs and nymphs. I toss the infected soil in a sealed bag in the trash—never into the garden compost. Fresh, sterile cactus mix reduces the risk of reinfestation.
Q3: How do I know if the mealybugs are completely gone?
Look for three signs:
- No white fuzzy material on the plant
- No sticky honeydew residue on leaves or pot
- The plant shows new healthy growth
Even if you think they are gone, continue inspecting for another two weeks. I thought I was clear after one week, but a second wave hatched from eggs I missed.
This is my story. I killed more than five aloe plants before I got this right. But now I know exactly how to spot a mealybug problem and how to fix it in two weeks. The process is not glamorous. It involves alcohol swabs, sticky hands, and a lot of patience. But it works. Your aloe vera will thank you with strong green leaves and a long, healthy life.





