 bluename
 How to Treat Root Rot in Aloe Vera Caused by Overwatering and Damp Soil
I killed my first three aloe vera plants before I finally understood root rot. Here's the straight answer: stop watering immediately, remove the plant from its pot, cut away all mushy brown roots with sterilized scissors, let it dry for 2-5 days on newspaper, repot in a terracotta pot with cactus soil mix, and don't water for at least 10 days. That's it. That's the shortcut I wish someone gave me.
But let me walk you through my actual 2-week process. I learned this the hard way—by smelling that rotten mushroom smell coming from my pots at 3 AM.
What Is Root Rot in Aloe Vera and Why It Happens
Root rot is basically your aloe roots drowning and then rotting. The soil stays damp too long. Oxygen can't reach the roots. Bacteria and fungi take over. The RHS actually states that overwatering is the number one killer of indoor succulents. And honestly? 90% of indoor plants die from overwatering. Not underwatering. Not pests. Too much love with that watering can.
My 2-Week Root Rot Treatment Journey
Week One: The Emergency Rescue
Day 1: The Discovery
I noticed my aloe was looking sad. The leaves felt soft and mushy. Not firm and plump like healthy aloe. It actually felt like a wet sponge when I squeezed the base. I knew this feeling—I'd felt it before with my dead plants.
Here's what I did:
First, I stopped watering immediately. Not one drop. I took the whole plant out of its pot. The soil was dark and smelled like a swamp. No joke. I've smelled that smell before, and it's never good news.
I ran lukewarm water over the roots to gently wash away all the soggy dirt. Then I laid everything out on newspaper. I could see the damage clearly now. About 60% of the roots were brown and mushy. The healthy ones were white and firm.
Day 1: The Surgery
I grabbed my sharpest scissors and sterilized them with rubbing alcohol. Then I started cutting. Every mushy root had to go. I cut about 2 inches above the rot line in some spots. I also trimmed off the bottom leaves that were already turning yellow-black. Those leaves were goners anyway.
Then came the hard part: letting it dry. I placed the aloe on a clean paper towel in a bright windowsill. No direct sun though—that would stress it more.
Day 2-3: The Waiting Game
I left the plant out for three full days. The cut roots needed to callous over. If you put a damaged root back in wet soil, you're just asking for more rot. I touched the cut areas gently each day. By day three, they felt dry and slightly hard on the surface.
Day 4: Repotting Time
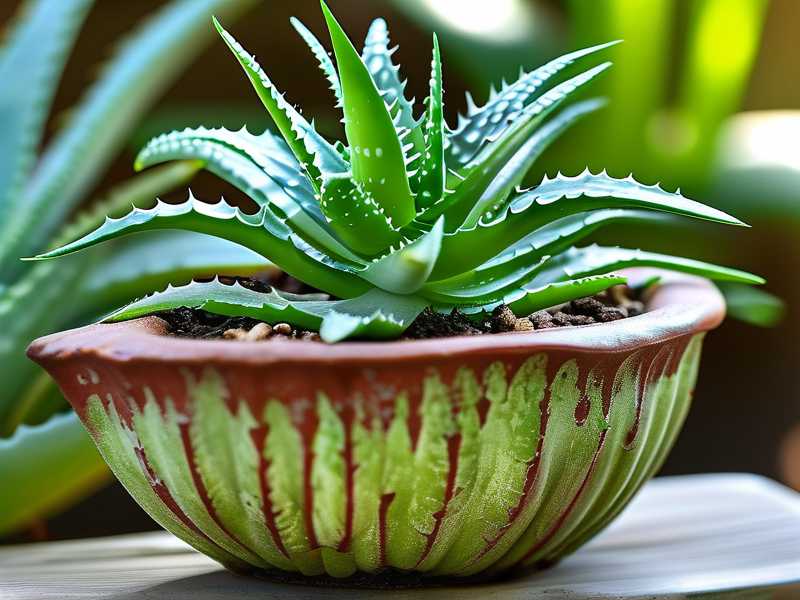
I chose a terracotta pot this time. I used to love those cute ceramic pots without drainage. Big mistake. Terracotta breathes. It wicks away moisture from the soil. I also made sure the pot had a drainage hole. Non-negotiable.
For soil, I used a cactus and succulent mix. Then I added extra perlite—about 30% perlite to 70% soil. This gives crazy-good drainage. I've learned that regular potting soil holds too much water for aloe.
I placed the aloe in the pot and added the dry soil mix. I didn't tamp it down hard. Loose soil drains better. Then—here's the counterintuitive part—I didn't water it. Not a single drop.
Week One Observations
Day 5-7: No Changes Yet
Honestly, the plant looked worse before it looked better. The remaining healthy leaves started curling inward. That's normal. It's conserving water. I felt nervous because I wanted to water it so badly. But I remembered my past mistakes.
I checked the soil moisture every morning. I used a wooden chopstick—insert it into the soil, pull it out, if it comes out clean, it's dry enough. This is my go-to trick.
Week Two: Signs of Recovery
Day 8: First Signs
I noticed a tiny change. The center leaves—the smallest ones—started looking a bit firmer. Not much. But it was something. The plant also sat more upright in its pot. Previously it had been slightly leaning.
Day 10: First Watering
The soil was bone dry. The chopstick came out clean from the bottom. I decided it was time for the first water. I used room temperature water and poured it slowly around the edges of the pot. About one cup total. I made sure no water sat on the leaves. Then I placed the pot back in its spot—a west-facing windowsill with bright indirect light.
Day 12: Visible Recovery
The leaves started plumping up again. Really. I could feel the difference when I gently squeezed them. The formerly yellow-green leaves were turning back to a deeper green. Even the droopy leaves were lifting up. Not dramatically, but noticeably.
Day 14: Root Check
I carefully tilted the pot to peek at the drainage hole. I saw tiny white root tips poking through. That's the best sign possible. New roots. Healthy roots. My aloe was coming back.
The 3 Deadly Mistakes New Plant Parents Make
I've made every single one of these. Don't be like me.
Mistake #1: Watering on a Schedule
"I watered every Monday because someone told me to." That was me, two years ago. Plants don't work like that. Aloe vera stores water in its leaves. It needs time to dry out completely between waterings.
What I do now: I stick my finger 2 inches into the soil. If it feels dry, I water. If it feels cool or damp, I wait. Simple. No calendar needed.
Mistake #2: Wrong Light Placement
I put my first aloe in a dark corner of my living room. It looked nice there. But aloe needs bright, indirect light to thrive. Without enough light, it can't use up the water in its soil. That slow growth leads to damp soil, which leads to root rot.
What I learned: A south or west window is best. If that's not possible, get a grow light. I use one for my winter setup.
Mistake #3: Using the Wrong Pot
Glazed ceramic pots look beautiful. But they trap moisture against the roots. I lost an entire plant because of one pretty pot with no drainage hole. Terracotta is your friend.
My pot rule: Always use terracotta. Always have a drainage hole. The pot size should be just slightly bigger than the root ball. Too much soil around a small plant holds too much water.
Preventing Root Rot From Coming Back
Once you've saved your plant, don't stop there. The AHS emphasizes proper care routines as the best prevention.
I now follow these rules:
- Water only when the top 2 inches are bone dry
- Water deeply but infrequently—every 2-3 weeks in summer, every 4-6 weeks in winter
- Always use a pot with drainage
- Mix perlite into soil for better aeration
- Check roots every time I repot
- Never let water sit in the saucer under the pot
Common Mistakes I Still See People Make
I visited a friend's house last month. She had a beautiful aloe in a glass terrarium. No drainage. Moss on top of the soil. She watered it every five days. The poor thing was already starting to rot at the base. I gave her my emergency protocol. She saved it in time.
Another mistake I see often: people chop off all the roots when treating rot. Don't do that. Keep the healthy white roots. Only cut the mushy brown ones. Your plant needs some roots to recover.
My Top Recommendations
For soil: any cactus mix plus extra perlite. I've tested four different brands. They all work if you add that extra drainage.
For pots: terracotta always. I buy unglazed ones from any garden center. They're cheap and effective.
For watering: I use a moisture meter sometimes. But honestly, the finger test works just as well.
Frequently Asked Questions
Q: Can I save an aloe that has no roots at all?
Yes, I've done it. Cut all the rot away until you have clean stem. Let it callous for 5-7 days. Then place it on top of dry cactus soil. Don't bury it. Wait 2-3 weeks. Roots will grow from the stem. I call this the "wait and hope" method. It works if the stem is still firm.
Q: How long should aloe dry before repotting?
Minimum 2 days. I usually go 3-5 days depending on how much rot I removed. If I had to cut a lot, I let it dry longer. Better to over-dry than under-dry.
Q: Can I use hydrogen peroxide to treat root rot?
I've tried it. Dilute 1 part 3% hydrogen peroxide with 3 parts water. Soak the roots for 10-15 minutes. It kills some bacteria. But honestly, I prefer just cutting away rot and letting it dry. Simpler and less risky. The peroxide can damage healthy tissue if you're not careful.
Look, I've been there. That sinking feeling when you see your aloe turning yellow and soft. The smell of rot when you pull it out. But now I know: root rot isn't always a death sentence. Most plants can bounce back if you catch it early and treat it right.
The trick is patience. Don't panic water. Don't repot too fast. Let your plant heal. I've saved three aloes this year alone. The last one bounced back in just 10 days.
One final thought: your aloe wants to survive. It's a tough desert plant. Give it dry roots and bright light, and it will reward you. Learn from my mistakes—I've killed enough plants so you don't have to.





