bluename
 aloe vera plant Size Control: Pruning Tips for a Thriving, Manageable Plant
My aloe vera was taking over. What started as a cute, compact rosette on my sunny kitchen sill had, over three years, morphed into a sprawling, top-heavy beast. Its lower leaves were brown and papery, new pups crowded the base, and the main stem had elongated into a weird, leggy neck. It was no longer the picture of serene, succulent health I’d envisioned. I realized I needed to learn about aloe vera plant size control. Simply letting it grow wild wasn't an option in my limited space. This began my hands-on journey into the art and science of pruning aloe vera, a two-week experiment that transformed my plant and my confidence as a grower.
Why Pruning is Essential for Aloe Vera Health and Size
Many people think aloe vera is a “set it and forget it” plant. While it’s forgiving, neglect can lead to the issues I faced: etiolation (stretching for light), energy drain from dying leaves, and overcrowding. Pruning isn’t just about controlling aloe vera size; it’s about redirecting the plant’s energy to produce vigorous, healthy new growth. The Royal Horticultural Society (RHS) notes that removing old, senescing leaves and excess offsets helps prevent disease and improves the overall aesthetic form of succulent plants. I wasn’t just trying to make it smaller; I was giving it a reset for better health.
My Step-by-Step Pruning Process: Tools and Technique
I gathered my supplies: a sharp, clean utility knife (rubbing alcohol for sterilization), a pair of tweezers, fresh succulent potting mix, and a new pot. Here’s exactly what I did.
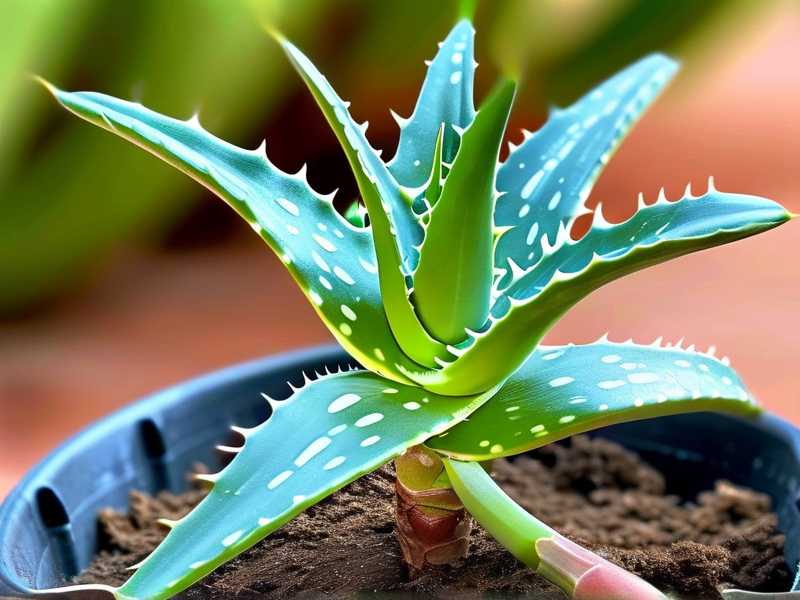
Step 1: Assessing the Plant and Planning the Cut I took the plant to my workspace and gently brushed away the topsoil. I identified my targets: 1) The lowest, completely brown and dried leaves. 2) Any leaves that were more than 50% damaged or yellowing. 3) The numerous small “pups” or offshoots crowding the main stem. My goal for aloe vera pruning was to clear the base, remove the weight, and propagate the pups.
Step 2: The Main Pruning Event For the mature, damaged leaves, I didn’t just pull. I learned that tearing can injure the main stem. Instead, I sterilized my knife and made clean, angled cuts as close to the main stem as possible without nicking it. A slight ooze of clear gel was normal. The thickest leaf took a bit of sawing motion—a testament to how tough these plants are. For the pups, I used the knife to carefully sever their connection to the mother plant, ensuring each pup had some roots attached.
Step 3: Post-Pruning Care and Propagation I left all the cut surfaces on the mother plant and the separated pups to “callous” or dry for a full 48 hours. This is a critical step to prevent rot when repotted. I then repotted the mother plant into a slightly larger pot with excellent drainage, using fresh mix. The healthy pups were potted up individually in small containers.
The Two-Week Observation: A Diary of Recovery and Growth
Days 1-3: The mother plant looked a bit stark, like a bad haircut. The callousing was happening with no issues. The pups were perky. No watering yet.
Days 4-7: After a week, I gave the mother plant a thorough bottom-watering. I observed the cut ends on the stem had dried into neat, brown seals. The center of the rosette, now unobstructed and receiving more light, appeared a deeper, healthier green.
Days 8-14: This was where the magic happened. By the end of the second week, I noticed firm, plump new growth emerging from the very center of the mother plant. The plant had stopped putting energy into sustaining dead leaves and was now focusing on fresh, compact growth. The repotted pups showed signs of new root establishment, feeling firmly anchored when given a gentle tug. The overall form was already more balanced and attractive.
The Pitfalls I Encountered (And How I Fixed Them)
My journey wasn’t flawless. I hit two significant snags.
Pitfall 1: The “Hidden Rot” Surprise When I removed one seemingly healthy lower leaf, I discovered a small, soft, brown spot on the stem beneath it—the beginning of stem rot. I panicked. My solution was to immediately sterilize my knife again and carefully carve out the soft, discolored tissue until only firm, green stem remained. I dusted the wound with cinnamon (a natural antifungal) and ensured the area stayed perfectly dry. This quick action saved the plant.
Pitfall 2: Overwatering After the Stress Eager to help it recover, I was tempted to water sooner than the 7-day mark. I resisted, remembering advice from the Arizona-Sonora Desert Museum’s horticulture guides, which stress that succulents need a dry period after root disturbance to prevent pathogens from entering. Sticking to a strict “dry” protocol was key to avoiding a second, more deadly issue.
How to Maintain Your Aloe’s Ideal Size Long-Term
Pruning is not a one-time fix. To manage aloe vera growth sustainably, I adopted new habits. I now rotate my plant quarterly for even sun exposure, preventing legginess. I water only when the soil is completely dry, and I fertilize sparingly—once at the start of spring. Most importantly, I do a “mini-assessment” every few months, removing any leaves that start to decline. This proactive approach keeps the plant in a manageable size and pristine health.
What is the best time of year to prune aloe vera? The ideal time is during its active growing season, which is spring and early summer. This gives the plant the optimal conditions (increasing light and warmth) to heal quickly and push out new growth after the pruning stress.
Can I prune a very young or small aloe plant? It’s best to avoid major pruning on very young plants. Focus on removing only completely dead or dying leaves. Let the plant establish a strong root system and several sets of mature leaves before attempting size-controlling cuts.
My pruned aloe stem looks woody and scarred. Is this normal? Yes, this is perfectly normal. As aloe vera matures and older leaves are removed, the stem naturally becomes more “corky” or woody. This is a sign of a healthy, aging plant. The scars will callous over and are not a cause for concern if the plant is otherwise growing well.
Mastering aloe vera plant size control through thoughtful pruning transformed my overwhelmed specimen into a collection of thriving plants. It taught me that sometimes, the most caring thing you can do is make a precise cut. The process requires clean tools, patience for callousing, and restraint with water. The reward, visible within just two weeks, is a rejuvenated, manageable plant that continues to grow with vitality and purpose. Your aloe doesn’t have to be a monster; with these tips, it can be the beautiful, architectural centerpiece it was meant to be.