bluename
 Let me be honest with you. Most aloe problems start underground. Not with water. Not with light. With the pot. I have killed three aloe plants before I finally understood that matching pot size to root spread is the single most important thing you can do for this plant. If your aloe sits in a pot that is too big, too deep, or too tight, everything else you do becomes a struggle. So before we go any further, here is the direct answer you came for.
Choose a pot that is only 1 to 2 inches wider than the current root ball. Aloe roots spread wide and shallow. They do not dive deep. A wide, shallow pot works far better than a tall, narrow one. If you are repotting a young aloe with a 4-inch root spread, go with a 6-inch pot. If the root spread is 8 inches, use a 10-inch pot. That extra inch or two gives the roots room to grow without drowning them in excess soil.
That is the core rule. Now let me walk you through everything I have learned about aloe roots, pots, soil, and the mistakes that nearly made me give up on this plant entirely.

Why Aloe Root Spread Changes Everything About Pot Choice
I used to think aloe roots behaved like tree roots. Deep, downward, searching for water far below. I was wrong. Aloe roots grow close to the surface. They spread sideways. In their native dry regions, they do this to catch every drop of rainfall before it evaporates. The root system is fibrous and wide, not a single taproot.
This matters because a deep pot full of soil will hold moisture far longer than those shallow roots can handle. The soil at the bottom stays wet. The roots never reach it. Then rot sets in from the bottom up. I lost my second aloe exactly this way. I put a small plant in a beautiful tall ceramic pot. It looked great. The roots rotted within six weeks. I did not see the damage until the leaves started going soft and yellow at the base.
Expert guidance from the Royal Horticultural Society confirms that succulents like aloe require sharply drained growing media and should never sit in waterlogged soil. The American Horticultural Society, which you can check at AHS Gardening, also emphasizes matching container size to the plant's root system to avoid overwatering issues. I wish I had read that sooner.
So what does this mean in practice? If your aloe has roots spreading 6 inches across, a pot with an interior diameter of 7 to 8 inches is perfect. Not 10. Not 12. Just one size up. And the depth should be no more than 6 to 8 inches for most indoor aloe varieties. Aloe vera specifically loves shallow containers. Terracotta or unglazed clay works best because it allows moisture to evaporate through the sides. Plastic and glazed ceramic hold water longer. If you use those, you must water even less frequently.
How to Check Aloe Root Spread Before Repotting
You cannot pick the right pot without seeing the roots. I used to guess. That is why I made so many mistakes. Now I always check the root ball before buying any container.
Here is my method. Water the aloe lightly two days before repotting. This makes the roots more flexible and less likely to snap. Then slide the plant out of its current pot. Do not yank it by the leaves. Turn the pot sideways and ease the root ball out. If it is stuck, squeeze the sides of the pot gently or run a knife around the inside edge.
Once the root ball is out, look at the shape. Healthy aloe roots are white or pale tan. They should spread out in a fan shape. If the roots circle around the bottom of the pot, that is a root-bound plant. It needs a slightly larger pot. If the roots are brown, mushy, or smell sour, you have rot. Trim those damaged roots before repotting into dry soil.
Measure the width of the root spread with a tape measure or just compare it to the old pot. If the roots filled the old pot completely, go up one pot size. If the roots still had some open space and you are only repotting to refresh the soil, you can reuse the same pot size. Going too large too fast is the fastest way to overwater. And yes, overwatering kills more aloes than anything else. In fact, 90% of indoor plants die from overwatering. Aloe is no exception.
The Exact Pot Sizes I Use for Different Aloe Stages
Over the years I have settled into a simple sizing system. It works for me and it will save you from guesswork.
For a young aloe pup with a root spread of 2 to 3 inches, I use a 4-inch terracotta pot. That gives about one inch of space around the roots. The pot is shallow, maybe 4 inches deep. Seedlings and fresh pups do not need more room than that.
For a medium aloe with a 5 to 6 inch root spread, I use a 7-inch or 8-inch pot. The extra inch or two allows for one season of growth. Aloe roots grow slowly indoors. You do not need to plan for massive expansion.
For a large mature aloe with a root spread of 10 inches or more, I use a 12-inch pot at most. Even large aloes do not need massive containers. The pot should be wider than it is deep. I have a mature aloe in a 12-inch shallow bulb pan right now. It has been happy there for three years.
If your aloe produces pups, which it will when it is happy, you can separate them. Each pup gets its own small pot based on its own root spread. Do not put a tiny pup in a large pot just because the mother plant was in one. That is another mistake I made. The pup sat in too much soil and rotted within a month.
Soil Mix That Works With the Right Pot Size
Pot size alone will not save your aloe if the soil holds too much water. The two go together. A small pot with dense, peaty soil will still rot. A large pot with gritty, fast-draining soil is still risky but less so.
My standard aloe mix is simple. I use three parts cactus potting mix to one part perlite or pumice. This gives you fast drainage and good aeration. Some growers add coarse sand. I have done that too. Just make sure the sand is horticultural grade, not beach sand or play sand. Those compact and reduce drainage.
When I first started growing aloe, I used regular houseplant potting soil straight from the bag. It stayed wet for over a week. The roots never dried out. The lower leaves turned translucent and soft. That was my first aloe death. I learned the hard way that aloe is a succulent. It evolved to survive dry spells. It cannot handle constant moisture around its shallow roots.
Now when I repot, I water the plant lightly once, then leave it completely dry for at least a week. This gives any damaged roots time to heal before they encounter moist soil. If you water heavily right after repotting, the roots may rot before they recover. This is especially important if you trimmed any roots during the process.
Watering Based on Pot Size and Root Spread
Watering frequency changes with pot size. This is something no one told me when I started. A small pot dries out faster. A large pot holds moisture longer. So the same aloe, in the same room, will need water more often in a 4-inch pot than in a 10-inch pot.
In my 4-inch terracotta pots, I water every 10 to 14 days during summer. In my 12-inch pot, I water every 3 to 4 weeks. The larger pot simply holds more soil and dries more slowly. You cannot stick to a fixed schedule. You have to check the soil.
I check by sticking my finger into the soil up to the second knuckle. If it feels dry at that depth, I water. If there is any moisture, I wait. You can also use a wooden skewer or a moisture meter. I prefer my finger. It is free and always available.
When you water, do it thoroughly. Water should run out of the drainage holes. Then empty the saucer. Do not let the pot sit in water. That defeats the purpose of fast-draining soil. After watering, the soil should dry out completely before the next watering. Aloe can handle drought. It cannot handle constant dampness.
During winter, I cut watering way back. Indoor aloes go semi-dormant when temperatures drop and light levels fall. I water my large aloe once a month or even less from November to February. The smaller pots get water every 3 to 4 weeks. Overwatering in winter is the fastest way to kill an aloe.
Light and Its Effect on Root Health and Pot Choice
Light affects how fast your aloe uses water. A plant in bright light grows faster, uses more water, and may need repotting sooner. A plant in low light grows slowly, uses little water, and can stay in the same pot for years. This is why you cannot separate potting advice from light advice.
Aloe needs bright, indirect light for best growth. A south-facing window is ideal in the northern hemisphere. Some direct morning sun is fine. But harsh afternoon sun through a window can scorch the leaves. I keep my aloes on a south-facing windowsill with a sheer curtain. They get bright light without the intensity that burns them.
If your aloe does not get enough light, the leaves stretch out, turn pale, and flop over. The plant uses less water. The soil stays wet longer. In a pot that is too large for the root spread, this becomes a death sentence. Low light plus too much soil equals rot. I learned this when I moved an aloe to a darker room one winter. I kept watering it the same as before. Within a month the lower leaves were mushy. The roots had started to rot.
If you live in a cloudy region or your windows face north, consider a grow light. Even a simple LED grow light for 8 to 10 hours a day makes a huge difference. Healthy light levels mean the roots actually pull water from the soil. That keeps the root environment balanced and reduces the odds of rot.
How I Repot an Aloe Step by Step
Let me walk you through exactly what I do when I repot an aloe. I have done this more times than I can count and my method has stayed mostly the same.
First, I gather everything. New pot with drainage holes. Fresh soil mix. Small trowel. Scissors or pruning shears for damaged roots. A piece of mesh or a coffee filter to cover the drainage hole. This keeps soil from washing out while still letting water drain.
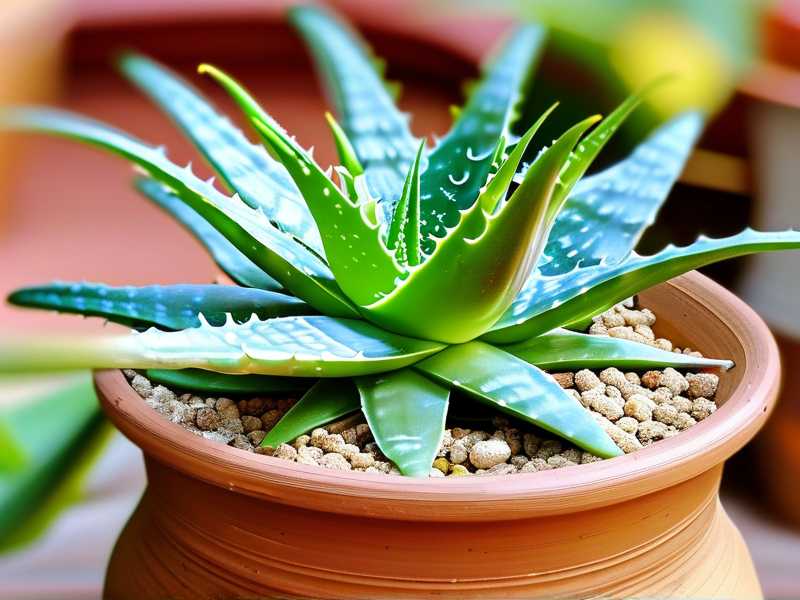
Second, I prep the new pot. I place the mesh over the drainage hole. Then I add a thin layer of gravel or coarse material at the bottom. Some people skip this. I find it helps with drainage, especially in deeper pots. But do not add a thick layer. That just raises the water table and can make things worse. A thin layer is all you need.
Third, I remove the aloe from its old pot and inspect the roots. I trim any that are brown, black, mushy, or smell bad. I also trim any roots that are circling tightly around the root ball. A few snips encourage new growth.
Fourth, I place the plant in the new pot. The base of the leaves should sit at or just below the rim. I fill in around the roots with the soil mix, pressing lightly. I do not pack it down hard. Aloe roots need air pockets.
Fifth, I wait. No water for a week. I put the plant in bright but indirect light. After a week, I check the soil. Only then do I give it a light watering.
I repot aloes every 2 to 3 years. They do not mind being slightly root-bound. In fact, aloe often flowers when it is a bit snug in its pot. If you repot too often or go too big, you delay flowering and increase rot risk.
Common Mistakes That Kill Aloe Plants
Let me list the three biggest mistakes I have made and seen others make. These apply to pot size and beyond.
Mistake one. Choosing a pot that is too large. I already covered this but it bears repeating. Too much soil holds too much water. The roots cannot absorb it fast enough. Rot follows. Always go up just one size. Maybe two if the plant is severely root-bound. Never more.
Mistake two. Using a pot without drainage holes. I once bought a gorgeous ceramic pot with no holes. I thought I could just water carefully. I could not. The water pooled at the bottom. The roots sat in it. The plant died. Now I only use pots with holes. If I love a pot without holes, I use it as a cover pot and keep the aloe in a plastic nursery pot inside it.
Mistake three. Watering on a schedule instead of checking the soil. Every home is different. Humidity, temperature, light, pot size, soil mix. All of these affect how fast the soil dries. You cannot say "water every Sunday" and expect that to work year-round. Check the soil. Trust your finger. That is the only reliable method.
Seasonal Pot Size and Root Spread Considerations
Aloe root growth is not constant year-round. In spring and summer, the roots expand. That is the best time to repot. In fall and winter, root growth slows or stops. Repotting then can stress the plant and lead to rot because the damaged roots will not heal quickly.
I repot in late spring or early summer. By then the days are long and warm. The aloe has plenty of light and time to recover before winter. If you repot in fall, the plant goes into winter with fresh soil that may stay too wet. That is risky.
One thing I noticed over the years is that aloe roots seem to grow outward more in warmer months. By late summer, the roots often reach the sides of the pot. If the pot is the right size, that is fine. The plant can stay that way until next spring. Do not rush to repot just because the roots touch the sides. Slight root binding is normal and even beneficial for aloe.
What to Do If You Already Put Your Aloe in a Pot That Is Too Big
I have done this. More than once. Here is how I fixed it.
Option one. Repot into a smaller pot. This is the simplest fix. Take the plant out, shake off excess soil, and move it into a pot that better matches the root spread. Do it gently and avoid watering for a week afterward.
Option two. Adjust your watering. If you cannot repot right away, water much less frequently. The larger pot holds more moisture. So instead of watering every two weeks, water every three or four. And always check the soil first. You can also remove some of the excess soil from the top of the pot to speed up drying.
Option three. Add more drainage material to the soil. If the plant is already in a large pot and you do not want to disturb it, mix in some extra perlite or pumice around the top layers. This will not fix the problem completely but it helps.
I once left an aloe in a pot that was two sizes too big for a full summer. I watered it very carefully. The plant survived but it did not grow much. The roots spent their energy trying to fill the excess space. The leaves stayed small. Once I moved it into a properly sized pot, it took off. New growth appeared within a month. That taught me that pot size affects more than just rot. It affects overall vigor.
How Pot Shape Affects Aloe Root Spread
Ten years ago I did not think pot shape mattered. Now I know it matters a lot. Aloe roots grow wide, not deep. So a wide, shallow pot is much better than a narrow, deep one. This applies to most succulents. It especially applies to aloe.
A standard pot has a height equal to its diameter. A 6-inch pot is 6 inches tall. That works okay for aloe. But a bulb pan or azalea pot is even better. These are shallower. A 6-inch bulb pan might only be 4 or 5 inches deep. That gives the roots room to spread without forcing them to deal with a deep column of wet soil.
I keep most of my aloes in terracotta bulb pans. The wide surface area allows the roots to spread naturally. The clay material wicks moisture away. The shallow depth means the soil dries evenly from top to bottom. If you can only find standard pots, that is fine. Just be extra careful with watering and consider adding more perlite to the mix.
FAQ
How do I know if my aloe needs a bigger pot?
Check the roots. Slide the plant out of its pot. If the roots circle tightly around the bottom, it is root-bound and ready for a pot one size up. If the roots still have loose soil around them, leave it alone. Aloe likes being slightly snug. Repot every 2 to 3 years at most.
Can I use a self-watering pot for aloe?
I would not recommend it. Self-watering pots keep the soil consistently moist. That works for ferns and peace lilies. It does not work for aloe. The roots need a dry period between waterings. A self-watering pot removes that dry period. If you really want to try it, use a very gritty mix and monitor closely. But honestly, a regular pot with drainage holes is safer.
What type of pot material is best for aloe?
Terracotta or unglazed clay is my top choice. It is porous. Moisture evaporates through the walls. This reduces the risk of overwatering. Plastic and glazed ceramic are okay if you water carefully. They hold moisture longer. Metal pots are the worst. They heat up in the sun and can cook the roots. Stick with terracotta if you are new to aloe.
How deep should an aloe pot be?
The pot should be no deeper than the root spread is wide. If your aloe roots spread 8 inches across, the pot should be about 7 to 9 inches deep at most. Shallow is better. Deep pots hold excess moisture at the bottom where the roots cannot reach it. That is a recipe for rot and fungus gnats.
I really do believe that once you match pot size to root spread, everything else gets easier. Light, water, soil, fertilizer. All of it falls into place because the roots are in an environment that works for them. I wasted years fighting with aloe plants because I ignored the pot. Now I have healthy plants that pup every spring and flower in summer. You can get there too. Start with the roots. Then build the pot around them.