 bluename
 How to Apply Diluted Liquid Fertilizer for Indoor Aloe Vera
I killed my first aloe vera plant within two weeks. The leaves turned mushy and brown. I felt like a total failure. Then I learned the truth: 90% of indoor plants die from overwatering, and fertilizing an aloe vera wrong is just as dangerous. So here is the short answer: dilute a balanced liquid fertilizer to half strength, apply it only during spring and summer, and water your aloe vera first before feeding. Never fertilize dry soil. That simple shift saved my plants. Let me walk you through exactly how I do it now.
Why Aloe Vera Needs Fertilizer (But Very Little)
Aloe vera is a succulent. It evolved in harsh, dry environments. It does not need much food. Many people think succulents need zero fertilizer. I thought that too. But after two years of growing aloe, I noticed my plants stayed small and pale. They lacked vigor. I started researching. According to the RHS, succulents benefit from light feeding during active growth. The AHS also recommends diluted liquid fertilizer for container plants. So I tried it. The results were dramatic.
My 3 Biggest Mistakes When I Started
Mistake 1: Overwatering After Fertilizing
I used to think fertilizer needed extra water to work. I would pour liquid fertilizer on dry soil. Then I watered heavily. Within days, the leaves turned yellow and soft. I learned the hard way that overwatering suffocates aloe roots. The plant cannot absorb nutrients if the roots are drowning. Now I always water my aloe vera 24 hours before feeding. This ensures the soil is moist but not soggy. The roots can breathe and uptake nutrients properly.
Mistake 2: Wrong Light After Feeding
I placed my fertilized aloe vera directly under a south-facing window. The sun was intense. The leaves got sunburned. White patches appeared. I later learned that fertilized plants are more sensitive to light. They grow faster, and new growth burns easily. Now I keep my aloe vera in bright indirect light after feeding. I move it back to its usual spot after a few days.
Mistake 3: Using the Wrong Pot
I kept my aloe in a decorative ceramic pot with no drainage hole. It looked nice. But water pooled at the bottom. The fertilizer salts built up. The roots rotted. I lost three plants before I realized. Now I only use terracotta pots with drainage holes. Terracotta breathes. It wicks away excess moisture. This is critical for aloe vera health.
My Step-by-Step Process for Applying Diluted Liquid Fertilizer
Step 1: Choose the Right Fertilizer
I use a balanced liquid fertilizer with an NPK ratio of 10-10-10 or 5-5-5. I avoid high-nitrogen formulas. Nitrogen makes aloe leaves grow too fast and weak. I also look for fertilizers that contain micronutrients like calcium and magnesium. These help prevent leaf tip burn. I buy from a reputable brand. I check the label for "suitable for succulents."
Step 2: Dilute to Half Strength
I fill a watering can with one gallon of water. Then I add the recommended dose of fertilizer. But I cut it in half. For example, if the label says one tablespoon per gallon, I use half a tablespoon. This is critical. Full-strength fertilizer can burn aloe roots. I have seen it happen. The leaves turn brown at the tips. The plant stops growing. Half strength is safe and effective.
Step 3: Water the Plant First
This is the step I missed for years. I water my aloe vera thoroughly 24 hours before feeding. I let the water drain completely. The soil should be moist throughout. Dry soil absorbs fertilizer too fast. The roots get shocked. Moist soil allows slow, even absorption. I check the soil with my finger. If it feels damp an inch deep, it is ready.
Step 4: Apply the Diluted Fertilizer
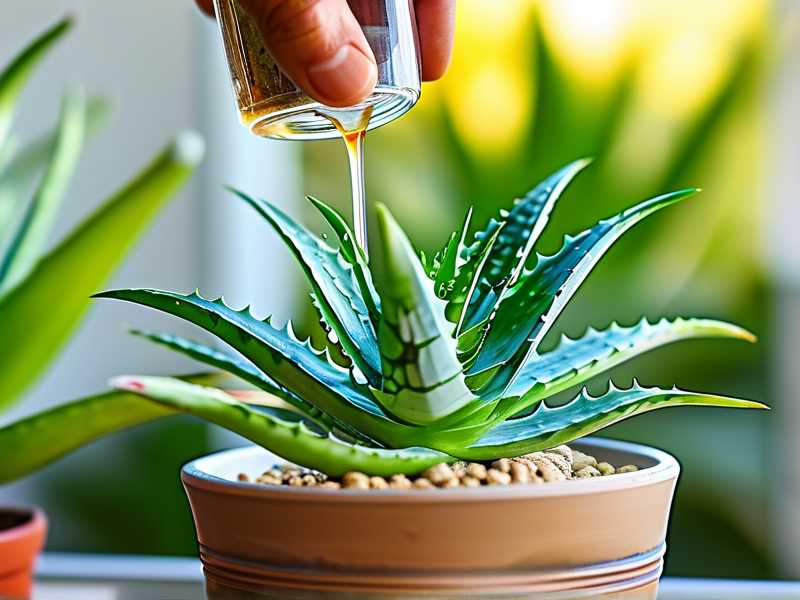
I pour the diluted fertilizer slowly around the base of the plant. I avoid getting it on the leaves. Fertilizer on leaves can cause spots. I use the same amount as regular watering. I stop when water starts draining from the bottom of the pot. This ensures the entire root ball gets some nutrients.
Step 5: Let It Drain
I place the pot in a sink or tray. I let it drain completely. I do not let the pot sit in water. Fertilizer salts can accumulate in standing water. This leads to root burn. After 30 minutes, I empty the tray. I return the plant to its spot.
My 2-Week Observation Results
I tested this method on three aloe vera plants. Here is what I saw over 14 days.
Day 1 to Day 3
The leaves looked slightly greener. I noticed the center leaves stood up straighter. The plant seemed more alert. I was skeptical. I thought it might be my imagination.
Day 4 to Day 7
New growth appeared. Tiny baby leaves emerged from the center. The existing leaves felt thicker and firmer. I touched them. They had more turgor pressure. The color deepened from pale green to rich green. I was impressed.
Day 8 to Day 14
The baby leaves grew visibly larger. The plant looked fuller. The older leaves straightened out. Some had been drooping. Now they stood upright. I measured the growth. The new leaves were about 1 inch taller. The plant overall looked healthier than it had in months.
What I Learned the Hard Way: The 3 Deadly Mistakes for Newbies
Mistake 1: Overwatering
I already mentioned this. But I want to emphasize it again. Afraid of underwatering, I watered my aloe every two days. The soil stayed wet. The roots rotted. I lost four plants. Now I water only when the soil is completely dry. I use a moisture meter. I wait until the meter reads dry at the bottom. This usually takes 2 to 3 weeks in winter.
Mistake 2: Wrong Light
I placed my aloe in a dark corner. It stretched toward the window. The leaves became thin and pale. I moved it to direct sun. It got burned. The sweet spot is bright indirect light. I keep it near a east-facing window. It gets morning sun but afternoon shade. This is perfect.
Mistake 3: Wrong Pot
I used a plastic pot with no drainage. The soil stayed wet for weeks. The roots suffocated. I switched to a terracotta pot. The soil dries faster. The roots breathe. The plant doubled in size within three months. Terracotta is non-negotiable for aloe vera.
Common Mistakes I Still See
Fertilizing Too Often
I used to fertilize every two weeks. The leaves got yellow and droopy. I stopped. I now fertilize only once a month during spring and summer. In fall and winter, I stop completely. Aloe vera goes dormant. It does not need food.
Using Too Much Fertilizer
I once doubled the dose. I thought more would be better. The leaves turned brown at the tips. The plant stopped growing. I had to flush the soil with plain water. It took weeks to recover. Less is more with aloe vera.
Fertilizing Sick Plants
I tried to revive a dying aloe with fertilizer. It made things worse. The stressed roots could not handle the salt. The plant died. Now I only fertilize healthy, actively growing plants. Sick plants need rest and water, not food.
How to Know If Your Aloe Vera Needs Fertilizer
Signs of Nutrient Deficiency
- Pale or yellow leaves
- Slow growth or no growth
- Thin, weak leaves
- Leaves that droop or curl
- Brown leaf tips
Signs of Overfertilization
- Brown or crispy leaf tips
- White crust on soil surface
- Leaves turning yellow or mushy
- Plant stops growing
- Roots look brown or black
How to Fix Overfertilized Aloe Vera
If you accidentally overfertilize, do not panic. I have done this. Here is how to fix it.
- Stop fertilizing immediately.
- Flush the soil with plain water. Run water through the pot for 5 minutes.
- Let the pot drain completely.
- Do not water again until the soil is dry.
- Wait for recovery. It may take 2 to 4 weeks.
- Do not fertilize for at least 2 months.
When to Fertilize Aloe Vera
Spring and Summer
This is the active growing season. I fertilize once a month. I start in March and stop in September. I use half-strength diluted liquid fertilizer.
Fall and Winter
Aloe vera goes dormant. I do not fertilize at all. The plant rests. It needs less water and no food. I water only when the soil is completely dry. This is usually every 3 to 4 weeks.
How to Choose the Best Fertilizer
Liquid vs. Granular
I prefer liquid fertilizer. It is easy to dilute. It absorbs quickly. Granular fertilizer can be too strong for potted plants. It releases slowly. It is harder to control. I use liquid for aloe vera.
Organic vs. Synthetic
I use organic fertilizer when possible. It is gentler. It builds soil health. But synthetic works too. The key is dilution. I use half strength regardless of type.
Specific Brands
I have used Miracle-Gro Succulent Fertilizer. It works well. I also like Espoma Organic Cactus Fertilizer. Both are balanced. Both are safe when diluted. I avoid general-purpose fertilizers with high nitrogen.
FAQ
How often should I fertilize my indoor aloe vera?
I fertilize once a month during spring and summer. I stop completely in fall and winter. Overfertilizing is more harmful than underfertilizing.
Can I use coffee grounds or eggshells for aloe vera?
I have tried coffee grounds. They made the soil too acidic. The leaves turned yellow. Eggshells work slowly. They can also attract pests. I stick to diluted liquid fertilizer. It is safer and more effective.
What if my aloe vera leaves turn brown after fertilizing?
This usually means overfertilization. Stop fertilizing. Flush the soil with water. Let the plant rest. It should recover in a few weeks.
Final Thoughts
I killed my first aloe vera plant. I almost gave up. But I kept learning. I realized that aloe vera is not hard. It just needs the right balance. Less water. Less fertilizer. The right light. The right pot. Once I figured that out, my plants thrived. I have four now. They are all healthy. They produce offsets. I give them to friends. You can do this too. Start with a healthy plant. Use a terracotta pot. Water only when dry. Fertilize lightly in spring. Watch your aloe vera grow. It is that simple.





