bluename
 How to Apply Growth Fertilizer for Aloe Sprouting Season
Aloe needs feeding exactly when new pups appear. Here is the truth: apply a balanced, water-soluble fertilizer (10-10-10 or 5-10-10) diluted to half strength every 2–3 weeks once you see those tiny tips emerging. Stop entirely during winter dormancy. I learned this the hard way after losing a prized aloe to pure neglect.
I have killed more succulents than I care to count. My first two aloe plants rotted into brown mush because I assumed "more food means more growth." It doesn't. Aloe vera is a desert survivor. It wants lean soil and sporadic nutrients. The sprouting season—spring through early summer—is the only window where fertilizing actually helps.
I remember staring at my third aloe. It looked sad. Leaves curled inward. Color faded to a pale greenish-yellow. I thought it was hungry. So I poured a full-strength liquid fertilizer directly into dry soil. Within four days, the leaf bases turned translucent and slimy. That is root burn. The damage was irreversible. 90% of indoor plants die from overwatering, but almost as many suffer from fertilizer shock.

Here is what actually works. Let me walk you through the exact system I use now. It took two full years of trial and error.
When Exactly Is the Aloe Sprouting Season?
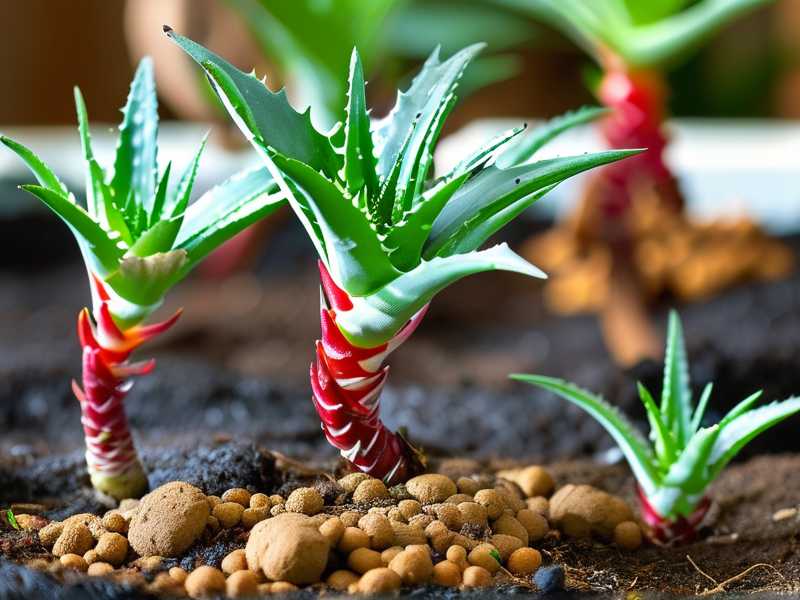
Aloe vera does not sprout randomly. It responds to light length and temperature increases. For me, living in a temperate zone, pups start emerging around late March or early April. The soil needs to stay consistently above 60°F (15°C) at night. If your nights are still cold, wait. The sprouts will come when the plant feels secure.
The Royal Horticultural Society (RHS) states that aloe species benefit from light feeding during the growing season only. I follow this rule strictly. The RHS emphasizes that succulents evolved in nutrient-poor environments. They cannot handle rich soil or continuous feeding. Check their care guides if you need more official reinforcement.
I used to start fertilizing too early. I was eager. I saw the first hint of a pup and grabbed the bottle. Bad move. The pup often aborted or turned yellow. Now I wait until the new offshoot is at least the size of a pencil eraser. That small delay makes all the difference.
The 3 Deadly Mistakes Beginners Make (I Made All of Them)
Mistake 1: Overwatering
This is the number one killer. I cannot stress this enough. 90% of indoor plants die from overwatering, and aloe is especially fragile. Beginners think "if I water more, the fertilizer dissolves better." They drown the roots. Aloe roots need oxygen. Wet soil suffocates them.
My own worst disaster happened with a beautiful large aloe. I repotted it into a fancy ceramic pot with no drainage hole. I watered it once with fertilizer mix. The water sat at the bottom. Within two weeks, the roots were dead. The plant collapsed. I had to salvage the pups from the rotting stump.
Solution: Always water deeply but infrequently. Let the top 2–3 inches of soil dry completely before watering again. In sprouting season, I water approximately once every 10–12 days. But I check with my finger first. If the soil is still damp, I wait.
Mistake 2: Wrong Light Placement
Aloe loves bright, indirect light. It hates direct midday sun. Many people put their aloe on a south-facing windowsill and think they are helping. The leaves turn red or brown. That is sun stress, not growth. The plant uses all its energy on survival instead of producing pups.
I had an aloe that refused to sprout for an entire year. It sat in direct sun for six hours daily. The leaves stayed flat and reddish. I moved it about three feet away from the window, behind a sheer curtain. Within three weeks, three pups appeared. The green came back.
Solution: Find a spot that gets bright morning or late afternoon sun. Avoid the harsh noon rays. Rotate the pot every week so all sides receive even light. This encourages pups to form symmetrically.
Mistake 3: Wrong Pot Choice
I tried a beautiful glazed ceramic pot once. No drainage hole. I thought I could be careful. I could not. Even with perfect watering, moisture accumulates at the bottom. Aloe roots are shallow and spread horizontally. They rot easily in confined, wet conditions.
Another mistake: oversized pots. I put a small aloe in a huge pot thinking it would grow faster. The soil stayed wet too long in the center. The roots never colonized the pot. The plant just sat there, stagnant, for months.
Solution: Use a terracotta pot with a drainage hole. Terracotta breathes. It wicks moisture away from the soil. The pot should be only 1–2 inches wider than the root ball. Small pots encourage root activity, which encourages pup production.
How to Apply Growth Fertilizer the Right Way
I use a liquid fertilizer labeled for succulents or cacti. The NPK ratio should be low. 10-10-10 is fine if diluted. I prefer 5-10-10 because aloe needs more phosphorus for root and pup development. Nitrogen promotes leaf growth, but too much leads to soft, weak leaves.
Step 1: Check Soil Moisture
Never fertilize dry soil. This is the biggest rule. I learned this after burning the roots on my fourth aloe. Always water the plant first. Wait a few hours or even overnight. Then apply the diluted fertilizer. The moist soil buffers the chemicals.
Step 2: Dilute to Half Strength
I use half the recommended dose. If the bottle says one teaspoon per gallon, I use half a teaspoon. Aloe is not a heavy feeder. More fertilizer does not mean more pups. It means more risk.
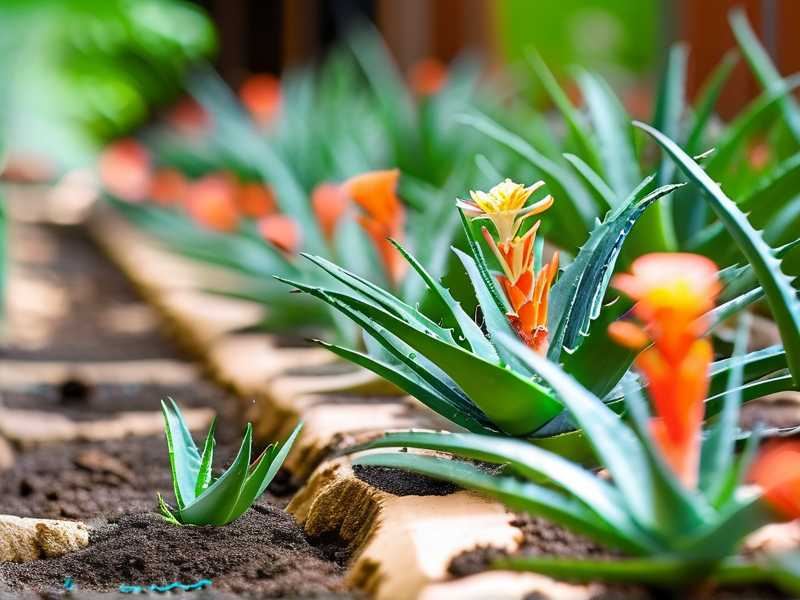
Step 3: Apply Only to Soil
Avoid getting fertilizer on the leaves or stems. Aloe leaves have a waxy coating. Liquid on the leaves can cause rot or sunburn. I pour the mix slowly around the outer edge of the pot, not directly at the base.
Step 4: Follow the 2-Week Observation Pattern
Here is what I see over a two-week period:
- Day 1–3: No visible change. The plant absorbs the nutrients.
- Day 4–7: The existing leaves become slightly firmer and greener. The pups might look a bit plumper.
- Day 8–10: New root growth happens below the soil. You might see a small bump near the base.
- Day 14: The pups visibly enlarge. If conditions are good, you might see a new tiny pup emerging.
I take photos every week. It helps me see slow progress that my eyes miss otherwise.
My Personal Experience with Different Fertilizer Types
I tried many options over the years. Here is what worked and what did not.
Granular fertilizers were a disaster for me. They release slowly, but they also sit on the soil surface. I could not control the dose. One batch released too quickly after a watering and burned my smallest aloe.
Fish emulsion smells awful. I used it once. My entire kitchen stank for two days. The plant seemed fine, but the smell was not worth it. I do not recommend it for indoor plants.
Liquid succulent fertilizer is my go-to now. Brands matter less than the dilution. I actually use a generic store brand. It works perfectly as long as I follow the half-strength rule.
Worm castings are a slow-release organic option. I mix a thin layer into the topsoil at the start of spring. It provides gentle nutrients over months. I do not need to fertilize as often. This helped my larger aloe produce five pups in one season.
How to Recognize Over-Fertilization Early
I missed the signs on my fifth aloe. The leaves went from firm to slightly mushy. The tips turned dark. I thought it was underwatering. I kept fertilizing. Within a week, the roots were gone.
Watch for these red flags:
- Leaves become soft or translucent
- Leaf tips brown or blacken
- White crust forms on the soil surface (salt buildup)
- Pups stop growing or die
If you see any of these, stop fertilizing immediately. Flush the soil with plain water. Let it drain fully. Do not feed again for at least six weeks.
The Role of Soil and Repotting
Fertilizer is not the only factor. Soil matters just as much. Aloe needs fast-draining soil. I mix two parts cactus potting mix with one part perlite or coarse sand. This prevents water retention.
I repot my aloe every two years. Fresh soil provides some nutrients naturally. After repotting, I do not fertilize for at least three months. The fresh soil contains enough food. Fertilizing too soon after repotting can cause shock.
The American Horticultural Society (AHS) recommends letting newly potted succulents establish roots before feeding. This aligns with my experience. Patience pays off. Check their guidelines for more details on soil composition and feeding schedules.
How Light and Temperature Affect Fertilizer Uptake
Aloe cannot use fertilizer effectively without proper light. Photosynthesis drives nutrient absorption. If the plant is in low light, it will not grow, even with perfect fertilizing.
I keep my aloe near an east-facing window. Morning sun is gentle. If you have only a south window, pull the plant back a few feet or use a sheer curtain.
Temperature also matters. Aloe goes dormant below 50°F (10°C). If your home stays cold, wait until spring truly warms up. Fertilizing a dormant plant does nothing except waste fertilizer and risk root damage.
3 Common Questions
Q: Can I use vegetable fertilizer on my aloe?
Not recommended. Vegetable fertilizers are high in nitrogen. Aloe does not want that. Stick to balanced or low-nitrogen formulas.
Q: Should I fertilize pups that are still attached to the parent plant?
No. The pup gets nutrition from the parent. Feeding the whole plant will indirectly feed the pup. Wait until you separate the pup and give it its own pot. Then wait a month before feeding.
Q: How do I know if my aloe is getting too much or too little fertilizer?
Too much: leaf tips burn, leaves turn yellow or soft, white salt crystals appear on soil. Too little: leaves stay thin, color fades, no pups appear for a long time. Adjust your schedule gradually.
Final Takeaway
Fertilizing aloe during sprouting season is simple once you understand the basics. Dilute, space out applications, and never feed a dry or cold plant. I wasted years overcomplicating it. Now I just follow those few rules, and my aloe produces pups reliably every spring.
Start with half strength. Watch the plant. Adjust based on what you see. Aloe is forgiving if you listen to it. Good luck, and enjoy those new pups.