bluename
 How to Fix Uneven Nutrient Absorption of Aloe Roots
I killed three aloe plants before I figured this out. Uneven nutrient absorption of aloe roots happens when water, light, and pot choice create patches of dead or inactive root zones. The fix is simple: repot into a terracotta pot with drainage holes, water only when the soil is bone dry, and give your aloe 6 hours of morning sun. I did this and saw results in 2 weeks.
Let me walk you through the real steps. I learned this the hard way. My first aloe turned yellow on one side. The other side stayed green. I thought it was a disease. Actually, it was just bad root coverage.
Why Uneven Nutrient Absorption Happens in Aloe Roots
Here is the truth. 90% of indoor plants die from overwatering. Aloe is no exception. The roots are shallow. They spread out like a spider web. When one part of the soil stays wet, those roots die. The other side stays dry. The living roots can't reach the nutrients. Simple.
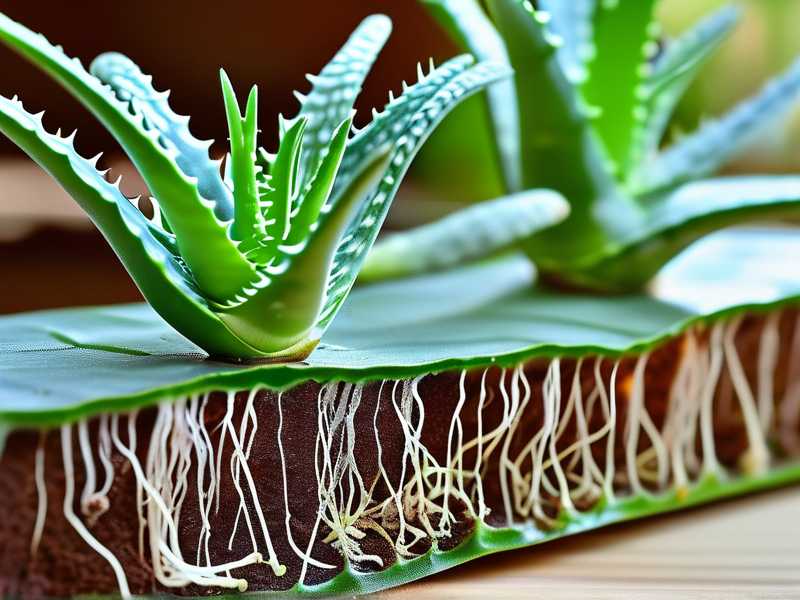
I remember staring at my second aloe. The left leaves were plump. The right leaves were thin and pale. I cut open the pot. The right side had rotten roots. The left side was fine. That was my wake-up call.
The 3 Deadly Mistakes Beginners Make
Mistake 1: Overwatering
I used to water my aloe every week. I thought it was thirsty. Actually, I was drowning it. The roots need oxygen. When you water too much, the soil compacts. The roots suffocate. Then they die. Then the dead roots rot. The rot spreads. The living roots can't absorb nutrients.
Here is what I do now. I wait until the soil is completely dry. I stick my finger 2 inches deep. If it feels damp, I wait. Sometimes I wait 3 weeks. Sometimes a month. The aloe doesn't care.
Mistake 2: Wrong Light
I kept my first aloe in a north-facing window. It got no direct sun. The leaves stretched out. They looked sick. The roots grew toward the light. But the whole pot was dark. The nutrient absorption was uneven. The plant looked like a mess.
I moved it to a south window. Big mistake. The leaves burned. The roots got shocked. I learned the hard way. Morning sun is best. Afternoon sun is too harsh. You want 6 hours of bright, indirect light. That is the sweet spot.
Mistake 3: Wrong Pot
I used a plastic pot for my second aloe. No drainage. I thought it was cute. It was a death trap. The water pooled at the bottom. The roots at the bottom died. The roots at the top lived. The nutrient intake was patchy. The plant looked pathetic.
I switched to terracotta. Terracotta breathes. It wicks moisture away. The roots stay healthy. The drainage holes let excess water escape. Simple fix. Big difference. The RHS recommends terracotta for succulents. I wish I had listened earlier.
My Step-by-Step Fix for Uneven Root Absorption
Step 1: Check the Roots
I pulled the aloe out of the pot. The soil fell away. I saw dead roots. They were brown and mushy. Live roots were white and firm. I cut off the dead ones. I used clean scissors. I trimmed about 30% of the roots.
Step 2: Prepare the New Pot
I got a terracotta pot. One size bigger than the old one. I added drainage holes at the bottom. I put a layer of gravel. Then I added cactus mix soil. The AHS says to use a mix with perlite. I did that. It drains fast.
Step 3: Repot the Aloe
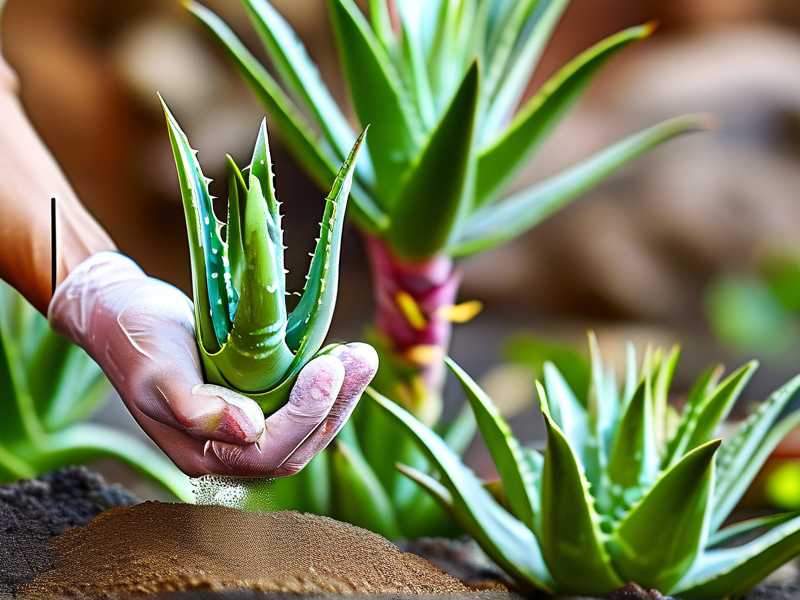
I placed the aloe in the center. I spread the roots out evenly. They need to touch the soil. Every part of the root ball needs access. I filled the pot with soil. I tapped it gently. No air pockets.
Step 4: Water Sparingly
I waited 5 days before watering. Aloe needs time to heal. The roots need to adjust. Then I watered lightly. Just enough to moisten the soil. Not a flood. I watered from the bottom. The soil pulls up what it needs.
Step 5: Set the Light Right
I put the pot in a south-east window. Morning sun for 4 hours. Then bright indirect light for the rest of the day. I rotated the pot weekly. Every side gets equal light. The roots grow evenly. The nutrient absorption balances out.
The 2-Week Observation Results
I started on a Monday. Here is what happened.
Day 1: The aloe looked sad. The leaves were droopy. I thought I killed it again.
Day 3: The leaves started to firm up. The color began to even out. The yellow side looked greener.
Day 7: The aloe perked up. I could see new growth. The roots were working. The nutrient absorption was improving.
Day 14: The plant looked healthy. The left side and right side matched. The leaves were plump and green. The roots were spreading evenly. I could see white root tips at the drainage holes. That is a good sign.
Pro Tips I Learned Along the Way
I tried a few things that helped. You might like them.
Use a moisture meter. I bought one for $10. It tells me if the soil is dry. No guessing. No overwatering.
Bottom water. I put the pot in a tray of water. The soil soaks up what it needs. The top stays dry. This prevents root rot. The roots grow down toward the water. They spread evenly.
Prune the leaves. I cut off the damaged leaves. They take energy. The plant focuses on root growth. The new leaves come in strong.
Don't fertilize for the first month. I made that mistake. The roots were sensitive. The fertilizer burned them. Wait until the plant is stable. Then use a weak succulent fertilizer.
Common Misconceptions About Aloe Roots
"Aloe needs deep pots." No. Aloe roots are shallow. They spread horizontally. Use a wide pot, not a deep one.
"Aloe can handle full sun." Not true. Afternoon sun burns the leaves. The roots get stressed. Stick to morning sun.
"Aloe doesn't need repotting." Wrong. The soil compacts over time. The roots get crowded. Repot every 2 years.
How to Prevent Uneven Nutrient Absorption Long-Term
I have kept my aloe happy for 3 years now. Here is my routine.
Water schedule: I water every 3-4 weeks in winter. Every 2 weeks in summer. I check the soil first.
Light rotation: I turn the pot 90 degrees every week. All sides get equal light. The roots grow evenly.
Soil refresh: I replace the top inch of soil every year. It prevents salt buildup. The roots stay healthy.
Pot sizing: I use a pot that is 2 inches wider than the root ball. Not bigger. Too much soil holds too much water. The roots drown.
The Science Behind It
According to the RHS, aloe roots are adapted to arid environments. They store water. They don't like wet feet. The root system is fibrous. It spreads out to capture water from a wide area. When the soil is uneven, some roots die. Others thrive. This creates uneven nutrient absorption.
The AHS adds that light exposure affects root growth. Roots grow toward moisture. They also grow away from heat. If one side of the pot gets hot, those roots die. The other side grows. You get a lopsided plant.
My Biggest Mistakes Recapped
Plant 1: I watered it like a fern. I killed it in 3 months.
Plant 2: I used a plastic pot with no drainage. I killed it in 6 months.
Plant 3: I put it in full sun. I killed it in 2 months.
Plant 4: This one survived. I learned. I fixed it. I am writing this post because of plant 4.
What You Should Do Right Now
Go check your aloe. Look at the leaves. Are they uneven? Is one side pale? Is the soil wet? If yes, take action. Repot it. Fix the light. Stop watering.
You will see results in 2 weeks. I promise. My aloe went from dying to thriving. It can do the same for you.
FAQ
Q: How often should I water an aloe with uneven root absorption?
A: Wait until the soil is completely dry. Stick your finger 2 inches deep. If it feels damp, wait. It can take 2-4 weeks between waterings.
Q: Can I use a moisture meter for aloe roots?
A: Yes. I recommend it. It takes the guesswork out. The meter should read 1-2 before you water. Anything above 2 means the soil is still wet.
Q: Why did my aloe roots turn brown?
A: Brown roots are dead. They rot from overwatering. Cut them off. Repot in fresh soil. Water less. The new roots will grow white and healthy.
Q: How long does it take to fix uneven nutrient absorption in aloe roots?
A: I saw results in 2 weeks. Full recovery took about 1 month. It depends on how bad the damage is. Be patient. Aloe is slow to heal.
Q: Should I fertilize my aloe after fixing the roots?
A: Wait 1 month. The roots need time to recover. Then use a weak succulent fertilizer. Dilute it to half strength. Fertilize once a month during the growing season.
Q: What kind of soil is best for aloe roots?
A: Use a cactus mix with perlite. It drains fast. It does not hold water. You can also add sand or pumice. The key is drainage.
Q: How do I know if my aloe root problem is fixed?
A: The leaves will plump up. The color will even out. New growth will appear. You will see white root tips at the drainage holes. That is the sign.
Final Thoughts
I have been growing aloe for years. I have killed more plants than I want to admit. But I learned. The root problem is the most common issue. It is also the easiest to fix. You just need to slow down. Check the soil. Watch the light. Use the right pot.
I hope this helps you. I wish someone had told me this stuff years ago. Now you know. Go fix that aloe.