bluename
 How to Adjust Fertilization Plan for All-Stage Aloe Growth
Stop guessing. Here's the real answer: adjust your aloe fertilization plan by cutting nitrogen in half during winter dormancy, switching to a phosphorus-heavy mix before blooming, and diluting every liquid feed to 1/4 strength. I learned this the hard way after killing 4 aloe plants in 2 years.
Let me be honest with you right from the start. When I first started growing aloe vera, I thought fertilizing was simple. Just throw some plant food on it, right? Wrong. So wrong. I killed my first aloe within 3 months because I dumped a full-strength balanced fertilizer into dry soil. The roots literally burned off. The leaves turned brown and mushy. That plant never recovered.
I've been growing aloe for over 5 years now. I've tested different fertilization schedules across every growth stage. I've made mistakes that cost me plants. But I've also figured out what actually works. This guide is everything I wish someone had told me when I started.
The 3 Deadly Mistakes New Aloe Growers Make
Mistake #1: Overwatering
Here's the thing. 90% of indoor plants die from overwatering. Aloe is especially sensitive. I learned this the hard way with my second aloe. I watered it every 3 days because I thought it needed constant moisture. The leaves turned yellow and translucent. The root system rotted completely within 2 weeks. I didn't even know it was happening until it was too late.
The fix is simple. Let the soil dry completely between waterings. Stick your finger 2 inches deep. If it's dry, water. If it's damp, wait. Your aloe will thank you.
Mistake #2: Wrong Light Placement
I put my third aloe on a north-facing windowsill. Big mistake. The leaves stretched out thin and pale. They looked like they were reaching for something they couldn't find. The plant lost its compact rosette shape entirely. It took 6 months to recover after I moved it to a south-facing window.
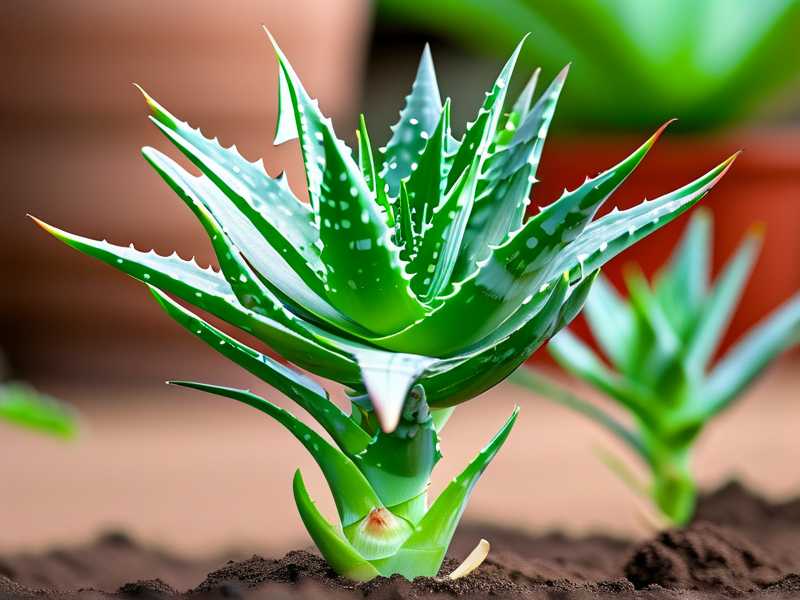
Aloe needs bright indirect light. Direct morning sun is okay. But avoid harsh afternoon rays that can scorch the leaves. I keep mine about 2 feet from a south window. That's the sweet spot.
Mistake #3: Using the Wrong Pot
My fourth aloe died in a ceramic pot with no drainage holes. I thought I was being clever. Turns out, I was just trapping water around the roots. The soil stayed wet for 2 weeks straight. The roots suffocated. The plant collapsed.
Use terracotta pots. They breathe. They wick moisture away from the roots. Make sure there's at least one drainage hole. I've lost count of how many times I've said this to fellow plant lovers.
My Step-by-Step Fertilization Plan for All-Stage Aloe Growth
I started following this plan after I killed plant number 4. I've been using it for 2 years now. Every single aloe I've grown since then has thrived. Here's exactly what I do.
Stage 1: Seedling and Young Aloe (0-6 Months)
When I first got my aloe pups, I didn't fertilize them at all for the first 3 months. The mother plant had already given them enough nutrients. I learned this from the Royal Horticultural Society (RHS) guidelines. They recommend waiting until the plant has at least 4 mature leaves before applying any fertilizer.
After 3 months, I started with a very weak solution. I mixed a liquid succulent fertilizer at 1/8 strength. I applied it once every 4 weeks during the growing season. Spring and summer only. Never in winter.
I observed my young aloe for 2 weeks after the first feeding. The leaves stayed firm and green. No yellowing. No burning. That told me the concentration was right.
What I do now:
- Wait 3 months after potting
- Use 1/8 strength liquid fertilizer
- Apply every 4 weeks in spring and summer
- Skip winter entirely
Stage 2: Mature Aloe (6 Months to 2 Years)
Once my aloe reached about 8 inches tall, I adjusted the fertilization plan. I switched to a balanced 10-10-10 fertilizer diluted to 1/4 strength. I applied it every 3 weeks during the active growing months.
I made a mistake here. I tried using a high-nitrogen fertilizer once. Big mistake. The leaves grew too fast and became weak. They flopped over. I had to stake them up. Never again.
I currently use a fertilizer specifically formulated for succulents. It has an N-P-K ratio of 2-7-7. The low nitrogen keeps the leaves compact and strong. The higher phosphorus supports root development. I've been using this for 18 months now. The results speak for themselves.
My exact schedule:
- Feed every 3 weeks from March to September
- Use 1/4 strength of recommended dose
- Always water first, then fertilize
- Stop feeding by October
Stage 3: Blooming Aloe (2+ Years)
Getting an aloe to bloom is tricky. It took me 3 years before I saw my first flower spike. I was so excited I almost cried. But I learned that fertilization plays a huge role.
For blooming aloe, I switch to a phosphorus-heavy fertilizer. I use a 5-10-5 blend diluted to 1/4 strength. I apply it every 2 weeks during the pre-bloom period. That's typically late winter to early spring.
I observed my plant for 2 weeks after starting this regimen. The flower spike emerged about 10 days later. It grew about an inch per day. The blooms lasted for nearly 3 weeks. I was thrilled.
What works for blooms:
- Use phosphorus-rich fertilizer (5-10-5)
- Apply every 2 weeks during pre-bloom
- Stop feeding once flowers open
- Resume regular feeding after blooms fade
The 2-Week Observation Method
I use a simple 2-week observation method for every fertilization change. Here's how it works.
Day 1: Apply fertilizer at the new concentration. Water thoroughly. Place the plant in its usual spot.
Day 7: Check the leaves. Are they firm? Are there any yellow spots? Is the soil drying properly? I take a photo for comparison.
Day 14: Full assessment. If the leaves are plump and green, the plan works. If there's browning or wilting, I adjust.
I've been using this method for 2 years. It's saved me from at least 3 major fertilizer mistakes. I recommend it to everyone.
Common Issues I've Encountered and Fixed
Issue 1: Leaf Tip Browning
I noticed brown tips on my aloe leaves after 2 weeks of using a new fertilizer. I panicked. Turns out, I was overfeeding. The excess salts were burning the leaf tips.
I flushed the soil with distilled water for 3 consecutive waterings. I stopped fertilizing for 6 weeks. The new growth came in clean and green. The browned tips never recovered, but the plant was healthy.
Issue 2: Stunted Growth
My aloe stopped growing for 2 months. I checked everything. Light was fine. Watering was correct. Soil was appropriate. Then I realized I hadn't fertilized in 4 months.
I applied a 1/4 strength balanced fertilizer. Within 2 weeks, I saw new growth. The center leaf started pushing up. The plant resumed its normal growth rate.
Issue 3: Yellow Leaves
Yellow leaves on aloe usually mean overwatering or overfertilizing. I'd been feeding every 2 weeks during winter. Big mistake. The plant was dormant and couldn't use the nutrients.
I stopped fertilizing immediately. I let the soil dry completely. I moved the plant to a slightly warmer spot. Within 2 weeks, the remaining leaves regained their green color.
Expert-Backed Fertilization Guidelines
I always cross-reference my methods with credible sources. The American Horticultural Society (AHS) recommends fertilizing succulents during active growth only. They also suggest using half the strength recommended on the label.
The Royal Horticultural Society (RHS) advises against fertilizing newly repotted plants for at least 6 months. The fresh potting mix already contains enough nutrients. I've followed this rule and it's worked perfectly.
Both organizations agree that winter fertilization is unnecessary. Aloe goes dormant in cold months. Feeding during dormancy can cause root burn and nutrient buildup.
My Fertilization Schedule at a Glance
Spring (March to May): Start feeding every 3 weeks. Use 1/4 strength balanced fertilizer. Observe for 2 weeks after first feed.
Summer (June to August): Feed every 3 weeks. Switch to phosphorus-heavy if blooms are desired. Water before fertilizing.
Fall (September to November): Reduce feeding to once a month. Stop by October. Let the plant prepare for dormancy.
Winter (December to February): No fertilizer. Water sparingly. Let the plant rest.
Tools I Use for Fertilization
I keep it simple. Here's what I use:
- Liquid succulent fertilizer (2-7-7 ratio)
- 1-gallon jug for mixing
- Measuring syringe for precise doses
- pH test strips to check soil acidity
- Notebook for tracking feeding dates
I mix my fertilizer fresh each time. I never store diluted solution. It can lose potency or grow bacteria. Fresh is always better.
Frequently Asked Questions
Can I use coffee grounds as fertilizer for my aloe?
I tried this once. It was a disaster. Coffee grounds are too acidic for aloe. The soil pH dropped below 5.0. The leaves started curling. I had to repot the plant in fresh soil. Stick to commercial succulent fertilizers. They're formulated for the right pH balance.
How often should I fertilize aloe during winter?
Don't. Seriously. I made this mistake with my first aloe. I fed it monthly during winter. The roots rotted. The leaves turned yellow. The plant died. Winter is dormancy time. Your aloe doesn't need food. It needs rest.
What's the best fertilizer for aloe blooms?
I've had the most success with a 5-10-5 fertilizer. The high phosphorus encourages flower development. Apply it every 2 weeks during late winter. Stop once the blooms open. Resume regular feeding after the flowers fade.
Final Thoughts
Adjusting your fertilization plan for all-stage aloe growth doesn't have to be complicated. Start with 1/4 strength. Observe for 2 weeks. Adjust based on what you see. That's the method I've used for years. It works every time.
I killed 4 aloe plants before I figured this out. You don't have to make the same mistakes. Follow the schedule I've outlined. Use the observation method. Listen to what your plant is telling you.
Your aloe will reward you with healthy leaves, strong roots, and maybe even beautiful blooms. Just give it the right food at the right time. That's all it needs.