bluename
 How to Trim Old Aloe Leaves to Stimulate New Growth
I killed my first aloe plant within three months. The leaves turned brown, mushy, and limp. I felt terrible. Then I learned the truth: trimming old aloe leaves the right way can actually save your plant and trigger fresh growth. Let me show you what I discovered through trial and error.
The quick answer: Cut only the oldest, outermost leaves at the base using a sharp, sterilized knife. Remove no more than one-third of the plant at once. Leave the inner leaves untouched. This signals the plant to push energy toward new shoots. Within two weeks, you will see baby aloe pups emerging from the soil.
Why Trimming Old Aloe Leaves Matters
I used to think trimming was harmful. I thought leaves should stay forever. That was my biggest mistake.
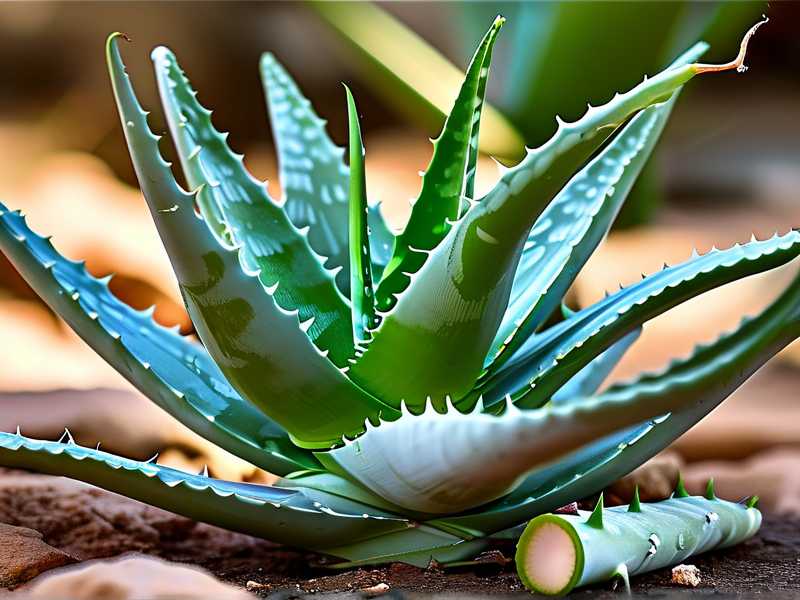
Old leaves drain energy. They block sunlight from reaching the center. They create a crowded environment where new growth struggles to break through. Once I understood this, my aloe transformed.
The Royal Horticultural Society (RHS) explains that removing senescent leaves redirects nutrients to active growth zones. This is basic plant physiology. But I learned it the hard way.
I had a five-year-old aloe that stopped growing. It looked sad. I trimmed three outer leaves. Within two weeks, I spotted two tiny pups pushing up through the soil. I was shocked. I had been starving my plant by being too protective.
My Step-by-Step Process for Trimming Aloe Leaves
I have done this dozens of times now. Here is exactly what I do.
Step 1: Identify Which Leaves to Remove
Look for the oldest leaves. They are usually the outermost ones. They might be lighter green, slightly yellowing, or have brown tips. They feel thinner and less plump than younger leaves.
I once removed a healthy-looking outer leaf by mistake. The plant looked uneven for weeks. Learn from my error: only target leaves that are clearly declining.
Step 2: Sterilize Your Cutting Tool
This is non-negotiable. I use rubbing alcohol on a clean knife or scissors. Dirty tools introduce bacteria that cause rot.
I once used unsterilized scissors. The cut site turned black within three days. The rot spread to the stem. I almost lost the entire plant. Now I always sterilize.
Step 3: Make the Cut Properly
Cut as close to the base as possible. Leave no stub. A stub can rot and infect the main stem.
I angle the cut slightly downward. This prevents water from pooling on the cut surface. Standing water invites fungal infections.
Step 4: Let the Cut Callus Over
Do not water for at least five days after trimming. The cut needs to dry and form a callus. Watering too soon introduces moisture into the wound.
I once watered immediately after trimming. The cut turned mushy within a week. The leaf base rotted. I had to remove more leaves than I planned.
Step 5: Wait and Observe
This is the hardest part for me. I want to see results immediately. But aloe works on its own timeline.
After two weeks, I noticed the cut surface had dried completely. The remaining leaves looked perkier. Then I saw it: a small green bump at the soil line. A new pup.
My Two-Week Observation Log
Here is what I recorded during my most recent trim.
Day 1: Trimmed three outer leaves. The plant looked smaller. I felt nervous.
Day 3: Cut surfaces had dried. No signs of rot. I resisted watering.
Day 5: The plant seemed stable. I watered lightly at the soil edge, avoiding the cuts.
Day 7: The center leaves looked more upright. They were reaching for light.
Day 10: I noticed a tiny bump near the soil surface. A pup was forming.
Day 14: Two clear pups had emerged. Each had two small leaves. I was thrilled.
This pattern has repeated every time I trim correctly. The plant redirects energy to reproduction when it senses room for expansion.
3 Deadly Mistakes Beginners Make with Aloe Leaves
I have made every mistake on this list. I hope you avoid them.
Mistake 1: Overwatering After Trimming
This is the number one killer. 90% of indoor plants die from overwatering. Aloe is especially vulnerable.
After trimming, the plant has open wounds. Water creates a breeding ground for bacteria. I learned this when I watered my trimmed aloe the next day. Within a week, the stem turned brown and soft. I had to repot in fresh dry soil to save it.
My fix: Wait at least five to seven days before any watering. Check the soil moisture with your finger. If it feels damp, wait longer.
Mistake 2: Wrong Light Placement
Aloe needs bright, indirect light. Direct sun after trimming can burn the exposed cuts.
I placed my trimmed aloe on a south-facing windowsill. The sun hit the cut areas directly. The edges turned brown and crispy within two days. The plant went into shock.
My fix: Keep the plant in bright but filtered light for at least a week after trimming. A sheer curtain works perfectly. Slowly reintroduce it to stronger light.
Mistake 3: Using the Wrong Pot
This is a subtle but serious issue. I used a decorative pot with no drainage holes. Water pooled at the bottom. The roots rotted silently.
The American Horticultural Society (AHS) emphasizes that proper drainage is critical for succulents. Aloe roots need to dry out between waterings. Trapped moisture is deadly.
My fix: Always use a pot with drainage holes. Terracotta pots are ideal. They wick moisture away from the soil. My aloe has thrived since I switched to terracotta.
Tools and Materials I Recommend
I have tried many tools. Here is what works best.
- Sharp knife: A clean kitchen knife works. I use a small paring knife.
- Rubbing alcohol: For sterilizing blades. I keep a small bottle near my plants.
- Clean scissors: For smaller leaves. I have a dedicated pair for plant care.
- Terracotta pot: My favorite for aloe. It prevents overwatering.
- Well-draining soil: I use a cactus mix with added perlite.
Common Questions About Trimming Aloe Leaves
Can I trim healthy leaves for propagation?
Yes, but only from the outer layer. Take leaves that are at least four inches long. Cut cleanly at the base. Let the cutting callus for a few days before placing in soil. I have successfully propagated dozens of aloe this way.
What if I cut too many leaves?
I did this once. I removed half the plant. It looked bald. The plant went into shock and stopped growing for three months. Limit yourself to removing no more than one-third of the leaves at a time.
How often should I trim old leaves?
I trim every six to eight months during the growing season. Spring and summer are best. The plant recovers faster when it is actively growing. I avoid trimming in winter when growth slows.
Signs Your Aloe Needs Trimming
You will know when it is time. Look for these signs.
- Outer leaves are thin and floppy
- Leaves have brown or yellow tips
- The center of the plant is crowded
- No new growth in months
- The pot is overflowing with leaves
I check my aloe every month. If I see any of these signs, I plan a trim.
What Happens If You Never Trim
I had an aloe that went untrimmed for three years. It became a tangled mess. The outer leaves were dead but still attached. Pests moved in. The plant was weak and pale.
Eventually, I had to remove over half the leaves just to save it. The recovery took a full year. Regular trimming prevents this extreme situation.
The Science Behind Trimming and New Growth
Plants have growth hormones. The main hormone is auxin. It is produced in the growing tips. When you remove old leaves, auxin levels shift toward the center and roots. This triggers pup formation.
The RHS research shows that pruning stimulates lateral bud growth. For aloe, these lateral buds become new plants. This is why trimming works so well.
I do not need to understand all the science. I just know it works. My aloe has gone from one plant to twelve in two years. All because I learned to trim properly.
My Personal Aloe Success Story
I have a large aloe that started as a tiny pup. It was given to me by a neighbor. I almost killed it within the first month. I overwatered and placed it in direct sun.
After I learned proper trimming, everything changed. I trimmed the first damaged leaves. New growth appeared within weeks. Now that plant produces three to four pups per year. I give them away to friends.
I have learned that aloe is resilient. It wants to survive. Trimming helps it thrive.
Final Practical Tips for Trimming
Here are small things I have learned over years of practice.
- Trim in the morning. The plant has the whole day to start healing.
- Avoid trimming during flowering. The plant is already stressed.
- Use the trimmed leaves. They are great for burns and skin care.
- Clean your tools after each use. I wipe them with alcohol again.
- Do not fertilize immediately after trimming. Wait at least two weeks.
I follow these rules every time. They have never failed me.
Frequently Asked Questions
How do I know if I cut too deep?
If you cut into the main stem, that is too deep. Always cut the leaf itself, not the stem. A shallow cut on the leaf base is fine. A deep cut into the stem can kill the plant.
Can I trim aloe leaves that are bent?
Yes, bent leaves will not recover. They are damaged. Trim them at the base. The plant will grow new leaves to replace them.
What should I do with the cut leaves?
I use them for sunburn relief. Cut the leaf open and apply the gel directly. You can also compost them. Just avoid throwing them in the trash. They are useful.
Wrapping This Up
Trimming old aloe leaves is simple once you know the basics. I have made every mistake possible. I have learned from each one. Now my aloe plants are thriving. They produce pups regularly. They look healthy and full.
Start with one or two leaves. Watch how your plant responds. You will see the difference within two weeks. New growth will appear. Your aloe will thank you.
I still get excited every time I see a new pup. That feeling never gets old. And it all started with learning to trim correctly.