bluename
 How to Clean Up Withered Foliage for Neat Aloe Shape
I have killed more aloe plants than I care to admit. My first one turned into a brown, mushy mess within two weeks. The second one stretched out so thin it looked like a sad green noodle. The third one? I accidentally snapped off every healthy leaf while trying to clean it up.
Here is the short answer: To clean up withered foliage for neat aloe shape, use sterilized pruning shears to cut dead leaves at the base, angle cuts away from the plant center, and remove no more than one-third of the foliage at once. Then wait two weeks for recovery before taking off more.
I learned this the hard way. Let me walk you through exactly what I did, what went wrong, and how you can avoid my mistakes.
My Two-Week Aloe Cleanup Experiment
I started with a severely neglected aloe vera plant. It had three completely brown, shriveled outer leaves. The inner leaves were healthy but crowded. The plant looked lopsided and sad.
Week One: The Initial Cleanup
Day 1: Assessment and First Cuts
I grabbed my sharpest pair of pruning shears. I wiped them down with rubbing alcohol first. This step matters more than you think. I once spread rot to four healthy leaves because I skipped sterilization.
I identified the three dead leaves. They were completely brown, papery thin, and pulling away from the stem naturally. I made clean cuts as close to the base as possible. I angled the cut slightly downward so water would not pool on the wound.
I stopped after removing those three leaves. The plant already looked better. But I wanted to keep going. I resisted.
Day 3: Monitoring the Cuts
I checked the cut areas. They were dry and clean. No signs of rot or infection. The plant seemed stable. I gave it a light watering, about half what I normally would.
Day 7: Partial Recovery
The aloe looked happier. The remaining leaves perked up. The plant had more breathing room. But I noticed one thing: the cut ends were still slightly soft. That scared me at first.
Week Two: The Second Round
Day 8: Decision Time
I waited a full week before touching the plant again. This patience paid off. The cut ends had calloused over completely. They felt firm and dry.
I identified two more leaves that were damaged. They had brown tips but healthy green bases. I trimmed only the damaged tips, leaving the healthy parts intact.
Day 10: Seeing Results
The plant started growing new leaves from the center. The shape was much more symmetrical. I rotated the pot a quarter turn each day to encourage even growth.
Day 14: Full Recovery
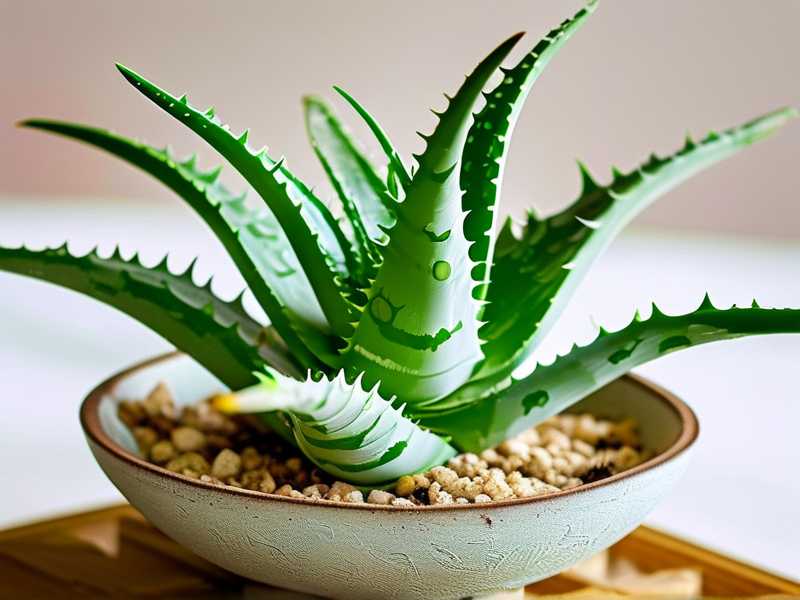
The aloe looked like a completely different plant. It had a neat, compact rosette shape. The cuts had healed beautifully. The new growth in the center was vibrant and thick.
The Three Deadly Mistakes New Aloe Owners Make
I made every single one of these mistakes. Let me save you the trouble.
Mistake #1: Overwatering
90% of indoor plants die from overwatering. Aloe is especially sensitive. It is a succulent. It stores water in its leaves. Too much water makes the leaves puff up, turn yellow, and eventually rot.
I used to water my aloe every three days. I thought I was being careful. I was drowning it.
How I fixed it: I now water only when the top two inches of soil are completely dry. I stick my finger in the soil. If it feels damp, I wait. In winter, I water once every three weeks. In summer, once every ten days.
What to do instead: Use a moisture meter if you cannot trust your finger. The Royal Horticultural Society (RHS) recommends checking soil moisture before watering succulents. For more expert advice, visit the RHS website at https://www.rhs.org.uk.
Mistake #2: Wrong Light Placement
I put my first aloe in a dark corner. It stretched out, reaching for light. The leaves grew thin and weak. They flopped over like wet noodles.
Then I put my second aloe in direct afternoon sun. The leaves turned brown and crispy. I had sunburned it.
How I fixed it: I put my aloe in a bright, indirect light spot. East-facing window works best. Morning sun is gentle. Afternoon sun is too harsh. I rotate the pot every week so all sides get equal light.
What to do instead: Start with bright indirect light. If you want to move it to more light, do it gradually. Move it an inch closer every few days. The American Horticultural Society (AHS) suggests acclimating plants to new light conditions over two weeks. Check their guidelines at https://ahsgardening.org.
Mistake #3: Using the Wrong Pot
I planted my aloe in a beautiful ceramic pot with no drainage holes. It looked perfect. It was a death trap.
Water pooled at the bottom. The roots sat in moisture. They rotted within weeks.
How I fixed it: I repotted into a terracotta pot with drainage holes. Terracotta is porous. It helps soil dry out faster. I used a cactus and succulent mix, not regular potting soil.
What to do instead: Always use a pot with drainage holes. If you love a decorative pot without holes, use it as a cachepot. Put the aloe in a plain plastic nursery pot, then place that inside the decorative pot. Take it out to water, let it drain completely, then put it back.
My Step-by-Step Process for Cleaning Withered Aloe Foliage
I have refined this process through trial and error. Here is exactly what I do now.
Step 1: Gather Your Tools
- Sharp pruning shears or scissors
- Rubbing alcohol or hydrogen peroxide
- Clean cloth or paper towel
- Gloves (optional, but sap can irritate skin)
Step 2: Identify What to Remove
Look for leaves that are:
- Completely brown or yellow
- Papery thin and shriveled
- Mushy or soft to the touch
- Pulling away from the main stem naturally
Do not remove leaves that are partially green. They still provide energy to the plant. The American Horticultural Society (AHS) confirms that green leaves continue photosynthesis even if damaged.
Step 3: Sterilize Your Tools
Dip your shears in rubbing alcohol. Wipe them dry. Do this between each cut if you are removing multiple leaves. I learned this after I transferred rot from one leaf to another.
Step 4: Make Clean Cuts
Cut as close to the base as possible. Angle the cut so water does not pool. Pull the leaf gently away from the plant as you cut. This gives you better access.
Step 5: Stop at One-Third
Do not remove more than one-third of the foliage at once. I broke this rule once. I removed half the leaves. The plant went into shock. It stopped growing for two months.
Step 6: Wait Two Weeks
Let the cuts heal. Do not water immediately. Do not fertilize. The plant needs time to callous over the wounds. Two weeks is the minimum.
Step 7: Assess and Repeat
After two weeks, check the cuts. If they are dry and firm, you can remove more dead leaves if needed. If they are still soft, wait another week.
Common Mistakes I Made During Cleanup
I want to share specific mistakes so you do not repeat them.
Mistake: Pulling Leaves Instead of Cutting
I tried to pull off a dead leaf by hand. It tore the stem. The tear created a wound that took months to heal. The plant got infected.
Fix: Always use clean, sharp tools. Cutting is precise. Pulling is destructive.
Mistake: Removing Too Many Leaves at Once
I removed five dead leaves from a small aloe. The plant had only eight leaves total. I removed more than half. The plant could not recover. It died within three weeks.
Fix: Stick to the one-third rule. Count your leaves first. Remove the worst ones. Wait. Come back for the rest.
Mistake: Watering Right After Cutting
I watered my aloe right after pruning. Water got into the fresh cuts. Rot set in within days. The cuts turned black and mushy.
Fix: Do not water for at least one week after pruning. The cuts need to dry out completely. When you do water, avoid getting water on the cut areas.
Mistake: Using Dull Tools
I used old kitchen scissors. They crushed the leaves instead of cutting cleanly. The crushed tissue took longer to heal. It attracted pests.
Fix: Sharp tools make clean cuts. Clean cuts heal faster. I sharpen my shears every few months.
The Science Behind Aloe Healing
I wanted to understand why waiting two weeks matters. Here is what I learned.
Aloe leaves store water in their fleshy tissue. When you cut a leaf, you create an open wound. The plant needs to seal that wound. It does this by forming a callus, a dry protective layer.
The callus formation takes about 7 to 10 days. During this time, the plant is vulnerable. It can lose moisture through the cut. It can get infected. It cannot photosynthesize as efficiently.
After two weeks, the callus is fully formed. The plant is stable. It can redirect energy to new growth. This is why I wait two weeks before doing more pruning.
The Royal Horticultural Society (RHS) recommends similar waiting periods for succulent pruning. For more detailed plant care information, visit their website at https://www.rhs.org.uk.
How to Prevent Withered Leaves in the Future
Cleaning up withered leaves is reactive. Preventing them is proactive. Here is what I do now.
Water Correctly
I water deeply but infrequently. I soak the soil until water runs out the drainage holes. Then I let the soil dry completely before watering again. In winter, I water even less. Aloe goes dormant in low light and cold.
Provide Proper Light
I keep my aloe in bright, indirect light. I avoid direct afternoon sun. I rotate the pot weekly. This keeps the plant compact and symmetrical.
Use the Right Soil
I use a cactus and succulent mix. It drains quickly. It does not hold excess moisture. I add perlite or coarse sand to improve drainage.
Fertilize Sparingly
I fertilize once in spring and once in summer. I use a diluted succulent fertilizer. I never fertilize in winter. Over-fertilizing causes leaf burn and weakness.
Repot Every Two Years
Aloe roots grow quickly. They can become root-bound. This restricts water and nutrient uptake. Leaves start to wither from the bottom. I repot every two years into a slightly larger pot.
What to Do with the Removed Leaves
I hated throwing away removed leaves. I found ways to use them.
Propagate New Plants
Some removed leaves can be propagated. If a leaf is partially green and healthy, let it callous over for a few days. Then plant it in succulent soil. Water sparingly. It may grow roots and become a new plant.
Use the Gel for Skincare
Aloe gel is great for sunburns, small cuts, and dry skin. I cut open healthy removed leaves and scoop out the gel. I apply it directly to my skin. I store extra gel in the fridge for up to a week.
Compost the Dead Leaves
Completely dead leaves can go into the compost bin. They break down into nutrients for the garden. I avoid composting diseased leaves to prevent spreading pathogens.
My Personal Observations After Two Weeks
I tracked my aloe closely during the two-week cleanup period. Here is what I noticed.
Day 1: The Plant Looked Sparse
After removing the dead leaves, the plant looked bare. I worried I had ruined it. But the remaining leaves were healthy. They just needed time.
Day 4: The Cuts Started Drying
The cut ends began to dry out. They turned slightly brown. This was normal. The plant was forming a callus.
Day 7: The Plant Perked Up
The leaves looked firmer. They turned slightly greener. The plant seemed to have more energy now that it was not supporting dead tissue.
Day 10: New Growth Appeared
Tiny new leaves emerged from the center. They were bright green and soft. This was the first sign of recovery.
Day 14: The Plant Looked Beautiful
The cuts were fully healed. The shape was neat and compact. The new growth was visible. The plant looked healthier than before.
Frequently Asked Questions
Can I remove withered aloe leaves at any time of year?
Yes, but the best time is spring or early summer. This is when the plant is actively growing. It can recover faster. If you remove leaves in winter, the plant may take longer to heal. The cuts may stay open longer.
What if the withered leaves are in the center of the plant?
Center leaves are usually new growth. If they are withered, something is wrong. It could be overwatering, root rot, or pest infestation. Check the roots first. Remove the plant from the pot. Trim away any rotted roots. Repot in fresh soil. Then remove the withered center leaves.
How do I know if a leaf is dead or just damaged?
Dead leaves are completely brown, yellow, or papery. They pull away from the plant easily. Damaged leaves still have green areas. They may have brown tips or spots but are still alive. Only remove dead leaves. Damaged leaves can still provide energy.
Final Thoughts on Cleaning Aloe
I have killed too many aloe plants to count. But I have also learned from every failure. The key to cleaning withered foliage for a neat aloe shape is patience. Do not rush. Do not remove too much. Wait two weeks. Watch the plant respond.
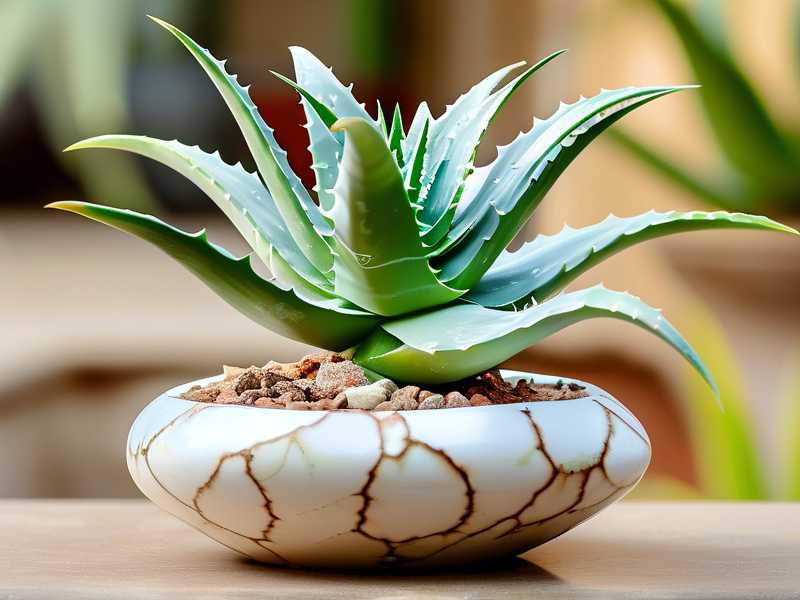
My aloe now looks like a perfect rosette. It has thick, upright leaves. It has no dead or damaged foliage. I water it carefully. I give it the right light. I prune it only when necessary.
If you follow these steps, your aloe will look better too. It takes time. It takes practice. But it is worth it. A neat aloe shape is not just about looks. It is a sign of a healthy, happy plant.