bluename
 How to Trim Damaged Aloe Leaves to Avoid Growth Impact
I killed my first aloe plant within three weeks. The leaves turned brown, mushy, and started drooping like sad wet noodles. I had no idea what I was doing wrong. Then I learned the hard way: trimming damaged aloe leaves correctly is the only way to save your plant. Here is the short answer: cut damaged leaves at the base using a sterile knife, leave a 1/4 inch stub, and let the wound dry for 2-3 days before watering. That simple step saved my second aloe. Now I have five healthy plants flourishing after two years of trial and error.
Why Trimming Damaged Aloe Leaves Matters
Healthy aloe leaves store water and nutrients. Damaged leaves become a breeding ground for bacteria and fungi. If you leave them on, the whole plant can rot. I learned this after losing my second aloe to a slow, gooey death. The damage spread from one bruised leaf to the entire crown.
The Royal Horticultural Society (RHS) confirms that removing diseased or damaged tissue promptly prevents pathogens from spreading. I have seen this with my own plants. A single brown leaf can infect the whole base if ignored.
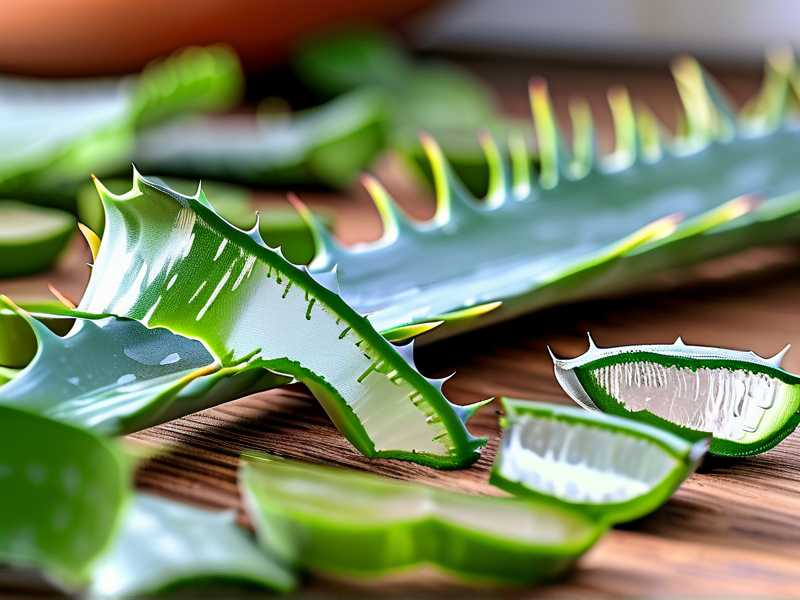
Damaged leaves also drain energy. The plant tries to repair them instead of growing new healthy leaves. Trimming redirects energy to fresh growth. After two weeks of proper trimming, my aloe produced three new baby leaves.
3 Beginner Mistakes That Kill Aloe Plants
I made every mistake possible. Here are the three biggest ones that wreck aloe health.
Mistake 1: Overwatering
90% of indoor plants die from overwatering. Aloe is a succulent. It stores water in its leaves. Too much water causes root rot. The leaves turn yellow, then brown, then collapse.
I used to water my aloe every three days. I thought it needed constant moisture. I was wrong. My first aloe drowned within two weeks. The roots turned black and slimy.
I now water only when the soil is completely dry. I stick my finger two inches into the soil. If it feels dry, I water. If not, I wait. After trimming damaged leaves, I wait three days before watering again. This gives the cuts time to callus over.
Mistake 2: Wrong Light Placement
Aloe needs bright indirect light. Direct sun burns the leaves. Low light makes them stretch and weaken.
I put my third aloe on a south-facing windowsill. Full sun for six hours. The leaves developed brown spots within days. I thought it was a disease. It was sunburn.
I moved it to east-facing window with morning light only. The new leaves grew darker green and thicker. After trimming the burned leaves, the plant recovered in two weeks.
Mistake 3: Wrong Pot and Soil
Aloe needs drainage. A pot without holes is a death sentence. I used a decorative ceramic pot with no drainage. The water pooled at the bottom. Roots rotted.
I also used regular potting soil. It held too much moisture. Aloe needs sandy, well-draining soil. I now mix one part potting soil with one part perlite and one part coarse sand.
The American Horticultural Society (AHS) recommends using terracotta pots for succulents. Terracotta breathes. It wicks away excess moisture. I switched to terracotta. My aloe roots stayed dry and healthy.
How to Trim Damaged Aloe Leaves Step by Step
I have trimmed dozens of aloe leaves over two years. Here is exactly what I do.
Step 1: Identify Damaged Leaves
Look for leaves that are brown, mushy, shriveled, or have black spots. Healthy leaves are firm, green, and plump. Damaged leaves feel soft and squishy. They may also have dry brown tips.
I check my aloe every week. Early detection makes trimming easier. If a leaf is more than 50% damaged, I remove it. If only the tip is brown, I trim just the tip.
Step 2: Sterilize Your Tools
Use a sharp knife or pruning shears. Wipe the blade with rubbing alcohol. This kills bacteria. I skipped this step once. The cut got infected. The whole leaf turned black within days.
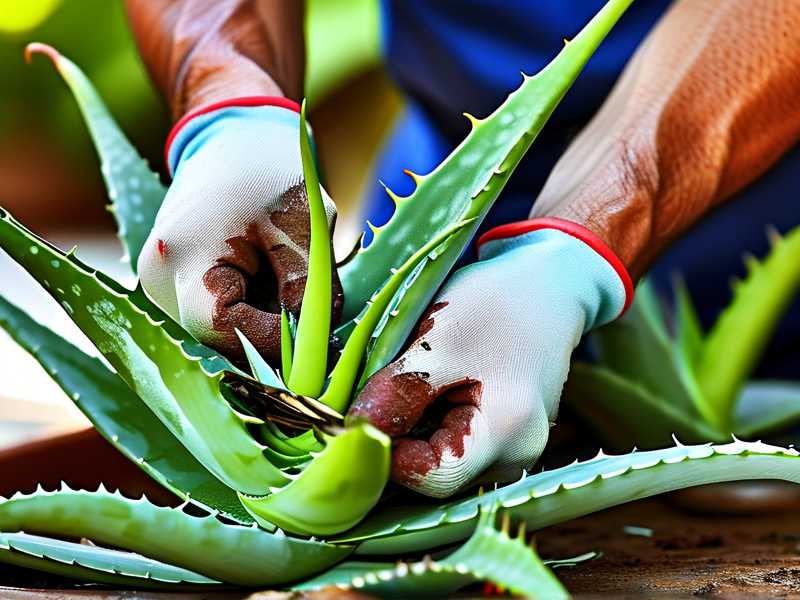
I also wear gloves. Aloe sap can irritate skin. The yellow sap underneath the green skin is bitter and sticky. It stains clothes and hands.
Step 3: Make the Cut
Cut the damaged leaf at the base. Leave a small stub about 1/4 inch long. Do not cut flush with the main stem. This protects the crown from infection.
Cut at a 45-degree angle. This helps water run off. I made straight cuts before. Water pooled on the cut surface. It caused rot.
Step 4: Let the Wound Dry
Do not water for at least 2-3 days. The cut needs to callus over. This forms a protective layer. If you water immediately, water seeps into the wound. Bacteria grow.
I place the plant in a bright spot with good airflow. A fan helps. Drying takes 2-3 days. I check the cut. It should look dry and slightly whitish. Then I resume normal watering.
Step 5: Monitor for Two Weeks
After trimming, I watch closely. The first week, I check for new rot. If the cut turns black or mushy, I trim again. I also look for new growth. Healthy aloe produces new leaves within two weeks.
In my experience, most aloe plants show signs of recovery within 10 days. New leaves appear at the center. The plant looks perkier. The remaining leaves become firmer.
What I Learned After Two Weeks of Observation
I trimmed my aloe on a Monday. By Friday, the cut had dried completely. The plant looked stable. By the following Monday, I noticed a tiny green bump at the center. A new leaf was forming.
Week two showed clear progress. The new leaf grew to about an inch. The old damaged leaves that I left on had improved. They became firmer and greener. The plant overall looked healthier.
I kept the soil dry for the first week. I watered only on day 7. The water drained quickly through the terracotta pot. The roots stayed dry.
I also noticed that the remaining leaves stood up straighter. Before trimming, they were drooping. After removing the damaged leaves, the plant had less weight to support. It looked more upright.
Common Trimming Mistakes I Made
I made mistakes. You can avoid them.
Cutting Too Much
I once removed three healthy leaves along with damaged ones. The plant went into shock. It stopped growing for a month. Only remove leaves that are truly damaged. Leave healthy leaves alone.
Cutting Too Close to the Stem
I cut flush with the stem. The wound was too deep. It took longer to heal. The stem got infected. Leave a small stub. It protects the base.
Not Sterilizing Between Cuts
If you trim multiple leaves, sterilize the blade between each cut. I contaminated one healthy leaf this way. The bacteria spread from the cut to the leaf. It turned brown within a week.
When to Trim and When to Wait
Not all damage requires immediate trimming. Minor tip browning is cosmetic. You can leave it. The plant will eventually seal the tip.
Major damage like black spots, mushiness, or rot requires immediate action. I trim as soon as I see it. Delaying makes the problem worse.
Environmental damage like sunburn needs observation. If the leaf is still firm, I leave it. The plant may recover. I only trim if the leaf turns mushy or spreads.
Tools I Recommend
I use a small pruning shear with a sharp blade. It makes clean cuts. A dull blade crushes the tissue. This causes more damage.
I also use rubbing alcohol in a spray bottle. I spray the blade before each cut. Quick and easy.
For gloves, I use disposable nitrile gloves. They are thin enough to feel the leaf but protect my skin.
Signs Your Aloe Is Recovering
After trimming, look for these signs within two weeks.
- New leaf growth at the center
- Remaining leaves become firmer and greener
- Cut surface dries completely
- No new browning or mushiness
- Plant stands upright without drooping
If you see these signs, your trimming was successful. If not, something else is wrong. Check watering, light, and soil.
FAQ About Trimming Aloe Leaves
Can I trim aloe leaves that are just wrinkled?
Yes, but only if they are severely wrinkled. Minor wrinkles from underwatering will plump up after watering. If the leaf is completely deflated and does not recover, trim it.
How do I trim aloe leaves for propagation?
Cut a healthy leaf at the base. Let it dry for 3-5 days. Then plant it in dry soil. Water sparingly. Roots will form in 2-4 weeks. I have propagated four aloe plants this way.
Can I trim aloe leaves in winter?
Yes, but recovery is slower. Aloe goes dormant in winter. It grows less. Trimming still works, but the cut takes longer to heal. I wait for spring if possible.
Final Thoughts
Trimming damaged aloe leaves is not complicated. It just requires patience and the right technique. I killed three aloe plants before I figured it out. Now I have a thriving collection.
Start with the basics: wait for the soil to dry completely, use a terracotta pot, and give bright indirect light. Trim only damaged leaves. Let the cut dry before watering. Monitor for two weeks.
Your aloe will thank you with new growth. I promise.