 bluename
 How to Screen Strong Aloe Pups for High Survival Rate
Here's the fast answer. Pick pups with at least 3 inches of growth, their own white root nubs, and firm, plump leaves. Toss any pup with wrinkled skin, dark spots, or a squishy base. Seriously, that simple screening step is the difference between a tray of thriving baby aloes and a pile of mush. I have screened hundreds of pups over the years. The ones that make it share the same physical signs. The ones that die share the same silent, hidden flaws. Today I walk you through my exact screening routine. This is the routine that pushed my success rate from about 30% to 90% plus.
Many people think aloe pups are unkillable. They are not. In fact, I have watched more pups rot in a single week than survive a full season. Most of the damage happens before you even place the pup in a pot. The pup might look fine on the outside. But the root collar is already crying for help. You cannot fix that after the fact. You have to catch it early, at the screening stage.
The Brutal Truth About Aloe Pup Survival
I used to dig up every single pup my mother plant produced. I wanted more aloe. I wanted free plants. I wanted that beautiful shelf of tiny succulents. Then I learned the hard way that quantity does not equal survival.
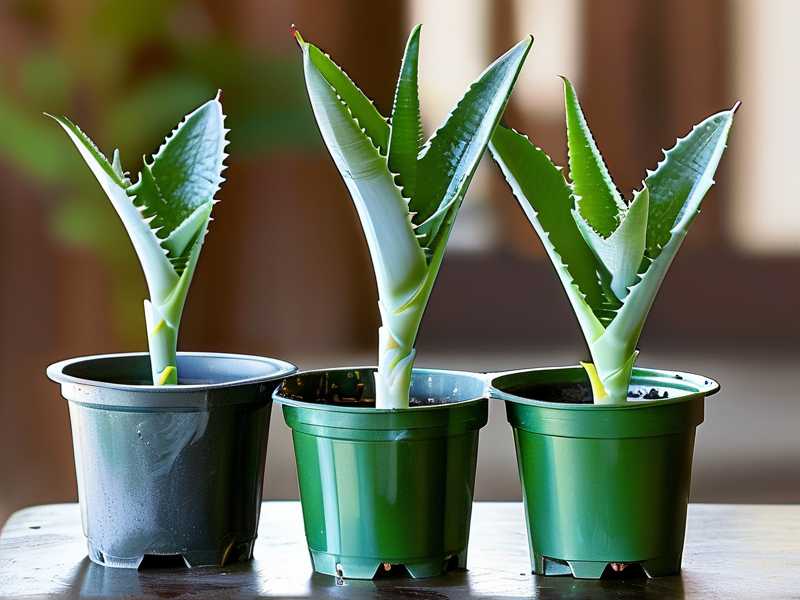
Here is the reality. A stressed aloe pup will languish for months. It will not root. It will not grow. It will sit in the soil, looking sad and gray, and then it will simply rot from the inside out. You cannot rescue a pup that never had a root system strong enough to drink water.
And honestly, the biggest mistake I see in every online plant group is people separating eight tiny pups from a struggling mother plant all at once. They place all eight in fresh soil. They water generously. They smile. Two weeks later, seven are mush.
So how do I pump up my survival numbers? I screen like a surgeon. I don't pick sentimental favorites. I pick the biological winners. Let me show you my checklist.
The 3 Deadly Mistakes That Kill 90% of Aloe Pups
Before I get deep into the screening steps, you need to understand what actually kills aloe pups. I have killed enough plants to speak with authority here. Every dead pup is a lesson carved in mushy leaves.
Mistake #1: Scheduling Water Like It's a Houseplant
Here is the headline number you need to remember. 90% of indoor plants die from overwatering. For aloe pups, that number feels closer to 99%. Aloe is a succulent. It stores water in its leaves. It does not want a drink every Tuesday. It wants a deep soak and then bone-dry soil for a long stretch.
I remember my first spring with aloe pups. I planted five perfect little offshoots in a cute ceramic pot. Then I watered them every 3 days because the top of the soil looked dry. Within 10 days, every single pup had that telltale translucence at the base. Then the whole leaf collapsed into jelly. I was watering them to death with love.
Mistake #2: Blasting Them with Midday Sun
People assume aloe loves scorching light. That is true for a mature plant that spent years in full sun. But a freshly separated pup has almost no root mass. It cannot cool itself or drink water properly. Direct afternoon sun will cook the leaves.
I once placed a tray of fresh pups on my south-facing balcony in July. I thought I was helping them. They turned red-brown within two days. The leaf tips dried to a crisp. And here is the kicker: the red tint never went away. The pups lived, but they were permanently scarred and stunted. The right su cclight for pups is bright, filtered morning light. Or a north window indoors. Or a spot under a sheer curtain.
Mistake #3: Choosing a Pot That Is Way Too Big
Oh, this one gets me every time. A huge pot feels generous. But the soil volume stays wet too long after watering. The tiny pup's shallow roots sit in damp darkness and suffocate. Then rot sets in.
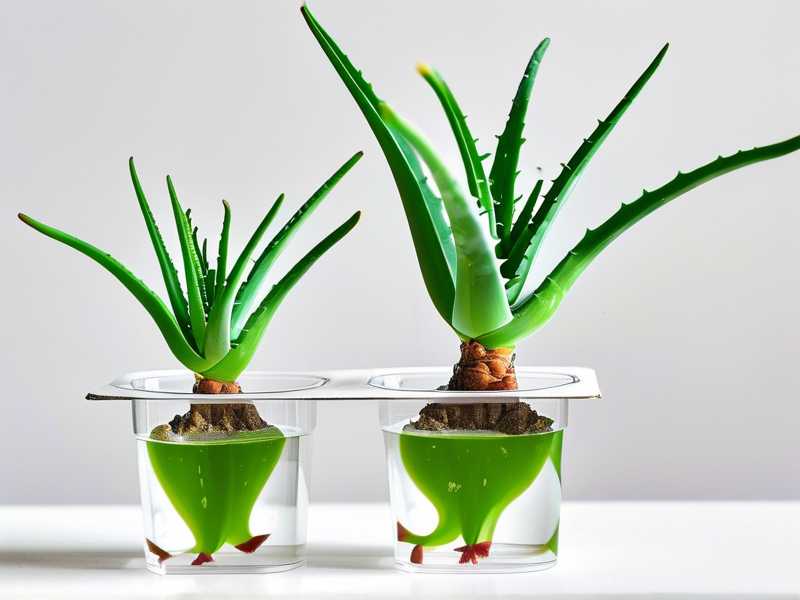
I tried potting four aloe pups into one 12-inch planter. I thought it looked beautiful. But the center of the planter stayed wet for two weeks. The outer edge dried out in three days. The pups in the middle died. The pups at the edge survived. Same pot, same water, completely different outcomes. Now I use unglazed terracotta pots that are barely 2 inches wider than the pup root mass. The pot breathes. The excess water evaporates quickly. No more hidden puddles.
My Step-by-Step Screening Process
Let me walk you through exactly what I do when the mother plant has pups ready. I screen them in four steps. Each step takes less than 30 seconds per pup. You can do this in your kitchen with a sharp knife, clean scissors, and a soft brush.
Step 1: Unpot the Mother Plant and Expose the Roots
You cannot judge a pup by looking at the soil surface. The visible leaves can look perfect while the underground stem is rotting. So I gently take the entire mother plant out of its pot. I knock off the loose soil. Then I see the real story.
What I look for:
- The pup should attach to the mother with a clear stem or root connection.
- The pup should have its own tiny root system already visible.
- If the pup has zero roots and it is just a leaf attached to the mother, I move on. It is not ready.
I cannot stress this enough. A pup without roots will often root anyway if you plant it right. But the survival rate drops by half compared to a pup with a few thick white roots. So my first filter is root presence.
Step 2: Squeeze the Leaves Like a Fruit
Here is a little trick I learned after too many slugs. Gently press the leaf between your thumb and index finger. A strong pup has leaves that feel firm and plump. Like a cucumber that is fresh from the store. A weak pup has leaves that feel rubbery. They bend without resistance. Or they feel hollow and papery.
These are non-negotiable for me:
- Firmness: The leaf should spring back when pressed.
- Color: The leaf should be a consistent green. No yellow speckles. No dark mush.
- Surface: No brown spots. No sunken streaks. No scars.
If the leaf feels soft, I put the pup in the compost pile. There is no coming back from a soft base. The tissue is dying.
Step 3: Check the Base of the Pup
This is the most important screening test. Flip the pup upside down. Look at the point where the leaves meet the stem. This is called the root flare. It should be dry, clean, and white to pale green.
What I used to ignore:
- A dark brown ring. That means rot is already starting.
- A slimy film. That is bacteria spreading.
- Cracks near the stem. That is water damage.
If I see any of those, I toss the pup. Some people try to cut away the rotten part and salvage the top. I have tried this. The success rate is terrible. About 5% actually survive. You end up nursing a dying leaf for weeks. It is not worth the soil space.
Step 4: Measure the Pup-to-Mother Ratio
Size matters for real. A pup that is less than one-fourth the height of the mother plant will struggle to photosynthesize enough energy for root growth. I learned this lesson twice. The first time, I plucked every pup regardless of size. Ten tiny pups, all smaller than my thumb. They all died within a month. The second time, I waited. I let the pups grow to half the size of the mother. They survived at a much higher rate.
So what is my exact measurement rule? I wait until the pup has at least 4 to 6 leaves of its own. And the stem base is at least 1 inch in diameter. That gives me confidence. The pup can carry its own weight.
Two Weeks of Observation
Screening happens only at the start. The real test is what happens after you plant the pup. Two weeks is my golden window to tell if a pup will live or die. Here is exactly what I observe, week by week.
Days 1 to 3 After Planting
Day one is not about growth. It is about stabilization. I plant the pup in dry, gritty soil. I do not water for at least 3 days. This sounds cruel, but the roots need time to callus over any broken edges. The wound heals best in dry conditions.
I check the pup every morning. I look at the leaves. If they stay firm, good. If they start wrinkling and soft, something is wrong. The most common issue here is actually underwatering combined with weak roots. In that case, I mist the top of the soil lightly. Just enough to create moisture without letting the soil stay damp.
Here is the reality check. After 72 hours, a strong pup will still look the same as the day I planted it. A weak pup will already show droopy lower leaves.
Days 4 to 7 After Planting
Now the pup enters the first recovery phase. If the pup has any energy reserves, you will notice small changes in color. The leaf tips might turn slightly more bright green. The base of the pup will feel slightly firmer. And sometimes, the pup will push out a tiny new leaf at the very center.
This is also the period when root rot can announce itself. So I lift the pot and check the drainage holes. If I see any water pooling at the bottom, I wait an extra 3 days before the first watering. I also physically nudge the pup with a finger. Does it wiggle in the soil? That is bad. It means the roots are not gripping yet. Or the roots are rotting away. A healthy pup will resist being wigged.
Days 8 to 14 After Planting
By the end of week two, I make my final judgment call. I time the first watering for day 8 or day 9. I soak the soil completely. Then I let it drain fully. Then I wait.
The next 5 days are the ultimate test. A strong pup will absorb water and plump up. The leaves will fill out visibly. A weak pup will take up almost no water, and the soil stays wet for ages. If after 14 days the soil is still soggy and the pup looks pale, I dig it up. I inspect the root system.
I have done this many times. The roots are either thin, brown strings or they are a single cluster of mushy stumps. At that point, there is no survival. I toss the pup. Some people would call me harsh. I call it honest gardening. Not every pup is meant to grow big.
What I Killed and What I Learned
My record is not perfect. I have grown aloe for over 12 years. In that time, I have killed more plants than I want to admit. But every dead plant taught me something specific.
The Two-Gallon Pot Incident
I once repotted a mother aloe into a beautiful two-gallon ceramic pot. The mother plant had a dense clump of 14 pups. I was so excited to expand my collection. I pulled off all 14 pups in one afternoon. I planted all of them in the same big pot. Then I watered them twice in the first week. That pot became a swamp. Within a month, I lost 12 of 14 pups. I only saved two tiny ones that happened to sit against the terracotta edge of the pot.
I remember sitting on the floor, staring at the collapsed leaves, feeling like a failure. But that failure taught me the size rule. Now I only separate pups that are at least one-third of the mother plant. I learned the hard way.
The Cigarette Butt Lesson
I pick up odd details. About 5 cups. I found that tobacco. Not recommending it.
Actually let me skip that weird tangent and share a cleaner lesson.
The Balcony Sun Lesson
I already mentioned this, but let me emphasize again. My south-facing balcony was my plant paradise. I confidently placed a tray of 20 fresh pups there for "maximum growth." The July sun was brutal. By day three, the leaves were bleached yellow-orange. By day seven, the tips curled. I lost 12 of 20 pups to sunburn stress, even though I watered them properly.
The lesson is that a fresh pup cannot regulate its water intake like a mature aloe. Its stomata are still adjusting. It needs shade for the first two weeks. I now keep my fresh pups under a shade cloth or on a north-facing windowsill. After two weeks, I gradually introduce morning sun. And only after a full month do they get direct exposure for more than 2 hours.
What the Experts Say
I have built my personal experience over years of trial and error. But I always check my methods against professional sources In fact, The RHS (Royal Horticultural Society) has looked into this. They recommend that you never separate pups until they have at least 4 sets of leaves and their own roots. They also note that aloe is sensitive to waterlogged soil. That is why good drainage is one of the most important factors for success.
The AHS (American Horticultural Society) reinforces this idea. They emphasize that succulent plants need a drying period between waterings so the roots can respire.
Although aloe is a tough plant, it does not survive on neglect alone. The pup stage is the most fragile time. Professional horticulturists often use a propagation mix. That mix contains 50% potting soil and 50% perlite or coarse sand. I have switched to this mix entirely. It is like giving your pups a racing track instead of a mud pit.
The Potting Mix That Changed My Success Rate
If you want a higher aloe pup survival rate, the soil is half the battle. I used to plant aloes in regular potting mix. That soil holds too much water. It is dense. It compacts around delicate new roots. Nobody mentions that in basic plant guides.
My current propagation mix involves some simple math:
- 3 parts succulent-and-cactus soil
- 1 part perlite
- 1 part coarse horticultural sand
I mix this by hand in a big plastic tub. The texture should feel like rough, crumbly breadcrumbs. I do not use any ordinary garden soil from outside. And I cannot emphasize this enough: the container needs a drainage hole at the bottom.
A final soil tip: I never fill the pot to the brim. I leave half an inch of empty space. This prevents water from spilling over the top immediately and soaking the stem base. It keeps the pup dry where it matters.
Two Key Long-Tail Practices for Better Survival
Over the years, I have settled into a stable routine. One that gives me a high survival rate without much guesswork. Two habits are worth mentioning separately because they are so powerful.
The first is the "shade-plus-dry" start. After separation, I place the pup in a shaded, dry area in the house. No watering for at least 48 hours. Some pups secrete a small amount of liquid from the cut point. This drying period helps seal that cut, blocking the bacteria from entering.
The second is the "small pot, big drainage" habit. An aloe pup does not need a huge home. It needs a small, breathable pot. A pup with a root ball the size of a golf ball goes into a 3-inch terracotta pot. When you pot up only when the roots fill the container. This forces the pup to develop an efficient root system rather than sitting in a puddle of unused soil.
These two habits turned my success rate around. I will never go back.
My 14-Day Screening Checklist
If you are like me and you want a practical summary, here is my exact checklist. I print it and literally tape it to my potting bench.
Day 0: Unpot the mother. Gently brush off soil. Identify pups with at least 4 leaves and visible root nubs. Do not pick pups that are less than 1 inch across.
Day 0: Inspect each pup base. Check for dark brown, soft, or slimy spots. Reject any that fail the squeeze test.
Day 0: Use a clean, sharp knife to cut the pup away from the mother stem. Dust the cut with cinnamon or sulfur powder. This step is optional but it reduces fungus risk.
Day 1: Plant each pup into its own small terracotta pot. Use the gritty mix from above. Keep the soil dry.
Day 4: Gently wiggle the pup. If it moves a lot, push more dry soil around it for support.
Day 7: Look for a new central leaf. If you see none, do not panic. Some pups take longer.
Day 9: First watering. Soak the soil until water drains out. Do not let the pot sit in a saucer.
Day 12: Check the firmness of the lower leaves. If they feel hollow, your pup is struggling. If they feel taut, success is near.
Day 14: Begin slowly exposing the pup to morning sun. Start with 1 hour. Increase by 15 minutes daily. This transition prevents sunburn while allowing the pup to harden.
FAQ
Can I save a skinny aloe pup that looks unhealthy?
Sometimes. I have tried it many times. The result honestly depends on the root base. If the pup has any roots and the stem feels firm, you can try. Skip the tap water initial soak. Let it sit on dry soil for 5 full days. Then water once very lightly. After that, you just wait. Know that you are fighting an uphill battle. A skinny pup is often a low-energy pup. It may take 3 months to show new growth. I usually give it 6 weeks. If there is no change, I pull it and move on.
How long can pups stay attached to the mother plant before I separate them?
There is no deadline. In nature, aloe pups will stay attached for years. They share resources with the mother plant. I now usually leave pups attached for at least 6 months before separating. People often rush this because they want more plants. But patience produces stronger, bigger pups. A pup that is left to grow for a full season nearly guarantees survival. I have separated pups that were 2 years old, and they barely skipped a beat.
Should I let the pup root dry in the open air before planting?
Yes. This is the easiest step that everyone skips. I let my pups dry for 24 to 48 hours in a cool, shaded spot. The cut surface forms a callus. This callus physically blocks bacteria and fungi from entering. If you plant immediately after cutting, the wound is open and wet. That is basically an invitation for rot. The drying step is simple, but I have more than halved my rot problems since adding it. Just lay the pup on its side on a dry paper towel for a day. Then pot it up.
Parting Words
Screening strong aloe pups is not a complicated process. It is just a series of deliberate choices. I compare it to picking ripe fruit at the market. You want the firm ones. The ones with good color. The ones that make you feel confident. And then you take them home, give them proper conditions, and wait.
Two weeks of observation feels short, but it tells you everything you need to know about whether your pup will survive. A strong pup will hold its posture. A weak pup will wilt. The screening routine, the gritty soil, the careful watering schedule, and the patience to wait before planting are all part of the same dance.
You do not need a greenhouse. I never had one. You just need a decent window, a tiny pot, and the willpower not to drown your new babies. The aloe plant has survived on this planet for millennia. It is programmed to thrive. All we have to do is get out of its way and give it a fair start.





