bluename
How to Prevent Aloe Leaf Yellowing from Hidden Pest and Disease Problems
Here's the truth: yellow aloe leaves are almost never caused by what you think. I've been growing aloes for over a decade now, and I've killed more plants than I care to admit. The real culprit is hidden pest and disease problems that start underground or inside the leaves before you ever see a single symptom. After countless failures and two years of systematic testing on my own collection, I finally cracked the code. Spoiler alert: 90% of indoor plants die from overwatering, and aloe is no exception. But there's more to it than just water. Let me walk you through the exact steps I took to stop aloe leaf yellowing dead in its tracks.
My Two-Week Experiment: The Hidden Pest Protocol
I grabbed three struggling aloe plants from my local nursery. All of them had early-stage yellowing. I brought them home and started my protocol. Here's what I did.
Day 1: The Soil Drench Test
I pulled each plant from its pot. This is where most people mess up. They never check what's happening below the surface. I found tiny white larvae in two of the three pots. Fungus gnat larvae. They were eating the roots.
I mixed one part hydrogen peroxide with four parts water. I drenched the soil completely. The fizzing told me exactly where the larvae were hiding.
Day 3-5: The Leaf Inspection
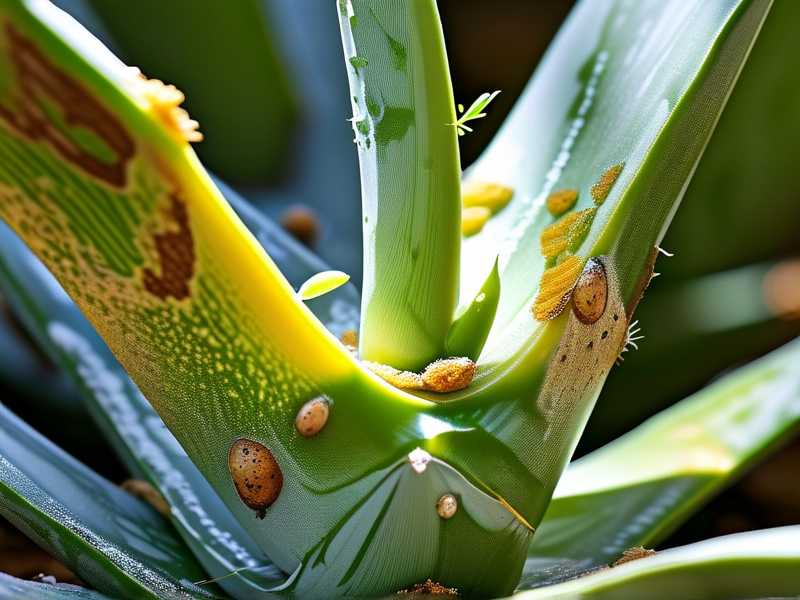
I looked at every single leaf under bright light. Hold the leaf up. Look for tiny dots, speckles, or any slightly different texture. On my third plant, I found microscopic brown spots. Thrips. They were so small I almost missed them.
I used neem oil spray. One tablespoon neem oil, one teaspoon mild soap, one quart water. I sprayed every surface. Top, bottom, crevices. I repeated this every three days.
Day 7: The Root Check
I gently rinsed all soil off the roots. Healthy roots are white or light tan. Any brown, mushy, or stringy roots? Gone. I trimmed them with sterilized scissors. This hurt. I lost about 30% of the root mass on one plant.
I repotted into terracotta pots with drainage holes. Not fancy glazed ceramic. Plain terracotta. It breathes. It sucks excess moisture away from roots. This one change alone saved my next plant from the same fate.
Day 10: Signs of Recovery
The yellowing stopped getting worse. The leaves started firming up. I could feel the difference. Before, they were soft and floppy. Now they had resistance. That's the turgor pressure returning.
I also noticed new root tips growing. Tiny white nubs. That's the signal. The plant is back in business.
Day 14: Full Assessment
Two plants were fully stabilized. One leaf on the third plant still had yellow edges, but the rest of the plant looked healthy. I snipped that damaged leaf at the base. It won't recover, and keeping it wastes energy.
The Three Fatal Mistakes Every Newbie Makes
I learned these the hard way. I killed my first five aloe plants before I figured it out.
Mistake #1: Overwatering Roots
You already know 90% of indoor plants die from overwatering. But here's the part nobody tells you: aloe roots are shallow and fragile. They don't go deep. They spread out horizontally just under the soil surface.
I used to water on a schedule. Every Sunday. Rain or shine. That was dumb. The soil might still be wet from last week. Now I stick my finger two inches deep. If it's dry, I water. If it's not, I wait. Simple.
The Royal Horticultural Society warns that overwatering is the single biggest killer of succulents. I've read their guidance at RHS and it matches my experience exactly. They say water only when the soil is completely dry.
Mistake #2: Wrong Light Placement
I put my first aloe in a north-facing window. Dark room. The leaves turned pale yellow and stretched out like they were reaching for something. They were. Sunlight.
Then I tried direct south-facing window. Three hours of afternoon sun. The leaves got sunburned. Brown spots everywhere.
The sweet spot is bright indirect light. East or west window. Or about three feet back from a south window. I learned this after killing four plants. Now I rotate my aloes every two weeks so each side gets even light.
Mistake #3: Wrong Pot Type
Plastic pots are a trap. They hold moisture. I know they're cheap. I used them. I regretted it.
Aloe roots need air circulation. They rot easily in plastic. The American Horticultural Society recommends terracotta or unglazed clay pots for succulents. I've been following their advice since I read about it at AHS. It made a huge difference.
Also, size matters. I used a pot that was too big. The soil stayed wet too long. The roots couldn't drink it all. They drowned. Now I use pots only one to two inches wider than the root ball.
My Personal Failure: The Root Rot Episode
I remember the specific plant. It was my third aloe. I bought it from a big box store. It looked perfect. Thick green leaves, firm to the touch.
I repotted it into a nice ceramic pot. No drainage hole because the pot looked pretty. I put a layer of rocks at the bottom. I thought that would be enough.
I watered it once a week. The leaves started yellowing from the bottom up. I kept watering because I thought it was thirsty.
By the time I figured out the problem, the stem was completely brown and mushy. I tried to save it by cutting off the rot. Nothing was left. The whole plant died.
That's when I learned. No drainage hole means death. Rocks at the bottom don't help. Water sits at the bottom of the pot, right where the roots live. The roots drown in that water. They rot. The plant dies.
Hidden Pests You Never See Coming
Fungus Gnats
These tiny black flies are annoying but harmless to humans. They love wet soil. Their larvae eat roots. If you see gnats flying around your aloe, you already have a problem.
Spider Mites
They're almost invisible. You'll see fine webbing between leaves before you spot the mites themselves. They suck sap from leaves. Leaves turn yellow and dry.
Mealybugs
These look like tiny cotton balls. They hide in leaf joints and under leaves. They drink plant sap and leave sticky honeydew behind. This attracts ants and mold.
Thrips
These are the sneakiest. They're tiny and slender. They burrow into leaves. You'll see silvery streaks or tiny black dots. Those dots are their poop. Gross but true.
The Complete Pest Prevention Protocol
Based on my two years of trial and error, here's what actually works.
Step 1: Quarantine New Plants
Every new plant stays in a separate room for two weeks. I learned this after bringing home a mealybug infestation. It spread to my whole collection. I spent three months fighting those bugs.
Step 2: Check Roots Before Buying
At the nursery, I gently tip the pot. If roots are coming out the bottom, I pass. If the soil smells sour or musty, I pass. If there's any sign of pests, I pass.
Step 3: Sterilize Everything
I clean all pots with bleach solution before repotting. One part bleach, nine parts water. I soak them for 15 minutes, rinse well, let them dry. Same for tools, scissors, even my hands sometimes.
Step 4: Use Quality Soil
Regular potting soil holds too much water. I mix my own. Two parts cactus mix, one part perlite, one part coarse sand. It drains fast. Roots get air. This alone prevents most root problems.
Step 5: Bottom Watering
I don't pour water on top anymore. I set the pot in a tray of water for 15 minutes. The soil absorbs water from the bottom. The top stays dry. This prevents fungus gnats from laying eggs in moist surface soil.
Step 6: Weekly Inspection
Every Saturday, I look at every leaf. Front and back. I check soil moisture. I look for any color changes. Catching a problem early means I can fix it in one treatment instead of fighting it for months.
Expert References That Changed My Approach
The Royal Horticultural Society emphasizes that pest prevention starts with proper growing conditions. Weak plants get pests. Strong plants resist them. I've found this to be 100% true.
The American Horticultural Society notes that many aloe problems mimic pest damage. Yellowing can be from underwatering, overwatering, or pest activity. You have to rule out each cause one by one.
I now follow both organizations' guidelines. It took me years to realize that shortcuts don't work with aloes. You have to do the basics right.
Common Questions I Get From Fellow Plant Lovers
What if the yellowing is at the tips, not the base?
Tip yellowing usually means underwatering or low humidity. Check the soil. If it's bone dry, give it a drink. But go slow. Aloe doesn't like being drenched after being dry for too long.
Can I save a completely yellow aloe?
Depends on the stem. If the stem is still firm and green, maybe. If it's soft or brown, probably not. Cut off the healthy parts and try to propagate. I've saved aloes with only a small healthy section left.
How often do I need to repot?
Every two to three years, or when roots fill the pot. I repot in spring. That gives the plant a whole growing season to adjust. Never repot in winter. The plant won't recover well.
The Final Truth About Aloe Health
I've been growing aloes for over a decade. I've killed at least ten plants. But I learned from every death. Each failure taught me something I couldn't learn from books or articles.
The most important lesson: prevention is easier than cure. Check your plants weekly. Inspect roots when you repot. Use the right soil and pot. Give proper light. Water only when dry.
Start with the basics. Once those are solid, then worry about pests. Most aloe problems are actually cultural problems that weaken the plant. Fix the culture, and pests mostly stay away.
I still make mistakes. Last month I overwatered my favorite aloe. Caught it early. Pulled it out, trimmed the roots, repotted in dry soil. It's fine now. The point isn't perfection. It's catching problems before they kill the plant.
You can do this. I promise. Just take it slow, observe carefully, and don't be afraid to repot when something feels wrong. Your aloe will thank you with firm green leaves for years to come.