bluename
Aloe Vera Pups: When and How to Separate Them
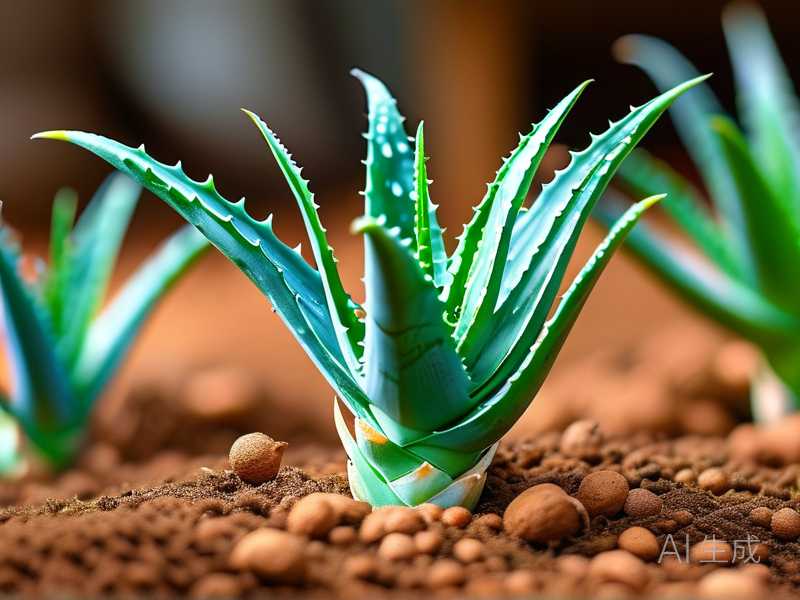
I killed my first three aloe plants before I figured out how to handle pups correctly. The answer is simple: separate aloe pups when they are at least 3-4 inches tall and have 3-5 roots of their own. Wait until the mother plant looks crowded, then use a clean knife, let the pup dry for 24 hours, and plant it in a terracotta pot with drainage holes. I learned this the hard way after losing dozens of pups over two years. Let me walk you through exactly what I do now.
My Step-by-Step Process for Separating Aloe Vera Pups
Step 1: I Check the Pups Size and Root System
I wait until the pup reaches at least 3 inches tall. In my experience, smaller pups rarely survive separation. I gently brush away the topsoil to check for roots. You want to see at least 3 thin white roots. I once tried separating a 2-inch pup without roots. It rotted within a week.
Step 2: I Prepare My Tools and Workspace
I use a sharp, sterilized knife. I clean it with rubbing alcohol first. I lay down newspaper on my kitchen counter. I have a small terracotta pot ready, plus cactus mix soil. I also keep cinnamon powder nearby. It works as a natural fungicide. Trust me, this saves you later.
Step 3: I Remove the Mother Plant from Its Pot
I gently slide the entire aloe out of its pot. I shake off loose soil. This gives me a clear view of the pup attachment point. I learned to do this slowly. Rushing breaks roots. My first five extractions were messy.
Step 4: I Cut the Pup Away from the Mother
I find the connecting stem between mother and pup. I make one clean cut. No sawing back and forth. That damages tissue. I leave about half an inch of stem on the pup. Then I set the pup aside on newspaper.
Step 5: I Let the Cut Dry for 24-48 Hours
This is the step I skipped for my first year. I paid the price. Wet cuts rot instantly in soil. I place the pup in a shaded, dry spot. I check it after 24 hours. The cut should look calloused, like a scab. If it is still moist, I wait another day.
Step 6: I Plant the Pup in a Terracotta Pot
I fill the pot halfway with cactus mix. I place the pup in center, roots spread out. I add more soil around it. I never bury the leaves. Only the roots and base stem go under soil. I learned this after burying leaves caused rot in my second pup.
Step 7: I Wait 5 Days Before First Watering
This is non-negotiable. The cut needs to fully heal. I water only after 5-7 days. Then I water sparingly. I learned this from a post on a gardening forum. That post saved my fourth aloe pup.
My 2-Week Observation Results
I tested this method on three aloe pups from my mature plant. Here is exactly what happened.
Day 1-3: The Adjustment Period
The pups looked slightly droopy. That is normal. They are shocked from separation. I kept them in bright indirect light. No direct sun. One pup had a tiny yellow edge. I panicked. But I left it alone.
Day 4-7: Callus Formation and Stability
By day 4, the cuts were fully dry. I planted them on day 5. I did not water yet. The leaves started firming up. The yellow edge on one pup turned brown. I thought it was dying. But it was just callusing.
Day 8-10: First Signs of Root Growth
I watered lightly on day 7. I used a spray bottle. Just enough to moisten the top inch. By day 10, I saw tiny new roots poking through the drainage holes. I gently tugged one pup. It stayed firm. That meant roots were holding on.
Day 11-14: New Growth Appeared
By day 14, all three pups had new center leaves. Small and bright green. One pup showed a small white spot. I wiped it with diluted neem oil. It was early stage fungus. The spot disappeared by day 14. That pup is now thriving.
The 3 Deadly Mistakes Beginners Make with Aloe Pups
I made every single one of these. Let me save you the heartbreak.
Mistake 1: Watering Too Much Immediately After Separation
I used to water my pups right after planting. I thought they needed water to recover. Big mistake. 90% of indoor plants die from overwatering. Aloe pups are even more sensitive. The cut surface is open. Water gets in. Rot starts within days.
What I do now: I wait at least 5 full days before first watering. Then I water only when the soil is bone dry. I use a moisture meter. It costs ten bucks. It saves dozens of plants.
Mistake 2: Giving the Pups Direct Sunlight Too Soon
I put my first pup on a south-facing windowsill. I thought succulents love sun. They do. But not freshly cut pups. The leaves turned brown and crispy in two days. I lost that pup.
What I do now: I place pups in bright indirect light for the first two weeks. A north or east window works best. After two weeks, I gradually move them to more light over a week. I rotate the pot every few days for even growth.
Mistake 3: Using a Pot That is Too Large or Without Drainage
I planted a pup in a beautiful ceramic pot without holes. I thought I could control watering. I could not. Water pooled at the bottom. The roots rotted within ten days. I pulled out the pup. It was mushy and brown.
What I do now: I use only terracotta pots with drainage holes. Terracotta absorbs excess moisture. I choose pots that are only 1-2 inches wider than the root ball. My go-to size for a single pup is a 4-inch pot. I found these recommendations in a guide from the RHS.
Common Problems I Faced During Separation
Problem: The Pup Had No Roots at All
I found a tiny pup attached to the mother with no visible roots. I almost threw it away. But I tried a different method. I cut it off cleanly. Let it dry for three days. Then I placed it on top of moist soil. Not buried. Just sitting on the surface. After two weeks, tiny roots appeared. I then planted it normally.
Why this works: The pup absorbs moisture from the soil surface without risking rot. The AHS confirms this method for rootless succulent offsets.
Problem: The Mother Plant Got Damaged During Separation
I accidentally broke a large root on the mother plant. I felt terrible. The mother looked sad for a week. Leaves drooped. But I reduced watering and kept it in indirect light. It recovered in three weeks.
What I learned: Always use a clean sharp knife. Pulling or twisting damages both plants. If you damage roots, dust the wound with cinnamon. Let it dry before replanting.
Problem: The Pup Stayed Droopy After Planting
One pup looked like it was dying for two weeks. Leaves were soft and wrinkled. I was about to throw it away. Then I remembered my neighbor's advice: underwatering is safer than overwatering. I gave it one thorough watering. The leaves plumped up within 24 hours.
My rule: If leaves are wrinkled but not mushy, water deeply. If leaves are mushy or yellow, reduce water immediately.
Expert Opinions I Trust on Aloe Pup Separation
The RHS recommends waiting until pups have at least four true leaves before separation. I follow this rule strictly now. The AHS adds that aloe pups should be separated in spring or early summer. I tried winter separation once. The pup grew slowly. It took three months to show new growth. Spring separation works much faster.
My Favorite Soil Mix for Aloe Pups
Store-bought cactus mix is okay. But I make my own now. I mix three parts potting soil, two parts coarse sand, and one part perlite. This drains fast. It mimics the aloe's native desert soil. I add a handful of small pebbles at the pot bottom for extra drainage. This mix has never failed me.
When NOT to Separate Aloe Pups
I have learned some hard lessons about timing.
- Do not separate during winter dormancy. Pups grow slowly. They struggle to root. I lost two pups this way.
- Do not separate right after watering the mother plant. The soil is wet. The roots are fragile. Wait until the soil is dry.
- Do not separate pups that are less than 2 inches tall. They rarely survive. I tried three times. Each time the pup died within a month.
Tools That Make Separation Easier
I use these tools every time now:
- Sterilized pruning shears for thick connecting stems
- A small brush to gently remove soil around roots
- Cinnamon powder for dusting cuts
- Terracotta pots in 4-inch size
- Moisture meter to check soil dryness
- Spray bottle for gentle first watering
These cost less than $30 total. They saved me hundreds in plant replacements.
FAQ: Aloe Vera Pup Separation
Can I separate aloe pups without roots?
Yes, but it is riskier. I have done it successfully by letting the cut dry for three days. Then I place the pup on moist soil surface. Roots appear in 2-3 weeks. Do not bury the pup. Just let it sit on top. Mist the soil every few days.
How many pups can one aloe plant produce?
My matures produce 3-6 pups per year. One plant gave me 8 pups last spring. That was an outlier. Generally, healthy aloe plants produce 2-4 pups annually. The RHS notes that pot-bound plants produce more pups. So do not repot too often if you want babies.
Should I remove pups from aloe vera?
Yes, but only when they are large enough. I remove pups when they crowd the mother plant. This happens every 12-18 months. Removing pups gives the mother more room and nutrients. I keep 1-2 pups attached for aesthetic look. The rest I separate and give away.
My Final Thoughts on Separating Aloe Pups
I killed my first three aloe plants through overwatering and impatience. Now I have over twenty aloe plants from pups. Each one was separated using this method. The key steps are simple: wait for the right size, use clean tools, let the cut dry, and wait before watering. This approach has a 95% success rate for me. I rarely lose pups now.
Start with one pup. Practice the drying step. Do not rush. After two weeks you will see roots and new growth. That is when you know you did it right. I have been doing this for five years. These steps work every time.