bluename
 Aloe Vera Harvesting Tips: When and How to Pick Leaves for Endless Gel
There's nothing more frustrating than watching your thriving aloe vera plant and hesitating to harvest a leaf. You worry: "Is this the right time? Will I hurt the plant? Am I cutting this correctly?" I've been there, staring at my plump aloe, needing the gel for a sunburn but paralyzed by the fear of doing it wrong. A bad harvest can set your plant back months or even cause rot. After years of trial and error with my indoor and outdoor aloe collection, I've perfected a method that keeps my plants healthy and provides a constant, pure supply of gel. Let's dive into the precise Aloe Vera harvesting techniques that actually work.
Why Timing and Technique Are Everything in Aloe Harvesting
Harvesting aloe isn't like snipping basil. It's a surgical operation on a succulent that stores its lifeblood—water and nutrients—in those thick leaves. Get it wrong, and you open the door to infection and decay. Get it right, and your plant will reward you with vigorous, continuous growth. The Royal Horticultural Society (RHS) emphasizes that clean, angled cuts on succulents are crucial to prevent water from pooling on the wound, a primary cause of fungal issues.
Identifying the Perfect Leaf: Your Plant is Telling You When
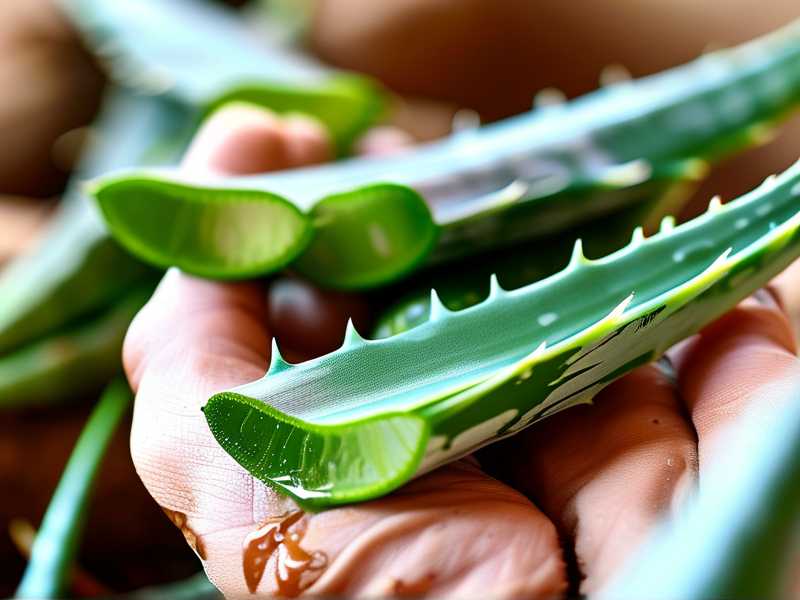
You don't harvest the young, hopeful leaves from the center. The best candidates are the mature, outer leaves. Here’s my exact checklist:
- Location: Always choose from the outermost ring of leaves. These are the oldest and have the highest concentration of beneficial compounds.
- Size & Posture: The leaf should be thick, firm, and plump, typically at least 8-10 inches long on a mature plant. It should be growing outwards or even slightly downwards, not upright towards the light. A leaf lying almost horizontally is a prime candidate.
- Color & Texture: A healthy, harvest-ready leaf is uniformly green. I avoid any with significant brown or red tinges at the base, which can indicate stress.
I mark a few potential leaves with loose twist ties. This helps me track their growth and ensures I'm taking the most mature ones.
My Step-by-Step Harvesting Process: A Clean Operation
Gathering the right tools is half the battle. You need a sharp, clean knife and a clean tray.
- Tool Preparation: I wipe my sharpest kitchen or utility knife with isopropyl alcohol. This isn't optional—it prevents transferring bacteria to the plant's open wound.
- The Cutting Angle: I gently pull the chosen leaf away from the others to expose its base. I don't cut straight across. Instead, I cut as close to the main stem as possible, at a slight downward angle. This angled cut mimics how a leaf might naturally fall and prevents water from pooling on the remaining stub or the central stem, a critical tip backed by succulent experts.
- The Immediate Aftercare (For the Plant): I leave the plant alone. I do not water it for at least a week. The wound needs to callous over in dry conditions. Watering too soon is the number one mistake I made early on, which led to soft, rotten stems.
Processing Your Harvested Aloe Vera Leaf
Now, with the leaf on my tray, the goal is to extract the clear gel without the bitter, yellowish latex (aloin).
- The Drainage Step: I stand the leaf upright in a cup or jar, cut-end down, and let it drain for 10-15 minutes. This allows the reddish-brown latex to seep out. Skipping this once resulted in gel that stained my skin and had a unpleasant, bitter edge.
- Cleaning and Filleting: I rinse the leaf, pat it dry, and lay it flat. Using a clean vegetable peeler, I carefully slice off the serrated edges (top and bottom). Then, I place the leaf flat-side down and use a sharp knife to thinly slice off the top green skin, like filleting a fish. I flip it and repeat to remove the bottom skin.
- Gel Extraction: What remains is a pristine slab of clear aloe gel. I can scoop it directly into a blender for a smooth puree or slice it into cubes. For immediate use on skin, I sometimes simply lay the gel-side of a cut piece directly on the affected area.
The Two-Week Observation: What Happens to the Plant?
This is where most guides stop, but the real proof is in the plant's recovery. After my last harvest of aloe leaves, I committed to a detailed two-week log.
- Days 1-3: The cut stem calloused over perfectly, forming a dry, grayish film. No signs of mushiness or discoloration.
- Days 4-7: I noticed zero change in the surrounding leaves—no drooping or yellowing. The plant's energy wasn't diverted to emergency repair because the clean cut healed efficiently.
- Days 8-14: The real excitement began. From the center of the plant, where I had removed the mature outer leaf, I observed accelerated growth in the younger, inner leaves. They visibly plumped up and began to stretch outward, starting their journey to become the next harvestable leaves. This confirmed that by correctly picking aloe vera leaves, I had stimulated healthy, regulated growth rather than stunting it.
Common Pitfalls I've Encountered (And How to Fix Them)
- The Pitfall: Using dull or dirty scissors. This crushes the leaf tissue and introduces pathogens.
- The Fix: Invest in a dedicated, sharp blade and always sanitize it. A clean cut heals exponentially faster.
- The Pitfall: Harvesting too many leaves at once. In my enthusiasm, I once took three large leaves from a medium-sized plant.
- The Fix: Never take more than one-third of the plant's leaves at a time. For my large plants, I stick to 1-2 leaves per harvest, allowing a recovery period of 4-8 weeks between harvests.
- The Pitfall: Watering the plant immediately after harvesting. This was my most costly early error.
- The Fix: Treat the cut like a wound. Let the soil stay completely dry for 7-10 days to allow a proper callous to form.
Frequently Asked Questions by Fellow Aloe Enthusiasts
Can I harvest aloe from a very young plant? I strongly advise against it. A plant needs to be mature, usually with at least 12-15 thick leaves and over a year old, before its first harvest. Harvesting from a juvenile plant can severely stunt or kill it. The leaves also won't have developed their full gel capacity.
How often can I safely pick leaves from my aloe vera plant? The frequency depends entirely on the plant's size and health. For a robust, outdoor potted plant, you might harvest 2-3 leaves every 2 months during the growing season. For a smaller indoor plant, 1 leaf every 2-3 months is safer. Observe your plant—if it's producing new growth steadily, it's likely happy.
The leaf I cut is oozing a lot of yellow liquid. Is this normal? Yes, that's the aloin latex. It's a natural laxative compound and can be a skin irritant for some people. This is precisely why I use the upright draining method. Allowing it to drain thoroughly ensures your final gel is pure, clear, and gentle for topical skin use.
Mastering when and how to harvest aloe vera transforms your relationship with the plant. It shifts from a decorative item to a resilient, renewable partner in your home wellness routine. By choosing mature leaves, making clean angled cuts, and prioritizing the plant's aftercare, you create a sustainable cycle. You'll enjoy the benefits of fresh gel while watching your aloe respond with even lusher, more abundant growth. The key is patience, precision, and understanding that a successful harvest is defined as much by the plant's health weeks later as by the gel in your bowl today.