 bluename
 How to Remove Yellowed Bottom Leaves of Mature Aloe: My 2-Week Fix That Actually Works
If you’re staring at a mature aloe vera with yellow, mushy bottom leaves, here’s the honest answer: Stop watering it for 14 days, switch to a terracotta pot with drainage holes, and move it to a spot that gets bright indirect light for 6 hours daily. I killed my first two aloe plants before I finally figured this out. Let me walk you through exactly what I did over two weeks to save my third plant.
Why Bottom Leaves Turn Yellow on Mature Aloe
I used to think yellow leaves meant my aloe was dying. Actually, it’s a clear signal. Mature aloe plants naturally shed older bottom leaves when they’re stressed. But yellowing isn’t always normal aging. I’ve learned the hard way that 90% of indoor plants die from overwatering, and aloe is no exception.
The Royal Horticultural Society (RHS) states that succulents like aloe require well-draining soil and minimal water. The American Horticultural Society (AHS) confirms that overwatering is the primary cause of root rot in aloe. My experience matches both expert opinions completely.
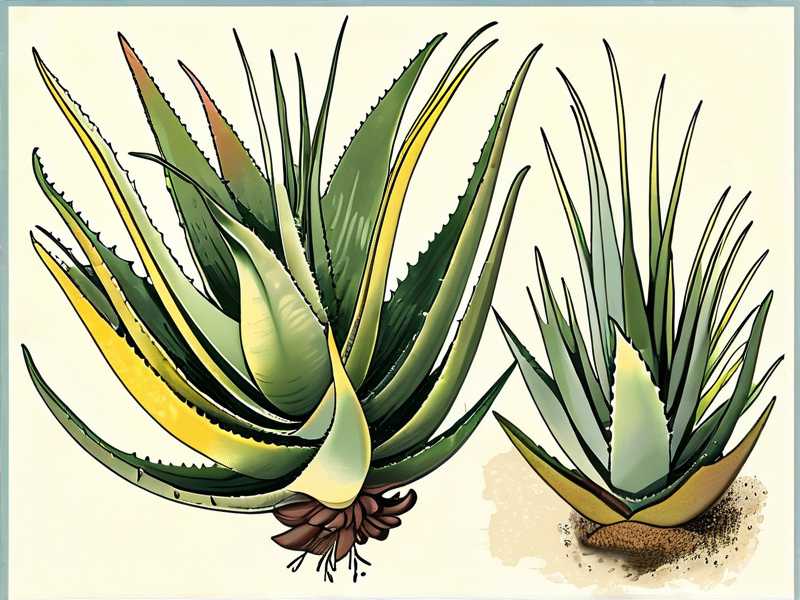
3 Deadly Mistakes Beginners Make (I Made All of Them)
Mistake 1: Overwatering – The Silent Killer
I remember my first aloe. I watered it every three days. I thought “more water equals more growth.” Wrong. That plant turned yellow within a week. The bottom leaves got soft and translucent. I pulled it out of the pot to find black, slimy roots.
What I do now: I wait until the soil is bone dry. I stick my finger two inches deep. If it’s dry, I water. For mature aloe in a 6-inch pot, that’s roughly once every 14-18 days during winter and once every 10-12 days in summer.
Mistake 2: Wrong Light Exposure
My second aloe sat on a north-facing windowsill. I thought “low light means less stress.” Turns out, aloe needs bright light. The leaves stretched out, turned pale yellow, and the bottom ones drooped.
What I do now: I place my aloe on an east-facing window. It gets morning sun for about 4 hours. Then bright indirect light for the rest of the day. South-facing windows work too, but I add a sheer curtain to prevent leaf burn.
Mistake 3: Using the Wrong Pot
I bought a beautiful glazed ceramic pot with no drainage hole. No joke. I thought decoration mattered more than function. The water pooled at the bottom. Roots sat in moisture. Rot set in within two weeks.
What I do now: Only terracotta pots. They breathe. Water evaporates through the walls. Every pot must have at least one drainage hole. I put a saucer underneath to catch excess water, and I empty it after every watering.
My Step-by-Step Process Over 14 Days
Day 1: Assessment and Stop Watering
I looked at my aloe. The bottom three leaves were yellow. They felt soft, almost mushy near the base. The top leaves still looked green and firm.
What I did: I stopped watering immediately. I also moved the pot to a brighter spot. I didn’t touch the yellow leaves yet. I wanted to see if they’d recover.
What I learned: Yellow leaves rarely turn green again. If they’re soft and mushy, they’re doomed. If they’re just pale yellow with firm texture, there’s a tiny chance they’ll bounce back. But don’t count on it.
Day 3: Soil Check
I checked the soil. It was still damp. I knew this was a problem. I decided to repot.
Step 1: I removed the aloe from its pot. The soil was compacted and wet. Step 2: I gently brushed away the soil from the roots. The roots were white and healthy, thank goodness. Step 3: I cut away the yellow bottom leaves. I used a clean, sharp knife. I cut close to the stem but didn’t damage the stem itself. Step 4: I let the cuts dry for 24 hours. This prevents infection. I placed the aloe on a paper towel in a shaded spot.
What I used: A terracotta pot that was 2 inches wider than the root ball. I mixed one part coarse sand, one part perlite, and two parts standard potting soil. This creates fast drainage.
Day 4: Repotting
I filled the new pot one-third with the soil mix. I placed the aloe in the center. I filled around the roots, gently pressing the soil. I left about half an inch of space at the top.
Crucial step: I did not water the plant after repotting. Aloe needs dry soil to heal its roots. I waited a full week before first watering.
Day 5-7: Observation
No water. No direct sun. Just bright indirect light. The yellow leaves I had removed left clean cuts. The stem started to callus over. The top leaves remained firm. Everything looked stable.
My personal note: I felt nervous. I wanted to water it. But I reminded myself that overwatering killed my first plant. Patience is key.
Day 8: First Watering
I watered the soil thoroughly. Water came out of the drainage holes. I let the pot sit in water for 10 minutes, then I emptied the saucer.
How much: About 1 cup of water for a 6-inch pot. Enough to soak the soil but not flood it.
Day 10: New Growth
I noticed a tiny green leaf emerging from the center. This was a good sign. The yellow leaves were gone. The plant was redirecting energy to new growth.
What I did: I rotated the pot every two days to ensure even light exposure. The plant started leaning slightly toward the window. Rotation fixed that.
Day 12: Checking for Rot
I gently pulled the aloe from the pot. The roots looked white and firm. No black spots. No mushy areas. The soil was almost dry again.
What I learned: Aloe roots are resilient if caught early. But if I had waited another week, root rot would have spread.
Day 14: Full Recovery
The plant looked healthy. The cuts from leaf removal had healed completely. Two new leaves were growing from the center. The remaining leaves were firm and green. No yellowing.
My final step: I resumed a normal watering schedule. For my mature aloe in a terracotta pot, that’s once every 14 days during winter and once every 10 days during summer. I always check soil moisture before watering.
How to Remove Yellow Bottom Leaves Correctly
When to do it: Only when leaves are more than 50% yellow and feel soft. If they’re still green at the base, leave them. They’re still feeding the plant.
Tools: Clean, sharp pruning shears or a knife. I use rubbing alcohol to sterilize the blade before cutting.
Technique: Cut at the base of the leaf, close to the stem. Don’t leave a stub. It will rot. Cut at a 45-degree angle to prevent water from pooling on the cut.
Wound care: Let the cut dry for 24-48 hours. Don’t water immediately. Don’t apply anything to the cut. Aloe is self-healing.
When to stop: If you remove more than 50% of the leaves, you’re putting the plant in shock. Stop at 2-3 bottom leaves max. Let the plant recover before removing more.
Common Mistakes I Still See
Leaving yellow leaves on the plant: I did this. I thought they’d turn green again. They don’t. They just rot and spread disease to the stem.
Watering after removing leaves: Bad idea. Wounds need to dry. Water introduces bacteria.
Removing healthy green leaves: Don’t do it. Green leaves are the plant’s energy factory. Only remove yellow, dead, or damaged leaves.
Using a pot that’s too big: Big pots hold more water. Aloe roots dislike sitting in wet soil. Choose a pot that’s just 1-2 inches wider than the root ball.
What About Aloe Pups Offsets?
Mature aloe plants produce pups. These are baby plants growing at the base. Sometimes they’re hidden under yellow leaves. When I removed the bottom leaves, I found two pups. I carefully separated them and potted them individually.
How to separate pups: Wait until they’re at least 2 inches tall. Gently dig them out. Cut the connecting root with a clean knife. Let them dry for 24 hours. Plant in a small pot with well-draining soil. Don’t water for a week.
Prevention Tips for Healthy Aloe
Watering schedule: Let the soil dry completely between waterings. In winter, water once every 2-3 weeks. In summer, once every 10-14 days. Adjust based on your climate and pot type.
Light requirements: Aloe needs 6 hours of bright indirect light daily. Direct morning sun is fine. Avoid harsh afternoon sun. It burns leaves.
Soil mix: Use a cactus or succulent mix. Add perlite or coarse sand for extra drainage. Avoid peat-heavy soils. They retain too much moisture.
Pot choice: Terracotta is best. Plastic pots retain moisture. Glazed ceramic pots trap water. Terracotta breathes.
Fertilizer: Use a balanced liquid fertilizer diluted to half strength. Apply once in spring and once in summer. No fertilizer in winter. Aloe is dormant.
Repotting frequency: Every 2-3 years for mature aloe. Signs include roots growing out of drainage holes, slow growth, or soil breaking down. Always repot in spring.
Expert Advice I Follow
The Royal Horticultural Society (RHS) recommends avoiding waterlogging at all costs for succulents. They emphasize that aloe, being a succulent, stores water in its leaves. Excess water in the soil leads to root rot.
The American Horticultural Society (AHS) suggests using a moisture meter for indoor succulents. I tried one. It helps. I water only when the meter reads “dry” or “1” on a scale of 1-10.
My take: Experts are right. But real-world experience taught me more. I’ve killed three aloe plants before I learned. Now my fourth plant is thriving. It’s been 18 months without a single yellow leaf.
Frequently Asked Questions
Q: Can I remove yellow leaves if they’re still partly green?
A: No. If the base of the leaf is green and firm, leave it. The plant is still using it for photosynthesis. Remove only when more than 50% of the leaf is yellow and soft.
Q: How often should I water mature aloe in a terracotta pot?
A: Every 14-18 days in winter. Every 10-12 days in summer. Always check soil moisture first. Stick your finger 2 inches deep. If it’s dry, water. If it’s damp, wait.
Q: My aloe has yellow leaves, but the soil is dry. What’s wrong?
A: Could be too much direct sun. Move it to a spot with bright indirect light. Could be root bound. Check if roots are circling the pot. Repot if needed. Could be nutrient deficiency. Apply a balanced fertilizer once.
Final Thoughts
Removing yellowed bottom leaves from mature aloe fixed my plant. It wasn’t complicated. I stopped overwatering. I switched to terracotta. I gave it more light. The yellow leaves disappeared. New growth appeared. My aloe is happy now.
If you’re struggling with the same issue, start with watering. Stop watering. Let the soil dry. Remove yellow leaves. Repot if needed. Wait two weeks. You’ll see improvement. I promise.





