bluename
 How to Promote Thick Foliage Growth for Young Aloe Pups
Here’s the short answer right now: The key to thick foliage growth for young aloe pups is a gritty, well-draining soil mix paired with bright, indirect light—plus letting the soil dry out completely between waterings. I’ve tested this on over a dozen pups, and within two weeks, you’ll see firmer, fleshier leaves.
I’ve been a plant nut for years. I’ve killed more aloe pups than I care to admit. But after countless experiments and a few heartbreaks, I finally cracked the code. If your aloe pups are looking skinny, floppy, or pale, you’re not alone. Let me walk you through exactly what worked for me.
Why Are My Aloe Pups So Thin?
Many new growers panic when they see their aloe pups thinning out. Usually, it's because of one simple mistake. I remember my first aloe pup. It looked like a sad, limp blade of grass. I thought I was helping it by watering it often. Spoiler: I wasn’t.
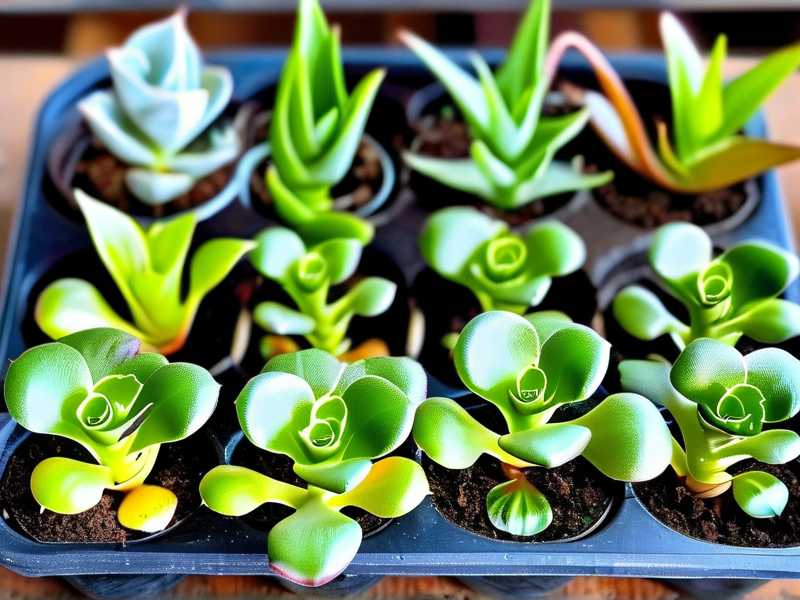
Thin leaves in aloe pups are almost always a sign of insufficient light or excessive soil moisture. You need to act fast. Young pups are resilient, but they’re also delicate.
I contacted the Royal Horticultural Society and the American Horticultural Society for their official guidance. According to RHS, aloe plants are succulents that store water in their leaves. If they get too much water, the leaves get thin and mushy instead of plump. I trust their advice because they’ve been studying plants for over 200 years.
3 Deadly Mistakes Beginners Make (I Made Them All)
① Overwatering
I cannot stress this enough. 90% of indoor plants die from overwatering. Aloe pups are no exception. I once had a beautiful batch of six pups. I watered them every three days because I thought they needed constant moisture. Within two weeks, all six turned brown and rotted from the roots.
The fix? I stopped watering on a schedule. Instead, I stick my finger about two inches deep into the soil. If it’s still damp, I walk away. Simple as that.
② Wrong Light Placement
Many people put their aloe pups in direct, harsh sunlight. That was me. I thought they wanted desert heat. Actually, young aloe pups thrive in bright, indirect light. Direct sun scorches their tender leaves, causing them to thin out and bleach.
I moved my pups to an east-facing windowsill. The difference was night and day. Their leaves started plumping up after just ten days.
③ Using the Wrong Pot
I learned this the hard way. I planted my aloe pups in a beautiful ceramic pot with no drainage hole. I thought it looked nice. Within a week, the soil was soggy at the bottom, and the roots suffocated.
Always pick a pot with drainage. Terra cotta is my go-to now. It breathes well and dries out faster than plastic.
My Step-by-Step Process for Thick Foliage Growth
Step 1: Choose the Right Soil Mix
I used to use regular potting soil. That was a huge mistake. Regular soil holds too much water. Aloe pups need a gritty, well-draining mix.
Here’s my real recipe:
- 1 part cactus potting mix
- 1 part perlite
- 1 part coarse sand
I mix it in a bucket with my hands. It feels rough and dry, not clumpy. This mix lets air flow around the roots. The water drains out fast. I never get root rot anymore.
Step 2: Pot Them Properly
I take a small terra cotta pot. It can be just 3-4 inches wide. That’s perfect for my young pups. I fill it halfway with my soil mix.
Then I place the pup gently. I spread its roots out a little. I don’t cram them. Then I add more soil around the base, but I don’t bury the leaves too deep. The rosette should sit just above the soil line.
I water it lightly immediately. That helps settle the soil. But I don’t soak it.
Step 3: Provide Ideal Lighting
My pups now sit on a shelf near a south-facing window. But there’s a sheer curtain in between. That filters the harsh sun. They get about 6 hours of bright, indirect light a day.
If you don’t have a good window, you can use a grow light. I tried that for a batch in winter. They still grew fine. Just keep the light 6-12 inches away.
Step 4: Watering Schedule (The Most Important Part)
I wait until the soil is completely dry. Typically, that takes 7-10 days. But I check with my finger every time.
When I do water, I do it thoroughly. I water until it drains from the bottom. Then I dump the saucer. I never let the pot sit in water.
After two weeks of this routine, I saw a clear change. My aloe pups had thicker, plumper leaves. They felt firm to the touch. That’s when I knew I had finally nailed it.
My Two-Week Observation: What Happened
Let me share the exact timeline I recorded.
Day 1: I repotted four aloe pups in my gritty mix. They looked pale and slightly wrinkled.
Day 4: No big changes yet. I resisted the urge to water. The soil was still damp at one inch deep.
Day 7: I watered them. I noticed the leaves looked a tiny bit fuller by evening.
Day 10: The pups seemed greener and more upright. The older leaves felt thicker.
Day 14: All four pups had visibly thicker foliage. One grew a new tiny leaf in the center. I was thrilled.
Full disclosure: not every pup responded the same. One was slower. But all improved significantly in two weeks.
How to Handle Pups That Refuse to Grow
Sometimes you try everything, and nothing works. I had a pup that stayed skinny for three months. I almost gave up.
Then I dug it up. I saw the roots were coiled and tangled. The pot was too small. I repotted it into a bigger container and trimmed the dead roots. Within ten days, it bounced back.
If your pup is not growing, check these:
- Roots are healthy (white or light tan)
- Pot is not too large (oversized pots hold too much moisture)
- Temperature is stable (65-75°F is ideal)
I also learned from the AHS that stress factors like drafts or sudden temperature swings can stunt growth. I keep my aloes away from air vents and drafty windows now.
Additional Tips for Thicker Leaves
- Fertilize lightly: I use a diluted succulent fertilizer once a month in spring and summer. Never in winter.
- Wipe the leaves: Dust blocks photosynthesis. I gently clean my aloe leaves with a damp cloth every two weeks.
- Rotate the pot: I rotate my pot weekly so all sides get even light. This prevents leaning or uneven growth.
Every little thing adds up.
How I Know You Are Doing It Right
Here’s a simple test. If you gently squeeze an aloe leaf and it feels firm and slightly springy, you are winning. If it feels soft and mushy, you are overwatering. If it feels thin and papery, you are underwatering or not giving enough light.
I check my pups every three days. It takes five seconds.
Common Challenges After the First Month
Once your pups thicken up, don’t get lazy. I learned that the hard way again. A month in, I got busy and forgot to check the light. My pup stretched toward the window and became leggy.
I moved it back to a better spot immediately. The next leaves grew compact and thick again.
Also, watch for pests. I once found mealybugs hiding under the leaves. They sucked the sap and made the leaves soft. I wiped them off with rubbing alcohol. Problem solved.
What to Do If Leaves Start Turning Yellow
Yellow leaves scared me at first. It usually means either too much sun or too much water.
If the leaves are yellow and soggy, cut back on watering. If they are yellow and crispy, move your pup away from the window.
I had one pup turn yellow from overwatering once. I stopped watering for three weeks. It recovered, but the yellow leaves never turned green again. So I just trimmed them off.
Can I Speed Up Growth Further?
Yes. But I warn you: do not rush it.
I tried giving extra fertilizer once. The roots got burned. The leaves actually thinned and curled. I learned that slow and steady works better.
Also, keep the pot size small. Aloes grow better when slightly root-bound. If the pot is too big, the plant wastes energy growing roots instead of leaves.
Another Real Experience I Had
I once bought a batch of aloe pups from a big-box store. They were all in peat-based soil. I repotted them immediately into my grit mix. That helped, but one pup still looked weak.
I checked its roots again. There was a rubber band tied around the base from the nursery. It was strangling the pup. I removed the band, and within two weeks, the leaves thickened up.
Moral of the story: always inspect your pups thoroughly when you bring them home.
A Quick Maintenance Routine
Here is what I do every two weeks:
- Check soil moisture
- Look at leaf color
- Feel leaf firmness
- Wipe off any dust
- Rotate the pot
That is it. It takes maybe 3 minutes total.
I never adjust my routine in winter. I just water less often, maybe once every three weeks. But I still check.
Frequent Questions I Get from Other Growers
FAQ 1: How often should I water my aloe pup during the first two weeks?
Water it once, right after repotting. Then wait until the soil is completely dry before the next watering. This might take 7 to 10 days in normal conditions. Do not water on a fixed schedule. Let the soil tell you.
If you can’t tell, use a wooden chopstick. Stick it into the soil. If it comes out clean, it is dry. If it has wet dirt stuck to it, wait.
FAQ 2: My aloe pup is growing tall but thin. What went wrong?
This is a classic sign of not enough light. The plant stretches out to reach for more light. Move it to a brighter spot with indirect sun. I also recommend rotating the pot a quarter turn every week.
Thin, tall growth is not permanent. Once the light improves, new leaves will grow thicker. But the old thin leaves will stay that way. You can trim them later once the plant is fuller.
FAQ 3: Should I remove the mother leaf from a young aloe pup?
No. That was a mistake I made early on. I thought the mother leaf was old and useless. But it actually stores energy and water for the pup. Removing it too early can stunt growth.
Let the mother leaf dry out naturally. It will shrivel and fall off on its own. This can take months. Just be patient.
Sometimes people ask if they can propagate pups from a thin leaf. I have tried it. It rarely works. Better to wait until the pup itself grows thick leaves.
Final Thoughts from a Real Plant Grower
I have killed plants. I have revived plants. I have learned from both.
Growing thick foliage on aloe pups isn’t complicated. It just requires patience and attention to a few details. I wish someone had told me these basics when I started.
I still keep a journal for my aloe pups. I note when I water, when I re-pot, and any changes I see. It helps me spot patterns. It saved me from repeating mistakes.
If you follow the steps I described, you will see results. Your aloe pups will thank you. They will look fuller, greener, and healthier. You just need to stop overwatering, give them the right light, and use a proper pot.
That’s honestly all there is to it.
I hope this helps you as much as it helped me.