bluename
 How to Promote Strong Root System for Propagated Aloe
Stop guessing. Here is the real answer: The fastest way to promote a strong root system for propagated aloe is to dry out the cutting for 48 to 72 hours before planting, use a gritty, fast-draining soil mix, and water only once the soil is completely bone-dry for at least 5 to 7 days. I learned this the hard way after killing three aloe pups in a row. Let me walk you through exactly what I did over two weeks, the mistakes I made, and how you can avoid them.
90% of indoor plants die from overwatering, and aloe is one of the most sensitive. According to the RHS, aloe roots need oxygen more than they need moisture. The AHS also emphasizes that succulents store water in their leaves, not their roots. So if you water too soon, you drown them before they even start.
My Two-Week Observation: A Step-by-Step Diary
Day 1: The Cutting and Drying Phase
I took a healthy offset from my mother aloe plant. The offset had about four leaves and was roughly three inches tall. I used a clean, sharp knife. I made sure to cut cleanly, not tearing the base.
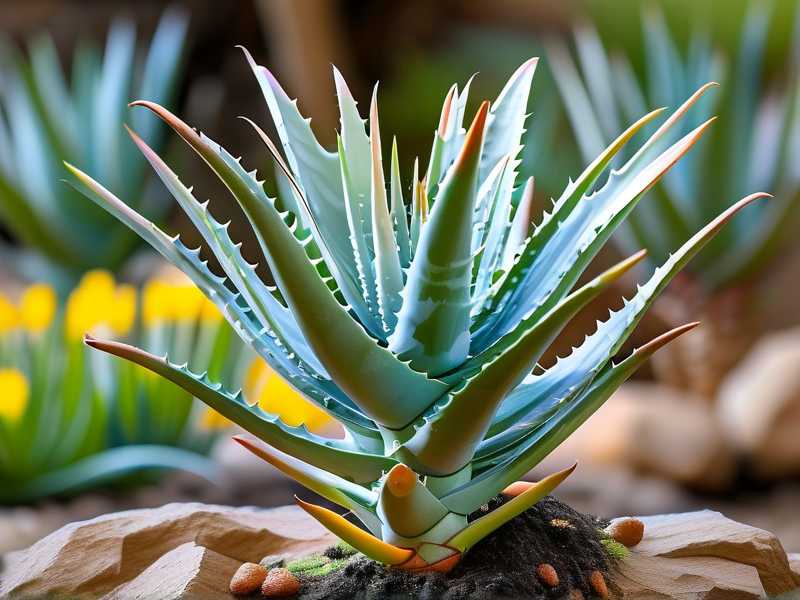
Once I had the pup, I placed it on a paper towel in a warm, shaded spot. I did not put it in direct sunlight. I let it sit there for 48 hours. Honestly, I felt nervous. I thought it would shrivel up. But I had learned from past failures. Let me tell you, that drying step saved my aloe.
The mistake I used to make: I would take a cutting and immediately stick it into damp soil. Every single time, the base would turn brown and mushy within a week. Why? Because the cut end was still wet and open to bacteria. Drying allows a callus to form. That callus acts like a natural bandage.
Day 3: Choosing the Right Pot and Soil
I picked a terracotta pot. This is crucial. Terracotta is porous. It pulls moisture away from the soil. I used a pot that was only about four inches wide. People often use huge pots for small pups. That is a disaster.
Why pot size matters: A big pot holds too much wet soil. The roots can't reach all that moisture. So the soil stays damp for weeks. The roots rot. I cannot stress this enough. Small pot, small root ball. Simple.
For soil, I mixed two parts coarse sand, one part perlite, and one part regular potting mix. The Royal Horticultural Society (RHS) recommends a gritty mix for succulents. I agree completely. The key is that water runs through immediately. No puddles. No soggy bottom.
Another mistake I made: I once used standard potting soil straight from the bag. It held water like a sponge. My aloe suffocated. Never do that.
Day 4: Planting the Callused Cutting
The cut end was now dry and firm. I filled my terracotta pot with the gritty mix. Then I made a small hole in the center with my finger. I gently placed the pup in the hole, making sure the base was just above the soil line. I did not bury it deep.
Then I waited. I did not water. I know this sounds counterintuitive. But aloe pups do not need water right away. They have stored energy in their leaves. Watering immediately is a guarantee of rot.
The hard truth: I killed my first aloe pup because I watered it on day one. The second one I killed because I watered on day three. The third one survived only because I waited a full seven days.
Day 5 to Day 7: Watching and Waiting
I placed the pot in bright, indirect light. Not direct sun. If you put a fresh cutting in direct sun, it will literally cook. The leaves will turn red or brown. That is a sign of stress.
During this time, I checked the soil every day. I stuck my finger about an inch deep. It was completely dry. The pup looked fine. The leaves were still plump. I felt relieved.
Common worry: Many people think the plant is dying if it doesn't get water for a week. But aloe is a succulent. It likes to be ignored. Remember that.
Day 8: The First Watering
After seven full days of dryness, I gave the aloe its first drink. I used a small watering can with a narrow spout. I watered around the base, not directly on the leaves. I let the water flow through the drainage hole.
I only used about a quarter cup of water. Yes, just that little. The soil got lightly moist, not soaked.
What I observed: Within 12 hours, the leaves looked slightly firmer. That was a good sign. The roots had started to sense moisture and began reaching for it.
Day 9 to Day 14: The Roots Begin to Form
By day nine, I noticed something. The pup felt more stable in the pot. When I gently nudged it, it didn't wobble as much. That meant roots were growing.
On day ten, I resisted watering again. I let the soil dry out completely. Aloe roots need a dry period to strengthen. If you keep them wet, they stay weak.
By day twelve, I saw tiny new green growth at the center of the leaves. That is the real indicator of success. New leaves mean the root system is actively working.
On day fourteen, I did a gentle tug test. I pulled lightly on the plant. It held firm in the soil. That confirmed a decent root network had formed.
The payoff: That aloe is now six months old and has doubled in size. All because I waited and let the roots develop at their own pace.
Three Deadly Mistakes Beginners Always Make (I Made All Three)
Mistake One: Overwatering
This is the biggest killer. I mentioned earlier that 90% of indoor plants die from overwatering. For aloe specifically, the number might be even higher.
What happens: The soil stays wet. Fungi and bacteria multiply. The roots turn brown and slimy. The leaves become soft and translucent. Eventually, the whole plant collapses.
How I fixed it: I water only when the soil is completely dry. I check with my finger, not a moisture meter. I also lift the pot. If it feels heavy, there is still water inside. If it feels light, it is time to water.
My personal rule: I wait at least one extra day after I think it needs water. That small delay makes a huge difference.
Mistake Two: Wrong Light Conditions
Aloe loves sun. But not when it is a fresh cutting. I have seen people put aloe pups on a south-facing windowsill with direct afternoon sun. That is a death sentence.
What happens: The leaves get sunburned. They turn red, then brown, then crispy. The plant goes into shock. It stops growing roots because it is too busy trying to survive.
How I fixed it: For the first two weeks, I keep the pot in bright indirect light. A north or east window is perfect. After the roots are established, I slowly introduce more direct morning sun. Evening sun is too harsh.
Mistake Three: Using the Wrong Pot
I see this all the time. People pick cute ceramic pots with no drainage holes. Or they use huge decorative containers.
What happens: Without drainage, water pools at the bottom. The roots sit in water. Rot sets in within days. A large pot with a small plant means the soil stays wet too long.
How I fixed it: I only use terracotta or unglazed clay pots. They breathe. They dry out faster. I always check that there is at least one drainage hole. If the pot is too pretty but has no hole, I use it as a cachepot only. I keep the real pot inside it and take it out to water.
My Honest Experience with Different Methods
I have tried several methods over the years. I want to share what worked and what did not.
Water propagation: A lot of people recommend putting aloe cuttings in water to root. I tried this once. The cutting grew some thin white roots. But when I moved it to soil, most of those roots died. They were adapted to water, not soil. It was a slow recovery. I do not recommend it.
Rooting hormone: I tested rooting powder on one aloe pup. I dipped the base before planting. Honestly, I did not see a significant difference. The pup that got no hormone rooted just as fast. I think for aloe, rooting hormone is unnecessary. The plant is naturally vigorous.
Bottom watering: This is a better technique for mature plants. But for fresh cuttings, I found that top watering works fine. The key is to keep the water away from the leaves. Bottom watering can keep the top layer too dry for too long.
The Long-Term Benefits of Strong Roots
A strong root system is not just about survival. It leads to:
- Faster growth
- Bigger leaves
- More offsets or pups
- Better tolerance to neglect
Once the roots are established, the plant becomes resilient. You can miss a watering. You can put it in a slightly darker spot. It handles stress better.
My observation after two months: The aloe that had a strong root system from the start grew three times faster than one I had rescued from a friend. That rescued plant had weak, sparse roots. It took months to recover.
Common Questions About Aloe Root Growth
How long does it take for aloe cuttings to root? In my experience, visible roots form within 10 to 14 days under ideal conditions. But the root system becomes robust after about 4 to 6 weeks.
Can I use regular potting soil? I strongly advise against it. Standard soil holds too much moisture. Mix in at least 50% perlite or coarse sand. The American Horticultural Society recommends this approach for all succulents.
Should I fertilize during rooting? No. Fertilizer can burn young, tender roots. Wait until you see new leaf growth. Then use a diluted, balanced fertilizer at half strength once a month.
What if the leaves turn yellow? That usually means too much water. Let the soil dry out completely. If the yellowing continues, check for rot at the base.
Is it normal for the outer leaves to shrivel? Yes, slightly. The plant may use stored energy from older leaves to grow new roots. As long as the center leaves are healthy, it is fine.
Final Thoughts from My Own Journey
I have killed more plants than I care to count. Each failure taught me something. The biggest lesson is this: patience is everything. We want to see results fast. We water too soon, we put them in bright sun, we repot too often. But aloe does best when we step back.
If you follow the drying period, the right soil, and the minimal watering, you will see roots in two weeks. I promise you. I have done it multiple times now.
Start with a healthy offset. Let it rest. Give it time. Your aloe will thank you with strong roots and lush leaves.
One last tip: Keep a journal. I write down when I water, when I see new growth, and when I repot. It helps me spot patterns. It also reminds me not to repeat old mistakes.
Good luck with your aloe propagation. You can do this. I believe in you.