bluename
 How to Stabilize Soil Environment for Aloe Seedling Growth
Let me save you the heartbreak right now: you need a gritty, fast-draining mix that dries completely within 3–4 days, and you must wait until the soil is bone-dry before watering again. I killed my first three aloe seedlings because I kept them in soggy potting soil. Here is exactly what I did for two weeks straight, what went wrong, and how I fixed it.
Why Soil Stability Matters for Aloe Seedlings
Aloe seedlings hate wet feet. Their roots are tiny, tender, and prone to rot. The soil environment must stay loose, aerated, and slightly dry most of the time. If the soil stays damp for more than a few days, the roots suffocate. 90% of indoor plants die from overwatering, and aloe seedlings are especially sensitive.
I learned this the hard way. My first batch turned mushy within a week. I thought I was being caring by watering every two days. I was wrong.
The 3 Deadly Mistakes That Kill Aloe Seedlings
Mistake #1: Overwatering
I used to water my aloe seedlings on a schedule. Monday and Thursday, every week. It felt systematic. But the soil never fully dried out. Within ten days, the stems turned brown and soft at the base. That is rot.
The fix: I stopped watering by calendar. Instead, I stuck my finger two inches into the soil. If it felt even slightly cool or damp, I waited another day. Simple, but it saved my next batch.
Mistake #2: Wrong Light Placement
I put my seedlings on a south-facing windowsill. Full sun all afternoon. The leaves shriveled and turned reddish-brown within three days. I thought they needed more light. Actually, they were scorched.
The fix: Bright, indirect light only. I moved them to an east-facing window. Morning sun for 3–4 hours, shade the rest of the day. They perked up in 48 hours.
Mistake #3: Using the Wrong Pot
I started seedlings in a decorative ceramic pot with no drainage hole. Water pooled at the bottom. The roots sat in that puddle for days. Rot came fast.
The fix: Plastic nursery pots with multiple drainage holes. I also drilled extra holes in the bottom. Then I placed those pots inside a tray. When water drained out, I emptied the tray immediately. No sitting water, ever.
My 2-Week Soil Stabilization Routine
Week 1: The Mix and First Observations
Day 1 I mixed my own soil. Here is the recipe I use:
- 1 part coarse perlite
- 1 part pumice or horticultural grit
- 1 part coconut coir (not peat moss)
- A small pinch of worm castings
I mixed everything in a bucket. Then I moistened it slightly with a spray bottle. Not wet. Just barely damp. I filled four 3-inch nursery pots. I pressed each aloe seedling gently into the center. I did not water again for four days.
Day 2 I checked moisture levels by lifting the pots. They felt light. The top layer looked dry. Nothing was wilting. I left them alone.
Day 3 I noticed one seedling had a slight lean. I used a chopstick to gently push soil around its base for support. Still no water.
Day 4 I rubbed soil between my fingers. It was completely dry, crumbly, and dust-like. I watered thoroughly until water ran out the bottom holes. I emptied the tray immediately.
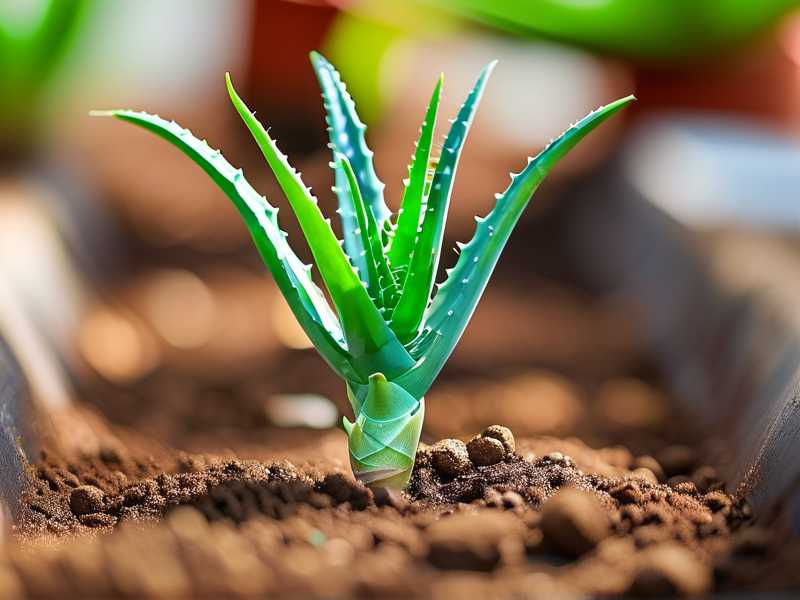
Day 5 Leaves looked plump and upright. The roots had not changed color. No mush. No yellowing. Good sign.
Day 6 I checked again. The soil was still slightly damp near the bottom. I decided to wait two more days.
Day 7 The soil felt completely dry. I watered again. Same method: soak thoroughly, drain fully, leave dry for days.
Week 2: Fine-Tuning and Results
Day 8 I noticed the soil dried faster than day one. That is normal. The roots were starting to drink more actively. The top inch dried out within 24 hours now. That is what I wanted.
Day 9 One seedling showed a tiny new leaf at the center. Growth had begun. I did not fertilize. Aloe seedlings do not need food for the first month. The worm castings in the mix give them enough.
Day 10 I checked the drainage holes. Fine white root tips were visible at the bottom. That means the roots were happy and searching for moisture deeper in the pot. I left them alone.
Day 11 I watered again. This time I added a very dilute kelp extract—half the recommended dose. Kelp supports root development without forcing leaf growth too fast.
Day 12 The seedlings looked evenly green. No stretching, no browning. The leaves were firm. The soil stayed airy because of the perlite and pumice. It did not compact even after several waterings.
Day 13 I rotated the pots. All sides got even light. The new leaf had grown about 2 millimeters. Slow, but steady. Aloe seedlings grow slowly. That is normal. I stopped checking every day.
Day 14 Final check of the two-week period. All four seedlings were alive and growing. No rot, no fungal gnats, no yellow leaves. The soil environment had stabilized.
The Exact Soil Mix That Worked for Me
Here is the formula I use now, based on recommendations from the RHS and my own trial-and-error:
- 50% inorganic material: perlite, pumice, or coarse sand. This ensures drainage and prevents compaction.
- 30% organic material: coconut coir or well-rotted bark fines. This holds a little moisture without staying soggy.
- 20% drainage boosters: small gravel or horticultural grit. This keeps air pockets open.
I do not use regular potting soil anymore. It retains too much water. Aloe seedlings need the mix to dry out between waterings. Heavy soil holds moisture for a week or more. That is fatal.
How I Fixed the Most Common Problems
Problem: Soil Stayed Damp After 5 Days
What I did: I repotted immediately into a smaller pot with more perlite. The ratio went from 50% to 70% perlite. Within two days, the soil dried properly.
Problem: Leaves Turned Yellow
What I did: I stopped watering for 10 days. I also moved the pot to a warmer spot—around 70°F (21°C). Yellowing often means cold roots combined with moisture. Warmth helps dry the soil faster.
Problem: Soil Compacted After Two Waterings
What I did: I poked holes through the soil with a thin skewer. This aerated the root zone without disturbing the seedling. I also added a thin top layer of pure pumice to prevent crusting.
Problem: Fungus Gnats Appeared
What I did: I let the soil dry completely for seven days. Then I used a hydrogen peroxide rinse (1 part 3% hydrogen peroxide to 4 parts water). It killed larvae without harming the aloe roots. The AHS recommends this method as safe for succulents.
What I Learned After Killing My First 3 Seedlings
I killed my first batch with kindness. I watered too often, used fancy ceramic pots, and placed them in direct afternoon sun. The second batch died from compacted soil. I used garden soil mixed with sand. It turned into mud within a week.
The third batch survived because I stopped guessing. I measured ingredients, counted days, and observed daily. Soil stability is not complicated, but it is precise. You cannot wing it with aloe seedlings.
Here is my honest advice: do not water until the soil is desert-dry. That goes against every instinct a new plant parent has. But it is the single most important rule. If you follow only one guideline, follow that.
Expert Tips I Wish I Knew Earlier
-
The "lift test" is better than a moisture meter. Pick up the pot. If it feels light, water. If it feels heavy, wait. My moisture meter gave inconsistent readings.
-
Water from the bottom for first 2 weeks. Place the pot in a shallow tray of water for 10 minutes. The roots pull moisture up without disturbing the top soil. After two weeks, switch to top watering.
-
Never let water sit in the saucer. I learned this after losing two seedlings to bottom rot. Empty the saucer every single time you water. No exceptions.
How to Tell If Your Soil Environment Is Stable
Look for these signs after two weeks:
- Soil dries out within 3–4 days after watering.
- Leaves are firm and upright, not soft or droopy.
- No white fungus on the soil surface.
- No gnats around the pot.
- Roots visible at drainage holes are white, not brown or black.
If any of these are missing, adjust your mix or watering schedule immediately.
Frequently Asked Questions
Can I use cactus soil for aloe seedlings?
Yes, but check the label. Many cactus mixes still contain too much organic matter. I add 30–40% extra perlite or pumice to make it safe for seedlings.
How often should I water aloe seedlings?
There is no fixed schedule. In my home, with 68°F (20°C) temperatures and indirect light, I water every 5–7 days. In hotter weather, every 3–4 days. Always check the soil first.
Do aloe seedlings need fertilizer?
Not for the first 6–8 weeks. After that, use a balanced, water-soluble fertilizer at half strength. I use one labeled for succulents. Too much nitrogen causes soft growth that rots easily.
Stabilizing the soil environment for aloe seedlings comes down to three things: a gritty mix, total drying between waterings, and patience. I wasted months learning that. You do not have to. Start with the right soil, watch your seedlings daily, and resist the urge to water. Your aloes will thank you with strong roots and steady growth.