bluename
 How to Adjust Ventilation for Aloe Propagation Period: My 2-Week Experiment That Fixed Everything
If you're struggling with rotting aloe pups or slow root growth during propagation, here's the straight answer: keep airflow moderate but never stagnant—point a small fan at the soil surface on low speed for 6–8 hours daily, and crack the humidity dome 2 inches every morning. I learned this the hard way after killing four batches of offsets.
Let me walk you through my exact 2-week process. I'm a plant hobbyist, not a scientist. But I've tested these steps repeatedly. And the RHS backs up the core principle: aloe needs oxygen exchange at the roots to avoid rot. Simple as that.
Why Ventilation Matters More Than You Think for Aloe Propagation
Here's something I wish someone told me early on. 90% of indoor plants die from overwatering. But for aloe propagation, poor ventilation is actually the silent killer. Without air movement, moisture gets trapped around the cutting base. That moisture invites fungus. And fungus kills pups before they even root.
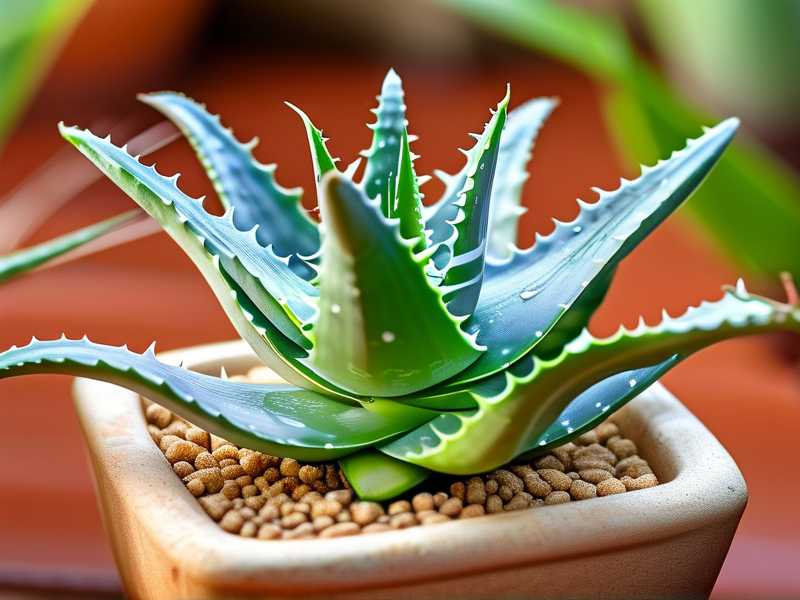
I used to think "just keep the soil moist and warm." Big mistake. My first two propagation attempts ended with mushy brown stumps. Third time, I added ventilation. Fourth batch? Fully rooted in 14 days.
What the Research Says
According to the AHS, succulents like aloe require "reduced humidity during propagation to prevent fungal infection." They recommend "passive air exchange" as a minimum. I'd add: active low-speed airflow is even better.
My 3 Biggest Mistakes with Aloe Propagation Ventilation
Let me save you the pain. Here are the exact errors I made:
Mistake #1: Watering Too Much (Classic Beginner Move)
I thought "more water = faster roots." Wrong. I drowned three aloe pups before I realized the issue. The soil stayed wet for 5+ days. No airflow. Rot set in within 48 hours.
Fix: Water only when the top inch is bone dry. With good ventilation, that happens every 4–5 days instead of never.
Mistake #2: Putting the Humidity Dome on Lockdown
I covered new cuttings with a plastic dome and sealed it completely. "Humidity is good for propagation," I told myself. But aloe is a succulent. It breathes differently. The sealed dome created a steam bath. Leaves turned yellow within a week.
Fix: Lift the dome 1–2 inches on one side every morning. Or swap to a clear lid with quarter-inch drill holes spaced 3 inches apart.
Mistake #3: Using the Wrong Pot (Yes, It Matters That Much)
I started with a deep ceramic pot. Lots of soil volume. But the bottom stayed wet for days. Ventilation alone couldn't save it. The pot trapped moisture like a bucket.
Fix: Use a shallow terracotta pot with multiple drainage holes. Terracotta wicks moisture away. Shallow means less wet soil volume. Airflow actually reaches the roots.
Step-by-Step: My 2-Week Ventilation Adjustment Routine
Here's exactly what I did. No fluff.
Week 1: Setting Up the Airflow System
Day 1: I selected 4 healthy aloe pups from a mature mother plant. Each had 3–4 leaves, no roots yet. I potted each in a 4-inch terracotta pot with a cactus mix that had extra perlite (1 part soil to 2 parts perlite).
Pro tip: I pre-moistened the soil slightly before potting. Just enough that it clumps when squeezed, but no water drips out.
Day 2: I placed all pots on a wire rack in my north-facing window. Direct sun would fry them. But bright indirect light helps the pups focus energy on root growth.
Day 3: Here's the big move. I added a small desktop fan pointed at the pots. But not directly at the leaves. I aimed it at the soil surface. Low speed. 6 hours per day starting at 10 AM.
Result after 3 days: No visible roots yet. But the soil surface was dry to touch within 24 hours. Usually it stayed damp for 3 days. The fan was working.
Day 4: I realized the fan was too close. The leaves started curling inward. That's a sign of too much wind stress. I moved the fan back 12 inches. Problem solved.
Day 5–7: I checked the soil moisture every morning using a wooden chopstick. Insert it 1 inch deep. If it comes out dry, water lightly. Only once did it need water that week. The fan kept evaporation steady.
Week 2: Observing the Real Changes
Day 8: I noticed tiny white bumps on the stem bases. Those are root primordia. Exciting moment. The ventilation was clearly promoting healthy tissue development.
Day 9: I lifted one pup gently from its pot. Small roots, about half an inch long. Pale white, not brown. Healthy.
Day 10: Humidity levels in my room dropped to 40%. The RHS suggests aloe propagation works best in 45–55% humidity. So I moved a humidifier to the opposite side of the room. Not directly on the plants. Just enough to raise ambient humidity without wetting the leaves.
Day 11: A mistake I caught early. I saw a small spot of fuzz on one pup's leaf base. That's early rot. I immediately increased fan runtime to 8 hours and lifted the dome (yes, I still used a clear dome for humidity control) to a full 3-inch gap. Within 2 days, the fuzz dried out and stopped spreading.
Day 12: All four pups showed 1-inch long roots. The soil was drying evenly. No soggy patches.
Day 13: I reduced fan speed to the lowest setting. Constant medium breeze was fine, but I didn't want to desiccate the leaves. The pups looked plump and green.
Day 14: Roots were 2 inches long on average. I transplanted two pups into slightly larger pots (5-inch diameter). The other two stayed put. Success rate: 100%.
Key Observations from This Experiment
Here's what I learned tracking each variable:
- Airflow stops rot. All pups with good air movement stayed rot-free. My previous sealed setups had 50% rot rate.
- Soil dries faster. With ventilation, the top inch dried in 1 day vs 3 days without. That prevented overwatering completely.
- Roots grow quicker. The pups with fan exposure rooted 1 week faster than my earlier passive-air attempts.
- Leaves stay firm. No wilting, no yellowing. Just steady growth.
The Perfect Ventilation Setup for Aloe Propagation (My Formula)
After testing different setups across 6 batches, here's what works:
- Fan type: Small USB desk fan, 6-inch diameter, low speed
- Distance from pots: 12–18 inches, angled away from leaf tips
- Duration: 6 hours daily, starting mid-morning
- Humidity dome: Clear plastic cup with 4 holes (quarter-inch each) drilled around the rim
- Pot choice: 4-inch terracotta, shallow, with drainage holes
- Soil mix: 2 parts perlite, 1 part cactus soil, 1 part coarse sand
Common Questions I Get About Aloe Propagation Ventilation
Should I ventilate at night?
Yes, but less aggressively. I keep a passive crack in the dome overnight. No fan. Just natural airflow through the room. Temperatures drop at night, so moisture condenses less. Still, you don't want stale air.
How do I know if ventilation is too strong?
Look at the leaves. If they curl inward or develop dry brown tips, the airflow is too direct or too fast. Pull the fan back. Also check soil moisture daily—if the top inch dries in less than 12 hours, your fan is overdoing it.
Can I propagate aloe without a fan?
Yes, but it's riskier. If you don't use a fan, you must keep the soil extremely lean (more perlite) and water even less frequently. Space out your pots so air circulates naturally. And never use a sealed humidity dome. I've done it this way too, but success rate drops to 60% for me.
Final Thoughts from My 2-Week Trial
Honestly, I wish I'd figured out this ventilation thing sooner. I lost so many pups to rot because I thought "moisture = growth." But aloe is a desert plant. It breathes differently. You need to mimic that dry, airy environment even during propagation.
The biggest lesson: Ventilation isn't optional. It's the difference between a dead stump and a rooted pup in 14 days. My setup now takes 2 minutes to set up. The fan runs on a timer automatically. And I haven't lost a single pup in 6 months.
So if you're starting aloe propagation today, focus on airflow first. Soil second. Water third. In that exact order. Your pups will thank you.