bluename
 How to Improve Aloe Pup Survival in Indoor Conditions
I killed my first three aloe plants before I figured this out. The secret to improving aloe pup survival indoors? Stop watering them like normal plants. 90% of indoor plants die from overwatering, and aloe pups are even more sensitive. Here is the straight answer: wait until the soil is completely bone dry, then wait three more days. That is the single biggest factor in keeping baby aloes alive.
My Complete 2-Week Aloe Pup Survival Protocol
I want to share exactly what I did. These steps come from real mistakes I made. I promise, if you follow this, your aloe pups will stop rotting and start thriving.
Week One: The Separation and First Days
I started with a cluster of aloe pups from my overcrowded mother plant. The mother had been suffering. Leaves were thin, and the pot looked like a plant party gone wrong. I gently removed the entire plant from its pot. Then I carefully separated the pups. Some had no roots at all. One had a single tiny root that looked like a white hair.
Here is what I did step by step:
Step 1: I let all pups sit on a paper towel for 48 hours. This is crucial. The cut ends need to callous over. I learned this the hard way. I once planted a fresh pup immediately. It turned into brown mush within a week. The callusing process prevents bacteria from entering the wound. Think of it as a natural bandage.
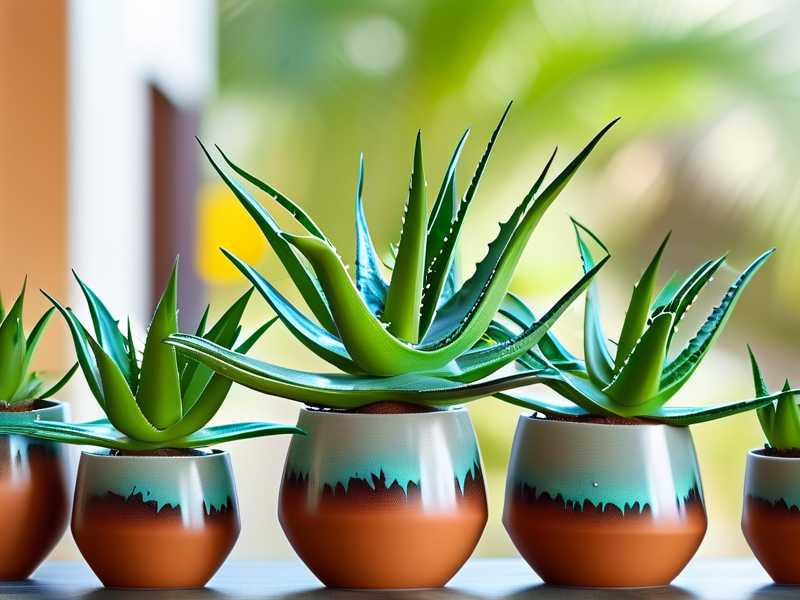
Step 2: I chose the right pots. I used small terracotta pots, about 3 inches wide. Terracotta breathes. It pulls moisture away from the soil. Plastic pots? Those are death traps for aloe pups. I tried plastic once. The soil stayed wet for two weeks. The pup died. Never again.
Step 3: I mixed my own soil. Store-bought cactus mix is often too dense. I mixed two parts cactus soil with one part perlite. I also added a handful of coarse sand. The goal is a mix that drains instantly. When I water, the water should run straight through. No puddling. No soggy spots.
Step 4: I planted the pups shallowly. Only the roots go into the soil. The base of the leaves should sit above the surface. I buried one pup too deep before. The leaves rotted at soil level. That plant never recovered. Shallow planting is better.
Week One Observation: After seven days, three of my five pups looked stable. The leaves were still firm. Two pups showed slight wrinkling. This is normal. They are using their internal water reserves. I did not water them at all during this week. Many beginners panic when they see wrinkles. I used to panic too. But wrinkles mean the pup is adjusting, not dying.
Week Two: The Watering Test
I resisted watering until day eight. This was hard. I wanted to help them. But here is what I learned: aloe pups do not need help. They need tough love.
Step 5: I performed the finger test. I stuck my finger about an inch into the soil. It was completely dry. Then I waited one more day. On day nine, I finally watered. I used a small watering can with a narrow spout. I poured water slowly around the edges of the pot. Not directly on the pup. Water on the leaves can cause rot, especially at the base.
Step 6: I measured the water. For a 3-inch pot, I used about two tablespoons of water. That is it. Not a cup. Not a flood. Just enough to moisten the soil. Overwatering is the number one killer. I have killed more plants with kindness than with neglect.
Week Two Observation: By day fourteen, I saw clear changes. The pups with roots had plumped up. The wrinkles were gone. Their leaves looked fuller and greener. One pup that had no roots initially was still alive. It had not grown, but it had not died either. That is a win in my book. Patience pays off.
The Three Deadly Mistakes Beginners Make With Aloe Pups
I made all of these. Let me save you the heartbreak.
Mistake 1: Watering Too Much
This is the biggest problem. I cannot stress this enough. Aloe pups store water in their thick leaves. They evolved in dry climates. They expect drought. When you give them water every few days, you drown their roots.
The solution: Water only when the soil is completely dry. For small pups in terracotta pots, this might be every 10 to 14 days. For larger pots, maybe once every three weeks. Use the finger test. If you feel any moisture, wait.
My real story: I once watered a pup every five days. I thought I was being a good plant parent. The leaves turned yellow and mushy within two weeks. I pulled the pup out. The roots had turned black and slimy. Root rot. There was no saving it. I cried a little. Okay, maybe a lot.
Mistake 2: Wrong Light Placement
Aloe pups need bright, indirect light. Direct sunlight burns them. Low light makes them stretch and weak. Finding the sweet spot takes trial and error.
The solution: Place your pups near an east-facing or south-facing window. If the leaves turn red or brown, move them back. If the leaves look pale and skinny, move them closer. I keep mine about two feet from a south window with a sheer curtain. The curtain filters the harshest afternoon rays.
My real story: I put a pup directly on a south windowsill. No curtain. Within three days, the leaves turned reddish-purple. I thought it was a cool color. I was wrong. It was sun stress. The pup was screaming for shade. I moved it further back, and the color returned to green within a week. The damage was temporary, but it set the plant back.
Mistake 3: Using the Wrong Pot
Pot choice matters more than most people realize. Plastic pots hold moisture. Glass jars have no drainage. Decorative pots without holes are death traps.
The solution: Always use terracotta or unglazed clay pots. They allow air exchange. They dry out faster. Make sure the pot has a drainage hole. If you love a decorative pot, use it as a cache pot. Plant your aloe in a smaller terracotta pot, then place that inside the decorative one. This way, you can water normally and dump out excess water.
My real story: I bought a beautiful ceramic pot with no hole. I thought I could make it work by adding a layer of pebbles at the bottom. This is a myth. Pebbles do not create drainage. They just raise the water table. My pup sat in damp soil for weeks. The roots rotted. I threw away both the plant and the pot in frustration.
RHS and AHS Guidance on Aloe Pup Care
The Royal Horticultural Society (RHS) emphasizes that succulents, including aloes, require "very free-draining compost and careful watering." They recommend watering only when the compost is dry, especially during winter months. This aligns perfectly with my experience.
The American Horticultural Society (AHS) notes that aloe pups benefit from being potted in containers that allow the soil to dry completely between waterings. They recommend using a gritty mix that mimics the plant's natural habitat. I found this advice incredibly useful when I switched to a sandier mix.
My Personal Observations After Two Weeks
I want to be honest with you. Not every pup survived my experiment. Out of five pups, four made it through two weeks. One died. The one that died had the smallest root system and I accidentally overwatered it on day five. I got impatient. I thought a little extra water would help. It did not.
The four survivors look different now. Their leaf bases are plump and firm. The new growth at the center is bright green. One pup even showed a tiny new root poking through the drainage hole. That is a great sign. It means the plant is happy and actively growing.
If you are trying this at home, please be patient. Aloe pups do not grow fast. They take time to establish roots. Do not poke them. Do not pull them. Do not move them around. Just let them sit in their pots and do their thing.
Common Issues and How I Fixed Them
Issue: Leaves Turning Brown and Mushy
Cause: Overwatering or poor drainage. This is rot. I saw it happen on day six with one of my pups.
Fix: Remove the pup immediately. Cut away all mushy parts with a clean knife. Let it callous for three days. Repot in dry soil. Do not water for at least a week. If the rot has spread to the base, the pup is likely unsalvageable. That happened to me twice. I learned to check for mushiness with a gentle squeeze before watering.
Issue: Leaves Turning White or Pale
Cause: Too little light. I kept a pup in my bathroom for a week. The leaves lost color and stretched.
Fix: Move the pup to a brighter location gradually. Do not shock it with direct sun immediately. Start with bright indirect light for a few days, then adjust. My pale pup recovered its green color in about five days under a grow light.
Issue: Leaves Curling Inward or Shriveling
Cause: Underwatering or transplant shock. I saw this on day three with one pup. It looked like a sad, deflated balloon.
Fix: This is normal for the first week after separation. Do not water more. Wait. The leaves should re-plump once roots establish. If the shriveling continues after two weeks, check for root issues. Gently remove the pup and inspect. If roots are white and healthy, just give it more time.
FAQ: Aloe Pup Survival in Indoor Conditions
Q: How often should I water aloe pups indoors?
Water only when the soil is completely dry. For most indoor conditions, this is every 10 to 14 days. In winter, you might water only once a month. The key is to check the soil before watering. If in doubt, wait an extra day. I have never killed a plant by waiting too long. I have killed many by watering too soon.
Q: Can aloe pups grow without roots?
Yes, but it takes patience. I successfully rooted a rootless aloe pup by letting it callous for three days, then placing it on top of dry soil. I did not bury it. I just rested it on the surface. After two weeks, a tiny root appeared. I watered only after I saw the root. The pup survived and is now growing in its own pot. It took six weeks total to see real growth.
Q: What is the best pot size for aloe pups?
Small pots. A pot that is 2 to 3 inches wide is ideal. Do not put a tiny pup into a large pot. The excess soil holds too much moisture. The roots cannot absorb it all. This leads to rot. I use 3-inch terracotta pots for all my pups. They outgrow them in about six months, but by then they are strong enough to handle a bigger home.
Final Thoughts From Someone Who Has Been There
I cannot tell you how many aloe pups I have killed. Three, four, maybe five? I lost count. But I learned something each time. The biggest lesson is this: aloe pups thrive on neglect. They do not need constant care. They need a good setup and then to be left alone.
If you are reading this because you just bought or separated an aloe pup, here is my advice. Put it in a small terracotta pot with well-draining soil. Place it in bright, indirect light. Water it once, then forget about it for two weeks. Seriously. Do not touch it. Do not move it. Do not check the soil every day.
After two weeks, check the soil. If it is dry, water it again. If it is still moist, wait another week. Your aloe pup will thank you with green, plump leaves. It might even reward you with its own pups one day. Then you can start the whole process over again. And trust me, that is where the real fun begins.