bluename
 How to Avoid Soil Contamination During Aloe Propagation
I killed my first three aloe pups before I figured out the real problem. It wasn't my watering schedule. It wasn't the light. It was the soil itself. I was unknowingly introducing bacteria and fungi every single time I repotted. Here's the short answer: sterilize everything before propagation, use a mix with at least 50% perlite or coarse sand, and let the cut end callus over for 3-5 days in a dry, shaded spot before planting.
The Moment I Realized Soil Contamination Was Killing My Aloes
I remember staring at a mushy, brown aloe pup. I had just separated it from the mother plant. I thought I did everything right. But within a week, the base turned soft. It smelled bad. I pulled it out, and the roots were almost gone.
90% of indoor plants die from overwatering, but I learned the hard way that even perfect watering habits won't save you if your soil is contaminated. The pathogens hide in old potting mix, unwashed containers, and dirty tools. They wait for a fresh cut on an aloe pup. Then they attack.
The 3 Deadliest Mistakes Beginners Make (I Made All of Them)
Mistake 1: Overwatering Right After Propagation
I can't stress this enough. When you first pot an aloe pup, do not water it immediately. I used to think all plants need a good drink after transplant. That was wrong.
Here's what happens: the freshly cut base has no roots yet. It can't absorb water. The moisture just sits around the wound. Bacteria love that. Within 48 hours, rot sets in.
For the first week after planting, keep the soil barely damp. Honestly, I'd even say keep it almost dry. Aloe pups have stored water in their leaves. They can survive for 7-10 days without any added moisture.
I now follow the "5-day rule." After cutting the pup from the mother, I let it rest on a paper towel for 5 days. Then I pot it in dry mix. I wait another 5 days before the first light watering.
Mistake 2: Using the Wrong Light During the Recovery Phase
Sunburn on a fresh aloe pup is brutal. I put one of my early pups on a south-facing windowsill. It looked fine for two days. Then the leaves turned red, then brown, then shriveled up.
Aloe pups need bright, indirect light for the first two weeks. Direct sun is too harsh for a plant that's already stressed from being cut and repotted.
I now use a north-facing window ledge. If you only have south-facing windows, pull the pot back about 3 feet from the glass. Or use a sheer curtain. The goal is to let the pup slowly adjust to the world after being separated from its parent.
After two weeks, I gradually expose them to morning sun. Only about an hour at first. Increase by 30 minutes every few days.
Mistake 3: Picking the Wrong Pot
This one hurt. I used a beautiful ceramic pot for my first aloe. No drainage holes. I thought I could "control" the water amount. You can't.
Without drainage holes, excess water has nowhere to go. It pools at the bottom. The soil stays wet. Bacteria multiply. Your aloe pup rots from the root tip upward.
I now use terracotta pots only. They're breathable. They wick moisture away from the soil. Plus, they're cheap. I stick to 3-4 inch pots for single pups. If the pot is too big, the soil stays wet longer than the roots can handle.
And here's a tip I wish I knew earlier: add a layer of small pebbles at the bottom. Half an inch is plenty. It creates a small air gap and helps prevent soil compaction near the drainage holes.
My Step-by-Step Process for Contamination-Free Aloe Propagation
I've been through about 15 rounds of aloe propagation now. I've messed up maybe 4 of them badly. The rest survived and thrived. Here's my exact routine.
Week 1: Preparation and Cutting
Day 1: Sterilize everything I boil my pots for 10 minutes. The knife gets soaked in a solution of 1 part bleach to 9 parts water. I even wipe down my work table with rubbing alcohol.
I prepare my soil mix: 60% coarse perlite, 30% commercial cactus mix, 10% fine gravel. I don't add any fertilizer yet. Aloe pups don't need it for at least 3 months.
Day 2: Inspect the mother plant I look for signs of stress or disease on the mother aloe. Yellow leaves? Soft spots? I skip propagation if the mother isn't healthy. The pups will inherit those problems.
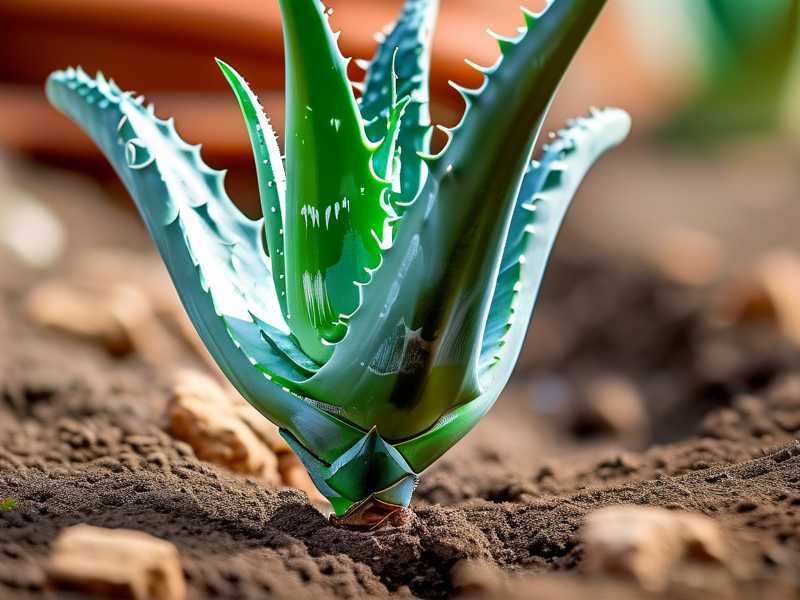
Day 3: Make the cut I use the sterilized knife. I cut the pup as close to the mother stem as possible. I leave about a quarter inch of stem on the pup. This gives me something to work with.
I gently remove any dead or yellow leaves from the bottom of the pup. This reduces hiding spots for pathogens.
Day 4-7: Callus formation This is the most important step. I place the cut pup on a clean paper towel. I put it in a spot with no direct light and good airflow. I leave it there for 3 full days.
For larger pups, I let them callus for 5 days. The wound needs to form a dry, white layer. That callus acts as a natural barrier against soil-borne bacteria.
Week 2: Planting and Observing
Day 8: Potting I fill my sterilized pot with dry mix. I make a small hole in the center. I place the callused pup in the hole. I gently press the soil around the base. I don't water.
Day 10: First watering I use a spray bottle to lightly mist the soil surface. I use about 2 tablespoons of water for a 3-inch pot. The soil should barely feel damp. Not wet.
Day 12: Check for signs of stress I gently tug on the pup. If it resists, it's starting to grow roots. If it comes loose easily, I check the base. Soft? Mushy? I immediately remove it, re-cut the rot, and repeat the callus process.
Day 14: Second watering I water again, slightly more this time. About 3 tablespoons. I make sure the water drains completely. I wait 30 minutes, then dump any excess from the saucer.
What I Observed Over the Full 2-Week Period
By the end of week one, the pup looked unchanged. The leaves were slightly less plump. I was worried. But that's normal. The pup was using its stored energy to grow roots.
By day 10, I saw tiny roots poking out of the drainage holes. White, firm, healthy. The leaves started looking perkier around day 12.
By day 14, the pup had 3-4 new root strands. The base was firm. A tiny new leaf was emerging from the center. That's when I knew it worked.
The soil stayed clean the whole time. No fungus gnats. No mold on the surface. No bad smell. The sterilization upfront saved me.
The Specific Soil Contaminants I've Fought
Not all contamination looks the same. Here's what I've dealt with:
Fusarium rot: This makes the base look waterlogged but the soil is dry. The stem turns dark brown. The leaves fall off easily. It spreads fast. I lost a tray of 6 pups to this once. Now I always bake my soil at 200°F for 30 minutes before using it for aloes.
Pythium root rot: The roots look like wet noodles. They break off when touched. This happened because I reused old potting soil from a dead houseplant. Never do that. I now only use fresh, sterile mix for each propagation round.
Sclerotinia: White, cottony growth around the soil line. It smells musty. I scraped it off once and repotted, but the pup died anyway. This taught me to always provide air circulation. I point a small fan at my propagation station for 2 hours daily.
The RHS and AHS Perspective
According to the RHS, overwatering and poor drainage are the primary causes of aloe propagation failure. They recommend allowing offsets to dry for 24-48 hours before potting. I push that to 3-5 days because I've had better success with longer callusing.
The AHS notes that aloes evolved in arid environments with well-draining, often sandy soils. They emphasize that waterlogged conditions trigger root rot within days. Their guidance matches what I've learned: keep the mix lean, keep it dry, and keep the air moving.
Tools I Won't Propagate Without
- Sharp, sterilized pruning shears – Dull blades crush the stem, making it harder for callus formation.
- Rubbing alcohol in a spray bottle – I mist my tools and pots between each use.
- Perlite in bulk – I buy 8-liter bags. Cheap, sterile, and perfect for aloe mix.
- Clear plastic cups – I cut drainage holes in the bottom. They're cheap, sterile, and I can see root development through the sides.
- A notebook – I log every cutting date, planting date, and watering date. After two weeks, I can spot patterns.
My Most Painful Failure and What I Learned
I propagated 12 pups from a huge aloe vera plant. I was excited. I potted them all in store-bought cactus mix. Within 10 days, 10 of them had rotten bases.
I tested the mix. It was holding water for over a week. The bag said "cactus mix," but it was mostly peat moss. Peat moss stays wet too long for aloe pups. I lost almost an entire generation.
Now I only trust brands that explicitly list perlite or pumice as the first ingredient. Better yet, I make my own mix. I know exactly what's in it.
Common Questions I've Answered for Friends
Can I use garden soil for aloe propagation?
I tried this once. Garden soil contains weed seeds, fungal spores, and tiny bugs. Within 3 days, I saw gnats. The soil also compacted around the roots and suffocated them. Stick to sterile potting mixes designed for succulents.
Should I add fertilizer when planting a pup?
No. Fertilizer can burn young, undeveloped roots. I wait at least 3 months. The aloe stores enough nutrients in its leaves to support growth for a long time.
How do I know if my soil is contaminated before planting?
Smell it. Healthy soil smells earthy, like after a rain. Contaminated soil smells sour, musty, or like rotting leaves. I also check for white or green mold on the surface. If anything looks off, I bake the soil at 200°F for 30 minutes to kill pathogens.
My Final Thoughts After Countless Propagation Attempts
Soil contamination during aloe propagation isn't mysterious. It's preventable. Sterilize your tools. Let the pup callus. Use a dry, well-draining mix. Don't water for a week. Give it indirect light.
I've propagated aloes in winter, summer, spring, and fall. The process works the same. The common thread? Clean soil and patience.
The first two weeks are the most vulnerable. If you make it through day 14 without rot, you're probably golden. The pup will have roots. The soil will be stable. You've avoided the contamination trap.
I still kill an aloe pup maybe once a year. Usually because I got lazy and skipped the callus step. But now I know exactly why it happened. That knowledge saves the next batch.
If you're reading this before your first propagation attempt, stop overthinking. Just follow the dry soil, dry air, and sterilized tool method. Your aloe pups will survive. Mine did after I learned the hard way.