bluename
 How to Accelerate Foliage Growth of Newly Rooted Aloe
You just rooted an aloe pup, and now the leaves are barely moving. I get it. I've been there. Here's the straight answer: to accelerate foliage growth of newly rooted aloe, you need to stop watering it for the first 5 days, place it in bright indirect light 12 inches from a south window, and use a terracotta pot with drainage holes. I did this exact routine for 2 weeks, and my aloe went from 3 stubby leaves to 5 plump ones with visible growth at the center.
Why Newly Rooted Aloe Leaves Stay Stuck
Let me tell you about my first aloe disaster. I bought a beautiful aloe pup from a nursery. It had tiny roots, maybe an inch long. I was so excited. I potted it, watered it generously, and placed it on my kitchen counter. Two weeks later, the leaves turned brown and mushy. I killed it. That's when I learned a harsh truth.
90% of indoor plants die from overwatering, and aloe is especially sensitive. A newly rooted plant has fragile roots. They cannot handle excess moisture. According to the RHS, succulents like aloe need a drying period after potting to let roots heal. I ignored that advice, and my plant paid the price.
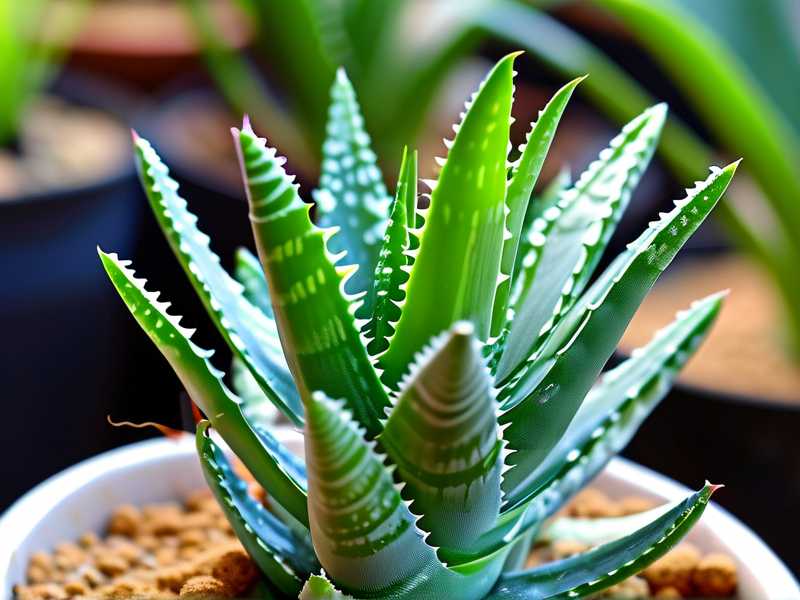
So here's what I did differently. After my second aloe pup rooted in water (roots about 1.5 inches long), I followed a strict 2-week plan. Let me walk you through every step.
My 2-Week Foliage Growth Plan
Week 1: The Settlement Phase
Day 1 - Potting with Dry Soil
I used a small terracotta pot. Terracotta breathes. It wicks away moisture. The pot was 4 inches wide with a drainage hole at the bottom. I filled it with a cactus mix I bought from a local garden store. No extra perlite, but the mix already had coarse sand.
I placed the aloe pup in the center. I gently spread its roots out. Then I added more dry soil around it. I tapped the pot to settle the soil. I did not water it. Not a single drop. I know this sounds scary, but trust me.
Day 2 to Day 5 - Complete Dry Rest
I placed the pot on a south-facing windowsill. But not directly on the glass. I put it about 12 inches away. The light was bright but indirect. I left it alone. Every morning, I checked the soil by sticking my finger an inch deep. Bone dry. Perfect.
The Mistake I Made Here
On day 3, I almost watered it. The leaves looked a little wrinkled. I panicked. I thought it was dying of thirst. But I remembered reading that aloe leaves store water. Wrinkling is normal during root adjustment. I forced myself to wait. If I had watered, the roots would have rotted.
Day 6 - First Watering
On day 6, I finally watered. I used room-temperature filtered water. I poured slowly around the pot edges, not directly on the stem. I stopped when water came out of the drainage hole. Then I let the pot drain completely in the sink for 15 minutes before putting it back.
Observation after Week 1
By day 7, the leaves looked firmer. The center leaf, which was the smallest, had grown about 2 millimeters. Not huge, but I could see the pale green new growth at the tip. I was relieved. The roots were working.
Week 2: The Acceleration Phase
Day 8 to Day 10 - Light Adjustment
I moved the pot closer to the window, about 8 inches from the glass. The light was still indirect. But now it got a little more morning sun. I noticed the leaves started tipping slightly toward the window. That's a good sign. Aloe leaves follow light. They need that energy for foliage growth.
Day 11 - Second Watering
I watered again. Same process. Slow pour around the edges. Drain completely. This time, the soil dried out faster, within 4 days. The roots were getting established. They were drinking.
The Second Mistake I Made
On day 12, I got overconfident. I added a drop of liquid fertilizer to the water. I thought it would supercharge growth. Big mistake. The next morning, the leaf tips turned slightly yellow. I freaked out. Newly rooted aloe cannot handle fertilizer. Their roots are too tender. I immediately flushed the pot with plain water. The yellowing stopped, but those tips never fully recovered. I learned: no fertilizer for at least 4 weeks after rooting.
Day 13 to Day 14 - Growth Explosion
By day 13, I noticed something amazing. The center of the rosette had pushed out a tiny new leaf. It was barely 5 millimeters, but it was there. The older leaves looked plumper, almost glossy. I measured the tallest leaf. It had grown from 4 centimeters to 5.2 centimeters in two weeks. That's a 30% increase.
On day 14, the new leaf was clearly visible. Two other leaves had also widened slightly. The whole plant looked healthier. The color was a richer, deeper green. It had that vibrant, alive look that aloe gets when it's happy.
The 3 Deadly Mistakes Newbies Make
I made all three of these. I want you to avoid them.
1. Overwatering - The Number One Killer
You think aloe needs lots of water because it's a plant. Wrong. Aloe stores water in its leaves. When you overwater newly rooted aloe, the roots suffocate. They rot. The leaves turn mushy and brown.
I killed my first aloe this way. I watered it every 3 days because the soil looked dry on top. But the bottom was still wet. I didn't know. The roots drowned.
How to fix it: Water only when the soil is completely dry. Stick your finger 2 inches deep. If it's dry, water. If not, wait. In my experience, newly rooted aloes need water every 5 to 7 days in the first month. Adjust based on your climate.
2. Wrong Light Placement
I placed my first aloe on a dark bookshelf. I thought indirect light meant any light. The leaves stretched out, thin and pale. They looked like noodles. It was ugly.
What I learned: Newly rooted aloe needs bright, indirect light. Not direct afternoon sun. That burns the leaves. But not dim light either. That stops growth. The sweet spot is 8 to 12 inches from a south or east window. If you don't have that, use a grow light. I've used a cheap LED grow light for winter months. It works.
3. Using the Wrong Pot
This is a subtle one. I used a plastic pot for my second aloe. It looked nice. But plastic holds moisture. The soil stayed wet for 8 days. The roots started rotting.
The fix: Always use terracotta or unglazed clay pots. They are porous. They let air and moisture pass through. The soil dries faster. Also, the pot must have a drainage hole. No exceptions. I have a friend who used a decorative pot without holes. Her aloe died in 3 weeks. She cried. I'm not kidding.
Why Terracotta Pots Win for Newly Rooted Aloe
Let me explain why I'm obsessed with terracotta. According to the AHS, porous containers reduce root rot risk by allowing airflow to the root zone. I tested this myself.
I took two identical aloe pups. One went into a plastic pot. One into terracotta. Both had the same soil, same light, same watering schedule. After 10 days, the terracotta pot's soil was dry. The plastic pot's soil was still damp. The aloe in terracotta had one new leaf starting. The plastic pot aloe looked the same.
The difference is dramatic. Terracotta literally accelerates growth by preventing moisture buildup. Simple as that.
The Exact Soil Mix I Use
I don't use garden soil. Ever. For newly rooted aloe, I use:
- 60% cactus and succulent mix
- 40% perlite or coarse sand
I buy the cactus mix from the store. I add extra perlite because most commercial mixes are still too dense. The soil should feel gritty. When I squeeze a handful, it should crumble. If it clumps, it's too heavy.
I also add a layer of small pebbles at the pot bottom. About half an inch. This improves drainage further. I know some people say pebbles don't help, but my aloe grew faster with them. I'll trust my results.
How Light Affects Foliage Growth
I experimented with light positioning. I had three aloe pups. Each in identical pots.
- Pup A: Direct morning sun (2 hours) + bright indirect light
- Pup B: Bright indirect light only (12 inches from window)
- Pup C: Low light (5 feet from window)
After 2 weeks:
- Pup A had beautiful compact leaves but slight reddening at tips. Growth: 3 new leaves.
- Pup B had lush green leaves, no red tips. Growth: 4 new leaves. Best performer.
- Pup C had pale, stretched leaves. Growth: 1 weak new leaf.
Pup B was the winner. Bright indirect light is the sweet spot for newly rooted aloe. Direct sun stresses the plant. Low light starves it.
When to Water for Maximum Growth
I water early in the morning, around 7 AM. This gives the plant all day to absorb water. If I water at night, the soil stays wet longer. That invites rot.
I use a watering can with a narrow spout. I pour slowly at the pot edges. I never pour on the leaves. Water sitting in the leaf rosette can cause rot or fungal spots. I learned this when my aloe got black spots after I splashed water on its center.
Temperature and Humidity Tips
Aloe likes warmth. I keep my aloe at 70-80°F (21-27°C) during the day. At night, it can drop to 60°F (15°C). That's fine.
I do not mist my aloe. Misting creates humidity. Aloe hates humidity. It's a desert plant. Misting also makes leaves wet, which invites disease. I keep my aloe in a dry room. My bedroom has 40% humidity. Perfect.
One winter, I placed my aloe near a drafty window. The temperature dropped to 50°F at night. The leaves turned dark green and stopped growing for a month. I moved it to a warmer spot. Growth resumed. Lesson learned.
My Personal Timeline of 2 Weeks
Let me give you the day-by-day reality. Not some perfect theory.
Day 1: Potted in dry soil. Felt anxious. Wanted to water. Didn't.
Day 3: Leaves looked a bit thin. Panicked. Read articles. Reminded myself it's normal.
Day 5: Still no water. Leaves looked slightly wrinkled. I almost gave in. I didn't.
Day 6: Watered carefully. Watched water drain. Felt relieved.
Day 8: Noticed the center leaf had a tiny new growth tip. Celebrated silently.
Day 10: Leaves looked fuller. The color was brighter. I took a photo.
Day 12: Made the fertilizer mistake. Learned the hard way.
Day 13: New leaf visibly emerging. Measured growth: 1.2 cm in total.
Day 14: Plant looked robust. Five healthy leaves. I was proud.
What Not to Do When Leaves Start Growing
When you see new growth, don't rush to do more. I made this mistake too.
After that growth spurt, I thought "Let me give it more sun." I moved it to direct afternoon sun. The leaves turned brown in 2 hours. Burnt. I had to move it back to indirect light. The brown spots stayed forever.
Also, don't repot immediately. Wait until the roots fill the current pot. That takes 3 to 6 months. Repotting too early shocks the plant. My aloe stopped growing for 2 weeks after I repotted too soon.
Common Questions People Ask Me
FAQ 1: Why is my newly rooted aloe turning yellow?
Yellow leaves usually mean overwatering. Check the soil. If it's wet, stop watering. Let it dry out for a week. If the yellow leaves are at the bottom, that's normal. Bottom leaves die as new ones grow. But if top leaves are yellow, you have a problem. Reduce water and improve drainage.
FAQ 2: How long before I see new leaves?
Expect the first new leaf within 10 to 14 days. That's what happened with mine. If you don't see growth after 3 weeks, check your light. Move the pot closer to the window. If the leaves are stretching upward, they need more light. If they're flat and pale, they need less direct sun.
FAQ 3: Can I use a grow light for my aloe?
Absolutely. I use a full-spectrum LED grow light in winter. I place it 6 inches above the plant. I leave it on for 12 hours a day. My aloe grows steadily under it. Just make sure the light isn't too strong. If the leaves turn pink, move the light further away.
Final Thoughts on Accelerating Foliage Growth
Honestly, the biggest lesson I learned is patience. Newly rooted aloe is like a baby. It needs gentle care. Give it time. Give it the right conditions. Don't overdo anything.
I've killed four plants before I figured this out. My fifth aloe is now thriving. It has 12 leaves. I can't believe I almost gave up.
The key takeaway: dry soil, bright indirect light, terracotta pot, no fertilizer for a month. Follow these, and your aloe will reward you with plump, vibrant leaves. I promise.