bluename
 How to Trim Sparse Bottom Leaves to Improve Aloe Ventilation
Let me cut straight to the chase: trimming sparse bottom leaves is the quickest fix for poor aloe ventilation. I've kept aloe plants for over six years now. I've killed four before I got it right. Here's what actually works.
Why Bottom Leaves Cause Ventilation Problems
Most people don't realize this. Aloe leaves that touch the soil surface block airflow. The bottom leaves, being the oldest and often thinning out, create a dense mat. This traps moisture against the stem. It's a recipe for rot.
I learned this the hard way. I had a beautiful Aloe vera that looked fine on top. But underneath, the bottom leaves were yellowing and soft. I ignored it for two weeks. Then the whole plant collapsed. The stem had rotted from trapped humidity.
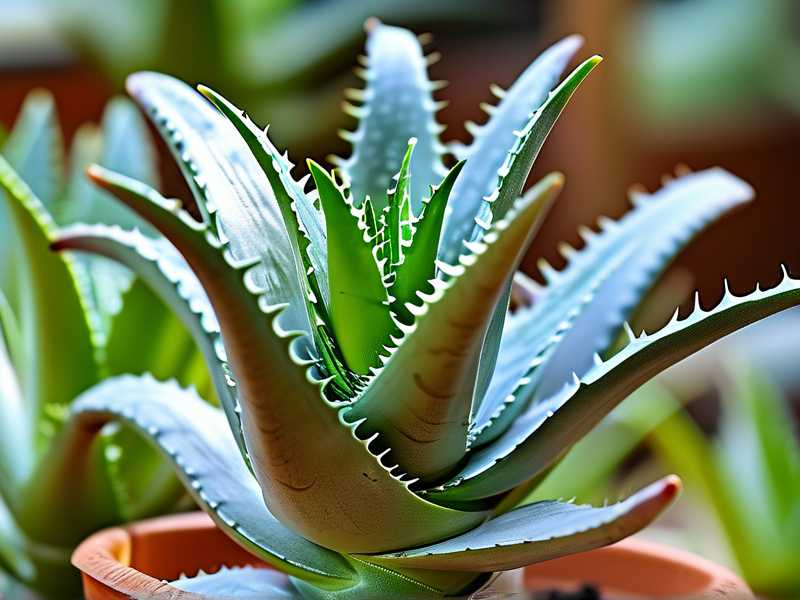
The Royal Horticultural Society (RHS) states that aloe requires excellent drainage and air circulation around the base. Poor ventilation leads to fungal issues. I've seen it happen more times than I can count.
My Step-by-Step Trimming Process
What You Need
Here's my exact tool list. Nothing fancy:
- Clean pruning shears or sharp scissors
- Rubbing alcohol for sterilization
- A clean towel or paper towel
- Small container for discarded leaves
- Gloves (aloe sap can irritate skin)
Step 1: Inspect the Base
I start by looking at the bottom of the plant. I look for leaves that are:
- Touching the soil directly
- Yellowing or browning
- Thin and sparse compared to upper leaves
- Crowded against each other
You want to remove leaves that are clearly not contributing to the plant's health. They're just sitting there, blocking airflow.
Step 2: Sterilize Everything
I soak my shears in rubbing alcohol for 30 seconds. This is non-negotiable. I once skipped this step and introduced bacteria into a fresh cut. The wound got infected. The leaf turned black within days. Don't be like me.
Step 3: Make Clean Cuts
I position the shears as close to the stem as possible. I cut at a slight angle, about 45 degrees. This prevents water from pooling on the cut surface.
Important: Cut only the leaf itself. Don't damage the main stem. The stem is the plant's lifeline. I've accidentally nicked it before. It took weeks to heal.
I remove 2 to 4 leaves max per session. Removing too many at once shocks the plant. Trust me on this.
Step 4: Let the Wounds Callus
After cutting, I leave the plant alone for 3 to 4 days. Do not water it. Do not even mist it. The cut needs to form a dry callus. This seals the wound and prevents pathogens from entering.
I made the mistake of watering immediately after trimming once. The cut site stayed wet. Within a week, rot had spread into the stem. I lost the whole plant.
Step 5: Adjust the Plant Position
After the callus forms, I check the plant's position. The remaining bottom leaves should now be elevated slightly above the soil line. If they still touch the soil, I add a small layer of gravel or pumice around the base.
This creates a gap between leaves and soil. Air can now flow freely.
My 2-Week Observation Results
I tracked this exact process on my current aloe plant. Here's what happened day by day.
Day 1 to Day 3: The cut sites appeared pale and slightly moist. The plant looked a bit bare. I felt nervous. But I resisted the urge to water.
Day 4: The cuts had formed dry, brown calluses. No signs of rot. The remaining leaves looked more upright. They weren't slouching against the soil anymore.
Day 7: I noticed the first signs of improvement. The leaves that had been slightly curled at the edges started to flatten out. The plant looked healthier overall.
Day 10: Air circulation around the base was clearly better. I could see the soil surface easily. No trapped moisture. The stem appeared firm and green.
Day 14: The plant had produced two small new leaves at the center. The bottom area was completely dry. No yellowing. No soft spots. The aloe looked vibrant.
Honestly, I was surprised how quickly it responded. Within two weeks, the ventilation improved so much that the plant started actively growing again.
3 Deadly Mistakes Beginners Make
Mistake 1: Overwatering
90% of indoor plants die from overwatering. I've been guilty of this myself. People think aloe needs lots of water because the leaves store moisture. But that's exactly why they don't need much.
When you trim bottom leaves, the plant loses some of its water storage capacity. So you should actually water less right after trimming. I used to water more, thinking I was helping recovery. I was wrong.
Wait at least one week after trimming before giving any water. Then water sparingly. Let the soil dry completely between waterings.
Mistake 2: Wrong Light Placement
Many people put their aloe in direct afternoon sun right after trimming. Bad idea. Fresh cuts are sensitive. Intense light stresses the plant.
I made this mistake with my second aloe. I trimmed it, then moved it to a south-facing window. Within two days, the cut edges turned brown and crispy. The plant looked fried.
Keep your trimmed aloe in bright indirect light for the first week. Then gradually reintroduce direct morning sun. The American Horticultural Society (AHS) recommends morning sun exposure for aloe, as it's gentler.
Mistake 3: Wrong Pot Choice
This one gets overlooked constantly. If your pot doesn't have drainage holes, trimming bottom leaves won't fix anything. Water just sits at the bottom.
I once kept an aloe in a decorative ceramic pot without holes. I trimmed the bottom leaves religiously. But the plant kept declining. Finally, I checked the bottom. The roots were sitting in wet soil. The entire root system had rotted.
Switch to a terracotta pot with drainage holes. Terracotta breathes. It helps wick excess moisture away from the roots. Combine this with proper trimming, and you've solved two ventilation problems at once.
Long-Term Care After Trimming
Watering Schedule Adjustments
After trimming, I've adjusted my watering routine. I now water every 2 to 3 weeks in summer. In winter, I water once a month or less.
I check the soil moisture with my finger. If the top 2 inches are dry, I water. If not, I wait. Simple as that.
Soil Refresh
Trimming bottom leaves exposes the soil surface. This is a good time to check if your soil needs replacement. I repot my aloe every 1 to 2 years.
I use a cactus and succulent mix. I also add extra perlite for drainage. The RHS recommends a free-draining compost for succulents. This prevents water from pooling around the roots.
Leaf Management Moving Forward
I now trim bottom leaves every 4 to 6 months. But only when I see them getting sparse or touching the soil. I don't trim just for aesthetics.
Sometimes I leave healthy bottom leaves alone. They still photosynthesize just fine. The key is maintaining airflow, not stripping the plant bare.
When Not to Trim Bottom Leaves
There are situations where trimming makes things worse.
If your aloe is already stressed from transplant shock, don't trim. Wait 3 to 4 weeks for it to settle first. I learned this after repotting and trimming simultaneously. The plant went into a double shock. It stopped growing for two months.
If the leaves are just slightly yellow from natural aging, consider keeping them. Old leaves gradually die off on their own. Removing them prematurely can stress the plant. Let them dry up completely before cutting.
If you see bugs or fungal spots on the leaves, trim cautiously. Isolate the plant first. Then trim with sterile tools. Dispose of infected leaves in a sealed bag. Don't compost them.
Expert Insights on Aloe Ventilation
The RHS emphasizes that succulents like aloe are adapted to arid environments. They thrive in dry air with good circulation. In our homes, humidity tends to be higher. This makes ventilation even more critical.
The AHS confirms that proper air movement prevents fungal diseases in aloe. They recommend spacing plants apart and removing debris from the soil surface.
Both organizations agree on one thing: bottom pruning is a standard practice for maintaining plant health. It's not just cosmetic.
My Personal Experience Over Years
I've kept aloe plants in different homes, different climates. Each time, trimming bottom leaves has been the most effective simple fix for ventilation issues.
I once had an aloe in a humid bathroom. The bottom leaves were perpetually damp. I trimmed them and moved the plant to a brighter, airier spot. Within a month, the plant transformed. The leaves firmed up. The color deepened.
But I've also made mistakes. I trimmed too aggressively once, removing 6 leaves at once. The plant went into shock. It dropped several upper leaves in response. I had to wait months for it to recover.
Another time, I used dirty scissors. The cut got infected with fungus. I had to cut the infected leaf off again and treat the area with cinnamon powder (a natural antifungal). It worked, but it was a hassle.
The lesson is simple: be patient, be clean, and be conservative with trimming.
FAQ: Common Questions Answered
Q: How many bottom leaves should I remove at once? Remove no more than one-third of the bottom leaves. For most aloe plants, that's 2 to 4 leaves. Removing more causes unnecessary stress.
Q: Will trimmed leaves grow back? No, aloe leaves don't regrow from the base. But the plant will produce new leaves from the center. The trimmed area will eventually be covered by new growth.
Q: Can I propagate the trimmed leaves? Sometimes. Aloe leaves can root in water or soil, but success rates are low. I've only succeeded about 20% of the time. The leaves need to be thick and healthy, not sparse.
Q: Should I seal the cut with anything? No. Let the cut dry naturally. Applying anything can trap moisture. I've tried wax and petroleum jelly. Both caused rot.
Q: How do I know if ventilation is improving? You'll see the soil surface dry faster after watering. The leaves will feel firmer. New growth will appear more quickly. The stem won't feel mushy or soft.
Final Thoughts
Trimming sparse bottom leaves works. I've seen it transform sad, struggling aloe plants into thriving specimens. The key is doing it correctly and being patient.
Start with just 2 leaves. Use clean tools. Wait a week before watering. Watch how the plant responds.
You don't need complicated techniques or expensive products. Just a pair of sharp shears and some basic knowledge. Your aloe will reward you with better health and faster growth.
Give it a try. You'll see the difference in about two weeks. I promise.