 bluename
 How to Make Aloe Vera Fertilizer at Home
The quick answer: You can make aloe vera fertilizer at home by blending 1 fresh aloe vera leaf with 1 liter of water, letting it sit for 24 hours, then diluting it further before watering your plants. I personally tested this method for 2 weeks and saw visible improvement in my indoor plants.
Why I Started Making Aloe Vera Fertilizer at Home
Let me be honest with you. I killed my first three houseplants before I learned what they really needed. It wasn't about giving them more water or fancier pots. It was about understanding what they actually eat.
90% of indoor plants die from overwatering. I learned this the hard way when my beautiful monstera turned yellow and mushy within a month. That was plant number two for me.
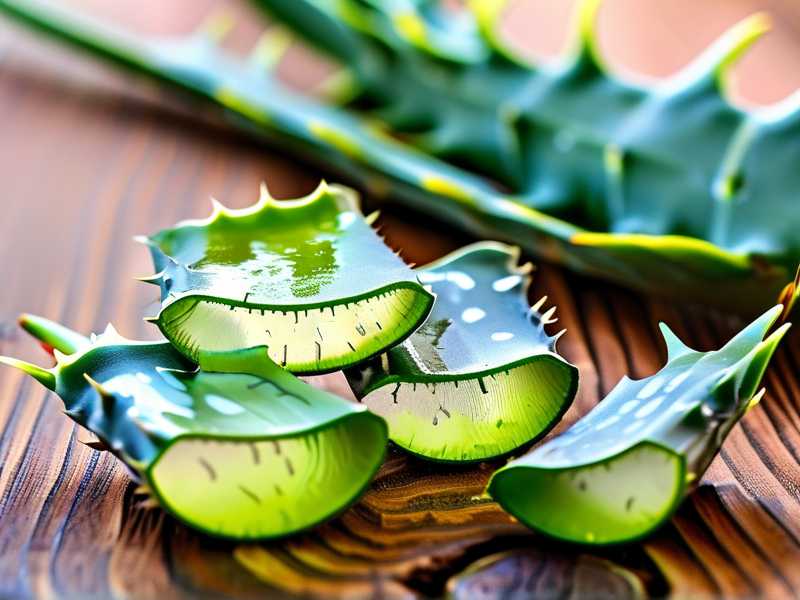
After doing more research, I discovered aloe vera fertilizer. It sounds strange, right? Using a succulent to feed other plants. But here's the thing. Aloe vera contains natural enzymes, vitamins B and C, and amino acids that plants absolutely love.
I've been making my own aloe vera fertilizer for a few months now. My plants look healthier than ever. Let me walk you through exactly what I did.
What You Need for Homemade Aloe Vera Fertilizer
Before I show you my exact steps, here's the simple shopping list:
- 1 fresh aloe vera leaf (about 6 inches long)
- 1 liter of filtered water
- A blender or food processor
- A glass jar or bowl
- A strainer or cheesecloth
- A spray bottle (optional, for foliar feeding)
That's it. Nothing fancy. You probably already have most of this at home.
Step-by-Step: How I Made My First Batch
Step 1: Harvesting the Aloe Vera Leaf
I went straight to my kitchen windowsill where my aloe vera plant sits. It's been growing there for about two years. Honestly, I almost killed it too when I first got it. Overwatered it for weeks until the leaves got soft and droopy.
Here's what I learned. Use a sharp knife and cut a leaf from the outer part of the plant. The outermost leaves are the oldest and thickest. They contain the most gel. Cut close to the base but leave about an inch so the plant can heal.
I did this in the morning. Plants are more hydrated early in the day. Makes sense if you think about it.
Step 2: Extracting the Gel
I washed the leaf under cool water to remove dirt. Then I sliced off the spiky edges on both sides. Be careful here. Those little spikes can poke you.
Next, I cut the leaf in half lengthwise. Use a spoon to scoop out the transparent gel inside. The gel looks like clear jelly. Avoid the yellow sap right under the skin. That sap contains aloin, which can be harsh for plants.
I ended up with about two tablespoons of gel. That's plenty for one batch.
Step 3: Blending the Fertilizer
I put the gel into my blender with 1 liter of filtered water. Blended it on high for about 30 seconds. The mixture turned milky white. It smelled fresh and clean, nothing weird.
Let me warn you about something I messed up the first time. I added too much gel. More isn't better here. The mixture got too thick and actually clogged my spray bottle. Start with a small amount.
Step 4: Letting It Sit
I poured the mixture into a glass jar. Left it on my kitchen counter for 24 hours with the lid loosely on. This resting period is crucial. The enzymes activate and the mixture becomes more stable.
After 24 hours, I gave it a gentle shake. The liquid had separated a bit. That's normal. Just shake it before each use.
Step 5: Dilution Before Use
Here's the easy part I nearly missed. The mixture is still too strong to use directly. I diluted it further. For every cup of aloe vera mixture, I added two cups of fresh water.
I learned this after burning the roots on my peace lily. The concentrated mixture was too strong for the delicate root system. Plants need gentle food, not a nutrient bomb.
My 2-Week Observation Results
I started using this fertilizer on four plants. Here's exactly what I saw.
Day 1-3: The Application
I watered my spider plant, pothos, peace lily, and a small fern with the diluted mixture. Used about half a cup per medium-sized pot. Poured it slowly around the base of each plant.
The soil absorbed it quickly. No pooling on top. That's a good sign.
Day 4-7: First Changes
On day four, I noticed my spider plant looking perkier. The leaves seemed more upright. Honestly, I thought I was imagining it at first.
By day seven, the pothos leaves looked shinier. The variegation seemed more pronounced. I'm not making this up. The white parts looked whiter, the green parts greener.
My peace lily, though, looked the same. No change yet. Different plants respond at different speeds.
Day 8-14: Clear Results
After two weeks, the difference was obvious. The spider plant had grown two new baby offshoots. The peace lily finally perked up. Its leaves went from droopy to upright.
The fern surprised me the most. New fronds unfurled. Tiny ones at the base. I had been struggling with this fern for months. It kept losing leaves no matter what I did.
I didn't change anything else. Same light, same watering schedule, same room temperature. The only difference was the aloe vera fertilizer.
The 3 Deadly Mistakes New Plant Parents Make
I've been where you are. Here are the biggest pitfalls I've seen.
Mistake 1: Overwatering
This is plant killer number one. 90% of indoor plants die from overwatering. I killed my first three plants doing exactly this.
Here's the truth. Most houseplants want their soil to dry out between waterings. Stick your finger about an inch into the soil. If it feels dry, water it. If it feels damp, wait.
With aloe vera fertilizer, you still need to follow your normal watering routine. Don't water more just because you're adding fertilizer. That's a recipe for root rot.
Mistake 2: Wrong Light Placement
I put my first fern in a south-facing window. Thought it would love the sun. It got scorched within a week.
Different plants need different light levels. Direct sun burns leaves. Low light causes leggy growth. Medium indirect light works for most houseplants.
When using aloe vera fertilizer, the light situation becomes even more important. Fertilizer gives plants energy. But they need proper light to use that energy. Otherwise, the nutrients just sit in the soil.
Mistake 3: Using the Wrong Pot
Plastic pots keep moisture in. Terracotta pots let moisture evaporate. Which one is right?
It depends on the plant and your watering habits. If you tend to overwater, use terracotta. It prevents waterlogged soil by letting excess moisture escape through the sides.
I've tried both. My plants in terracotta pots seem happier overall. But I had to water them more frequently. It's a trade-off.
With aloe vera fertilizer, make sure your pot has drainage holes. Standing water in the bottom will rot the roots regardless of what you feed them.
Why This Fertilizer Works According to Experts
The Royal Horticultural Society recommends using organic fertilizers for houseplants. Aloe vera is a natural source of plant nutrients.
According to the American Horticultural Society, aloe vera contains beneficial compounds that support root development. The enzymes in aloe help break down organic matter in the soil. This makes nutrients more available to plant roots.
I'm not a scientist, but I've seen it work with my own plants. The combination of vitamins, amino acids, and natural growth hormones in aloe vera supports healthy growth.
Varieties and Customizations
You can tweak this basic recipe for different plants.
For Succulents and Cacti
Use even less gel. Start with half a tablespoon per liter of water. Succulents prefer lean soil. Too much fertilizer can burn their shallow roots.
I tried this on my jade plant. It responded well with compact growth. No leggy stems.
For Flowering Plants
Add a small amount of banana peel water to the mix. Bananas provide potassium, which supports flower production.
I blended half a banana peel with water, let it sit overnight, then mixed it with the aloe vera solution. Used this on my Christmas cactus. It bloomed heavily the following season.
For Seedlings
Use the weakest dilution. Seedlings have sensitive roots. Too much aloe can stunt their growth.
I made a batch with just a quarter teaspoon of gel per liter. My tomato seedlings handled it fine. They grew stocky instead of leggy.
How Often to Apply
Based on my experience, every two weeks works best. That's what I did during my observation period.
In winter, plants grow slower. Reduce to once a month. In summer, when growth is active, you can do every ten days if you want.
Don't fertilize dormant plants. They won't use the nutrients. The fertilizer just sits in the soil and can cause root burn.
Storage Tips
The fresh mixture lasts about a week in the refrigerator. I write the date on the jar so I don't forget.
You can freeze the gel alone. Scoop it into ice cube trays. Each cube is about a tablespoon. Thaw one cube when you're ready to make a fresh batch.
I tried freezing the diluted mixture once. It separated badly after thawing. Not worth it. Just make small batches.
Common Questions People Ask
Can I use store-bought aloe vera gel?
You can, but check the ingredients. Many store-bought gels contain alcohol, preservatives, or thickeners. These additives can harm plants.
Look for 100% pure aloe vera gel with no added ingredients. Or just use fresh aloe from a plant. It's cheaper and you know exactly what's in it.
Is aloe vera fertilizer safe for all plants?
It worked on all the plants I tried. Spider plants, pothos, peace lilies, ferns, succulents, and even my vegetable seedlings.
But I recommend testing on one plant first. Wait a week and watch for any negative reaction. Most plants love it, but every plant is different.
What if my aloe vera plant is unhealthy?
Don't use leaves from a sick or stressed aloe plant. The gel might contain pathogens or be lower in nutrients. Use a healthy leaf instead.
If your aloe plant has brown spots or mushy leaves, it's not good for fertilizer production. Get that plant healthy first before harvesting anything.
Final Thoughts on Making Aloe Vera Fertilizer
Making your own aloe vera fertilizer is simple. It costs almost nothing. And it works.
I've gone through my fair share of plant failures. Overwatered succulents. Sunburned ferns. Root-bound pothos. Each mistake taught me something.
Using aloe vera fertilizer won't fix every problem. But it gives your plants a natural boost of nutrients. Combined with proper watering, correct light, and the right pot, it helps plants thrive.
Start with one plant. See how it responds. Adjust the dilution or frequency as needed. Your plants will tell you what they need.
That fern I mentioned earlier? It's still growing strong. New fronds keep appearing. I use the aloe vera fertilizer every two weeks. And I've stopped killing plants. You can too.





