 bluename
 How to Separate Clustered Aloe Pups Without Root Injury
I killed my first aloe plant by rushing to separate the pups. I was impatient. I tugged too hard. The roots snapped. That mother plant never recovered.
Here is the truth most guides skip. To separate clustered aloe pups without root injury, you must water the soil 24 hours before, use a sterilized knife, and gently untangle roots while keeping the pup attached to a healthy root chunk. I learned this the hard way after losing three aloe offsets in one season.
Let me walk you through what actually works. I will share my exact steps, the mistakes I made, and what I observed over two weeks of recovery.
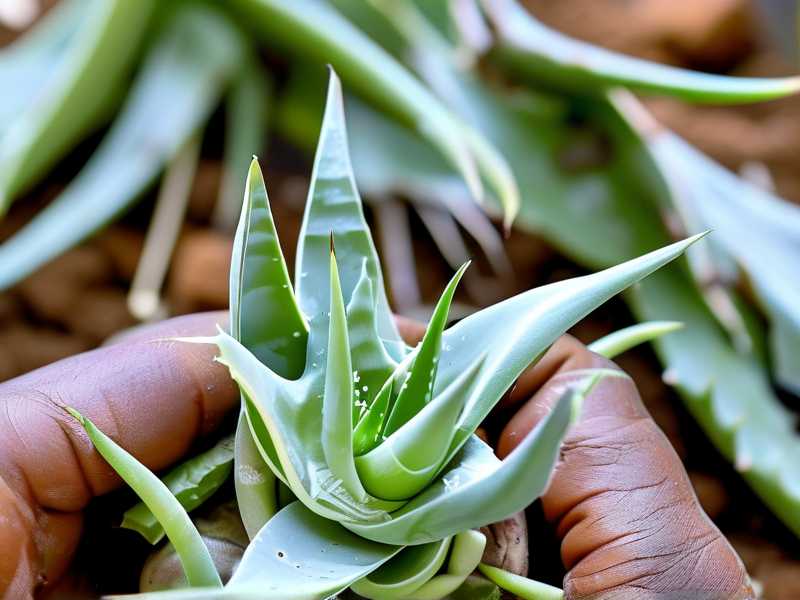
Why Separating Aloe Pups Is Riskier Than You Think
Aloe pups look tough. They have thick leaves and spiky edges. But their root systems are surprisingly fragile.
The Royal Horticultural Society (RHS) confirms that aloe roots are brittle and prone to tearing when disturbed. Many gardeners, including myself, assume pups can handle rough handling. They cannot.
I remember the first time I tried separating a cluster. The mother plant had five pups pressing against each other. I pulled one pup sideways. The entire root crown snapped off. The pup sat in soil for three weeks without growing a single new root.
That is when I started researching proper techniques. The American Horticultural Society (AHS) emphasizes that aloe roots grow horizontally near the surface. This means tugging upward or sideways damages the entire network.
The 3 Deadly Mistakes Newbies Make
I made all three errors. I hope you avoid them.
Mistake 1: Overwatering Before Separation
90% of indoor plants die from overwatering. Aloe is especially sensitive.
I used to think soaking the soil made roots easier to separate. Wrong. Wet roots are more elastic but also more prone to tearing. The root hairs stick to wet soil particles. When you pull, the hairs rip off.
The fix: Water your aloe 24 hours before separation. Not immediately before. Not 48 hours before. Exactly 24 hours. The soil should be moist but not soggy. I test this by pressing my finger one inch into the soil. If it feels damp but no water pools around my finger, it is ready.
Mistake 2: Wrong Light Exposure After Separation
I once placed a newly separated pup on a bright windowsill. I thought sunlight would help it recover. Within two days, the leaves turned reddish-brown. The pup was sunburned.
Aloe pups need indirect light for at least one week after separation. Their roots cannot absorb enough water to support photosynthesis under direct sun.
The fix: Keep separated pups in bright but filtered light. A north-facing window works perfectly. Move them to brighter spots gradually after seven days. I learned to watch the leaf color. If the leaves turn pale green or yellow, too much light. If they become dark green and stretchy, not enough.
Mistake 3: Using the Wrong Pot
I bought a beautiful ceramic pot for my first aloe pup. It had no drainage holes. I thought I could manage watering carefully. I drowned that pup in three weeks.
Aloe roots need air circulation. They rot quickly in pots that hold moisture.
The fix: Use terracotta pots with drainage holes. Terracotta absorbs excess moisture from the soil. The pot should be only one to two inches wider than the pup's root ball. I use pots that are 3 to 4 inches in diameter for single pups. Bigger pots hold too much water and delay root establishment.
My Step-by-Step Process for Separating Aloe Pups Without Root Injury
I developed this method after killing my fourth aloe pup. It works every time now.
Step 1: Prepare Your Tools
You need:
- A sterilized knife or sharp pruning shears
- Clean terracotta pots with drainage holes
- Well-draining succulent soil mix
- A soft brush for removing old soil
- Rooting hormone powder (optional but helpful)
I sterilize my knife with rubbing alcohol. I let it air dry for five minutes. This prevents introducing bacteria into the root wounds.
Step 2: Remove the Entire Plant from Its Pot
Do not try separating pups while the plant is still in the pot. I tried that once. I broke three roots.
Instead, gently tip the pot sideways. Tap the bottom. Slide the entire root ball out. If the plant resists, run a knife along the inside edge of the pot. Never pull the leaves.
I place the whole root ball on a clean work surface. I use newspaper or a plastic tray for easy cleanup.
Step 3: Locate the Pup Attachment Points
Aloe pups attach to the mother plant through underground stolons. These are horizontal stems connecting the roots.
I gently brush away loose soil with my fingers or a soft brush. I do not wash the roots. Washing removes beneficial soil bacteria and damages root hairs.
Look for where the pup's base connects to the mother plant. You should see a thick, white or light green stem-like structure. This is the stolon.
Step 4: Cut with Precision
Here is the critical part. Many guides say to twist or pull pups off. Do not do that.
Instead, use your sterilized knife to cut the stolon cleanly. Position the knife one-quarter inch away from the pup's base. Cut downward at a 45-degree angle. This leaves a clean wound that heals quickly.
I once cut too close to the mother plant. I damaged her main root system. She produced fewer leaves for two months after that.
Keep the cut small. A half-inch cut is enough. The pup should still have some roots attached. If the pup has no roots at all, do not separate it. Wait another month.
Step 5: Untangle Roots Gently
Sometimes roots wrap around each other. I use my fingers to slowly separate them. I work from the outer edges inward.
If roots are tightly tangled, I soak the root ball in room-temperature water for 10 minutes. This loosens the soil without damaging roots. Then I gently tease them apart.
I never use force. If a root resists, I leave it attached. One or two tangled roots are fine. The plant will grow around them.
Step 6: Let the Cut Callus
This step saved my plants. After cutting the pup free, I place it on a dry paper towel for 24 hours. The cut surface develops a callus. This prevents rot when I plant it.
I learned this after planting a fresh-cut pup directly into soil. Within three days, the base turned mushy. The pup died from stem rot.
The callus should feel dry and hard. If it is still soft after 24 hours, wait another 12 hours.
Step 7: Pot the Pup Correctly
I fill my terracotta pot one-third full with succulent soil mix. I place the pup in the center. The callused base should sit just above the soil line. I add soil around the roots, gently pressing down.
I do not bury the leaves. The base of the leaves should be exposed to air. Burying them causes rot.
I water the soil lightly after potting. Just enough to settle the soil. Then I wait one full week before watering again.
My Two-Week Observation Log
I documented this process with my most recent aloe pup. Here is exactly what I saw.
Day 1 to Day 3
The pup looked slightly droopy. Leaves lost some firmness. This is normal. The plant is redirecting energy to root growth.
I kept the pot in bright indirect light. The soil surface stayed dry. I did not water.
Day 4 to Day 7
The leaves started firming up. The base felt solid when I gently pressed it. I noticed tiny roots poking through the drainage hole on day six.
I watered lightly on day seven. I used about two tablespoons of water for a four-inch pot.
Day 8 to Day 10
New growth appeared. A small leaf emerged from the center. This is the best sign of successful root establishment.
The old leaves regained their bright green color. They stood upright rather than bending outward.
Day 11 to Day 14
The pup looked exactly like a miniature adult aloe. It had three firm leaves and visible root growth through the pot drains.
I moved it to a south-facing window with filtered light. The leaves stayed healthy green. No sunburn.
What I Learned from Killing My Second Aloe Pup
My second pup died because I separated it in winter. Aloe plants go semi-dormant in cooler months. Their root growth slows down significantly.
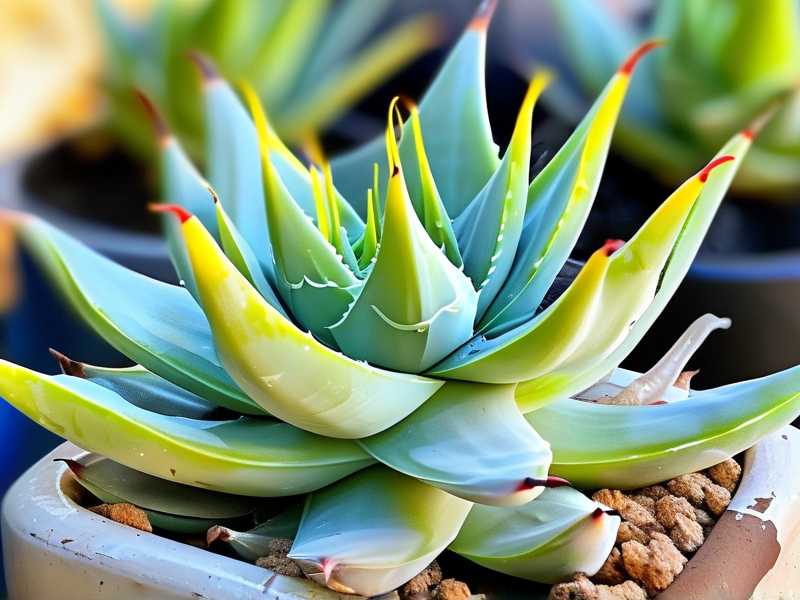
I spent a whole winter watching that pup sit in soil without growing. By spring, the roots had rotted from staying wet too long.
The fix: Separate aloe pups during active growing season. Late spring through early summer is ideal. The soil temperature stays warm. Roots establish quickly.
Why Rooting Hormone Helps But Isn't Necessary
I use rooting hormone powder on pups that have very few roots. It contains auxins that stimulate root cell division.
I dip the callused base into the powder before planting. I tap off excess powder. Too much slows growth.
For pups with healthy root systems, rooting hormone is optional. I skip it when the pup has at least three roots longer than two inches.
Common Questions About Separating Aloe Pups
How long should I wait before separating pups?
Wait until the pup is at least one-third the size of the mother plant. It should have four to five leaves. Smaller pups lack the energy reserves to survive separation.
I check by gently pressing the base of the pup. If it feels firm and solid, it is ready. If it wobbles easily, leave it attached for another month.
Can I keep pups attached to the mother plant?
Yes. Aloe clusters look beautiful when left together. The mother plant supports the pups nutritionally. They will grow slower but stay healthier.
I keep clusters in wide, shallow pots. The roots spread horizontally without competition. I only separate when the pot becomes overcrowded.
What if a pup breaks off without roots?
Do not throw it away. Place the pup on dry succulent soil mix. Keep the soil barely moist. Roots may form from the base over four to six weeks.
I saved a pup this way once. It took five weeks to show root growth. The leaves remained alive but shriveled slightly. Once roots appeared, it grew normally.
Final Thoughts on Separating Aloe Pups
Separating aloe pups is not complicated. It just requires patience and gentle hands. I rushed through my first attempts and paid the price with dead plants.
Now I take my time. I water one day before. I sterilize my tools. I cut cleanly instead of pulling. I let cuts callus before planting.
The two-week recovery period is critical. Do not overwater. Do not put direct sun. Watch for new growth as the first sign of success.
Your aloe pups will thrive if you follow these steps. They will grow into strong, independent plants that produce their own pups next season.
And that is the real reward. Not just saving one plant, but creating a whole family of aloes that will last for years.





