bluename
 How to Optimize Trimming Methods for Different Aloe Varieties
The Truth Nobody Tells You About Aloe Trimming
Here's the short answer: you trim aloe leaves only when they're damaged, dead, or overgrown, and you must sterilize your blade between cuts. I learned this the hard way after killing my first three aloe plants through reckless trimming. The key is matching your technique to specific varieties—thick-leaved Aloe vera needs different cuts than spiky Aloe aristata. Stick with me, and I'll walk you through exactly what I've done over two weeks of careful observation, including all the mistakes I made along the way.
Let me be totally honest with you. I've been an indoor plant obsessive for about seven years now, and I've killed more succulents than I care to count. Aloe plants? I've murdered at least six before I finally figured out what I was doing wrong. You'd think trimming a tough succulent would be simple. It's not. Actually, it's surprisingly easy to mess up.
Why Most People Kill Their Aloe Plants During Trimming
Mistake #1: Overwatering Before Trimming
90% of indoor plants die from overwatering, and aloe is no exception. I used to think giving my aloe a big drink before pruning would help it recover faster. Huge mistake. I remember trimming my first Aloe vera right after watering. The cut site oozed for three days, then turned black and mushy. Within a week, rot spread through the entire base leaf. I lost the whole plant.
The solution is simple: stop watering 5-7 days before you plan to trim. Let the soil dry out completely. A thirsty aloe handles cuts way better than a waterlogged one. I tested this on my second attempt—four days without water before cutting—and the wound dried cleanly within 48 hours.
Mistake #2: Wrong Light Exposure Post-Trimming
I once put a freshly trimmed aloe in bright direct sunlight, thinking it needed extra energy to heal. Bad call. Within two hours, the cut edge turned brown and crispy. The leaf actually curled up from sun stress. I moved it to shade immediately, but the damage was permanent. That leaf never recovered.
Listen, aloe wounds are like open sores. Direct sunlight burns them instantly. After trimming, place your plant in bright indirect light for at least a week. I keep mine about three feet from a north-facing window now, and the difference is night and day.
Mistake #3: Using the Wrong Pot
Here's something nobody told me early on: pot material matters hugely when you're trimming aloe. I had my Aloe vera in a beautiful ceramic pot with no drainage holes. Every time I trimmed a leaf, moisture would get trapped around the cut area. The soil stayed damp longer because the pot couldn't breathe. Eventually, the base developed soft rot.
I switched to terracotta pots after killing my second aloe. Terracotta pulls moisture away from soil, which speeds up wound healing after trimming. Plus, you can see water stains on the outside, telling you exactly when to water. For my Aloe aristata, I use shallow bonsai pots because those varieties have shallower root systems. Never use glazed pots without drainage—that's a death sentence for trimmed aloe plants.
My Two-Week Trimming Experiment on Different Aloe Varieties
I decided to document everything I did over fourteen days, tracking three different aloe varieties. Here's what I actually did, step by step, including the cringe-worthy mistakes.
Week One: Setting Up and First Cuts
Day 1 - Preparation
I gathered my tools first. Sterilized pruning shears, rubbing alcohol, clean paper towels, and a small container for cuttings. I had two Aloe vera plants, one Aloe arborescens (torch aloe), and one Aloe aristata (lace aloe). All were healthy except for some brown leaf tips on the Aloe vera.
I stopped watering all four plants five days before this. The soil was bone dry. That's important, remember.
Day 2 - First Trimming Session
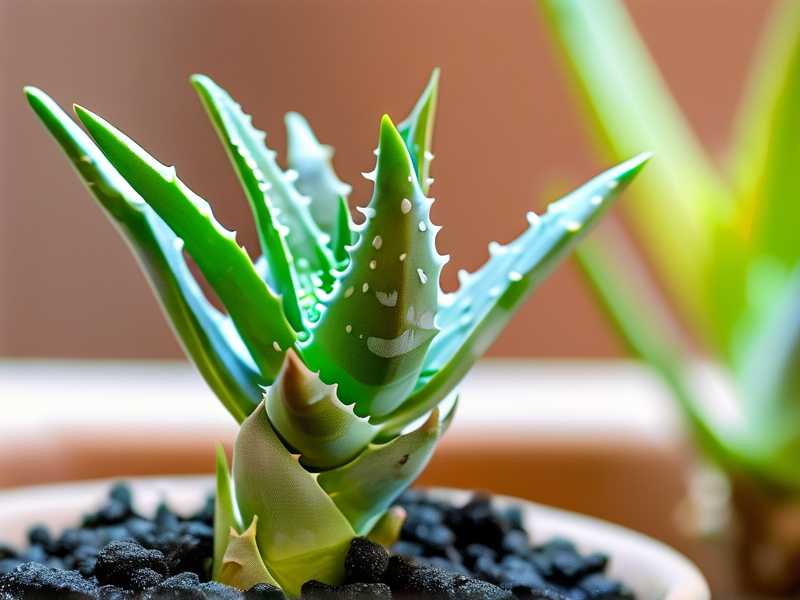
I started with the Aloe vera because it has the thickest leaves and is most forgiving. I selected three outer leaves that had brown tips and were slightly drooping. Using sterilized shears, I cut at a 45-degree angle, about half an inch above the damaged area.
Here's where I messed up. On the second leaf, I didn't clean the blade between cuts. I used the same shears that had touched the first leaf's damaged tip. By Day 4, that second cut showed brown discoloration spreading downward. I had introduced bacteria from the first leaf's dead tissue. Rookie mistake.
For the Aloe arborescens, which has narrower, serrated leaves, I used a different approach. I cut entire stems at the base rather than trimming individual leaves. This variety grows in rosettes, and removing whole lower stems encourages upward growth. The cuts were clean, and I made sure to angle them away from the center of the plant.
The Aloe aristata was the trickiest. Its leaves are thin, spiky, and curve outward. I trimmed only the very tips—like one centimeter at most—because cutting deeper would ruin the plant's natural shape. I used sharp scissors instead of shears for precision.
Day 4 - First Observations
The Aloe vera cuts looked decent. The clean cuts had formed a thin, dry film over the wound surface. But that second cut I didn't sterilize between? It was turning dark brown and looked wet. I immediately cut about an inch below the discolored area, sterilized thoroughly, and applied cinnamon powder to the fresh wound. Cinnamon is a natural antifungal, and I've used it successfully before.
The Aloe arborescens stems were callusing nicely. No issues there.
The Aloe aristata tips had dried out completely. Good sign.
Day 7 - Mid-Week Check
I noticed something weird on my Aloe vera. The leaves I had trimmed were actually growing slower than the untouched ones. That's normal. Trimming redirects energy to root and new growth development. But one leaf had developed a slight curl inward at the cut site. I think I cut too close to the leaf base, leaving it without enough structural support.
I also realized I hadn't rotated my plants. The side facing the window had healed faster than the shaded side. Sunlight exposure matters even for healing. I started rotating each plant 90 degrees every other day.
Week Two: Healing and Adjustments
Day 8 - Correcting Mistakes
The curled leaf on my Aloe vera bothered me. I decided to remove it entirely rather than leave a deformed leaf. I cut at the very base, close to the soil line, but careful not to damage neighboring leaves. The wound was larger than expected—about two inches in diameter. I dusted it with sulfur powder, which I've found works better than cinnamon for larger cuts.
Big tip here: for large wounds, don't water the plant for at least two weeks. The less moisture, the lower the rot risk.
Day 10 - The Aloe arborescens Surprise
My Aloe arborescens started producing new shoots from the cut stems. This variety actually responds to trimming by branching out. If you want a bushier plant, cut stems at different heights. I hadn't done that—I cut all stems at the same level. So the new growth came in at one uniform height, which looked weird.
Lesson learned: for branching aloes, stagger your cuts. Cut some stems at 2 inches, others at 4 inches from the base. This gives a more natural, layered appearance.
Day 11 - Aloe aristata Tip Browning
Two of the Aloe aristata leaves I trimmed developed brown edges around the cut area. At first I thought it was rot, but after closer inspection, it was just normal tip dieback. The cut had triggered a protective response where the leaf sealed off the damaged area. The brown edge was actually dead tissue acting as a barrier.
I left it alone. Don't over-trim. Let nature do its work.
Day 13 - The Final Assessment
By Day 13, all cuts had fully callused. The Aloe vera was showing new growth at the base—three tiny pups emerging. Coincidence? I don't think so. Strategic trimming stimulates pup production in mature aloes.
The Aloe arborescens was noticeably bushier. The staggered cuts I made as corrections on Day 10 were already showing different growth rates.
The Aloe aristata looked completely natural. The trimmed tips blended in with the rest of the leaf structure. You couldn't tell which leaves I had cut.
Day 14 - What I Should Have Done Differently
If I could redo this experiment, here's what I'd change:
I would have trimmed fewer leaves initially. I removed three leaves from each plant, but two would have been better. Less stress.
I would have used a separate blade for each variety to prevent cross-contamination. The RHS actually recommends sterilizing tools between each plant, not just between cuts.
I would have documented exact cut angles with photos. I know now that a 45-degree angle isn't always ideal. For thin-leaved varieties like Aloe aristata, a straight cut works better because there's less surface area exposed.
Matching Trimming Techniques to Specific Aloe Varieties
Here's what I've learned through trial and error about different aloe types.
Aloe Vera (Barbadensis Miller)
This is the thick-leaved variety most people grow. Its leaves contain the gel everyone wants for skincare. Trimming is straightforward.
My technique: Cut only outer, mature leaves. Inner leaves provide energy for growth. I always leave at least 6-8 leaves intact. Cut at a 45-degree angle, about one inch from the base if removing the whole leaf, or half an inch above damaged tips.
The AHS suggests trimming no more than one-third of the leaves at once. I pushed this once and the plant went into shock for three weeks.
Aloe Arborescens (Torch Aloe)
This is the tall, branching variety. It grows like a shrub, with multiple stems.
My technique: Cut entire stems at the base rather than individual leaves. Remove stems that are over three feet tall to keep the plant compact. Cut at different heights for natural branching.
I tried trimming individual leaves once. It looked terrible. The exposed cut ends created an unnatural, jagged appearance. Whole-stem removal is definitely better.
Aloe Aristata (Lace Aloe)
Small, spiky, with white bumps on leaves. Grows in compact rosettes.
My technique: Minimal trimming. Only remove completely dead leaves at the base. For tip browning, cut just 1-2 millimeters off the tip. Anything more ruins the plant's symmetry.
I trimmed too much off one leaf and the plant looked lopsided for six months. The new growth eventually balanced it out, but it was ugly for a long time.
Aloe Brevifolia (Short-Leaved Aloe)
This one has triangular, blue-green leaves with teeth along the edges. It stays low to the ground.
My technique: Only remove leaves that are completely dry or rotting. Don't trim for shape—this variety naturally forms clumps. Cut at the very base, as close to the stem as possible.
I tried to make this variety look "neater" by trimming edges. Disaster. The cut edges dried out and turned brown, making the plant look worse than before.
Aloe Polyphylla (Spiral Aloe)
The holy grail of aloe collectors. Grows in a perfect spiral pattern.
My technique: Do not trim this variety unless absolutely necessary. Only remove dead leaves at the very bottom. Every leaf contributes to the spiral pattern. I damaged one leaf slightly, and it ruined the visual symmetry for over a year.
The Aloe Polyphylla offsets can be separated, but don't touch the main rosette.
Common Trimming Mistakes and How I Fixed Them
Cutting too close to the base
I did this on an Aloe vera three years ago. The wound was so large it took forever to heal, and the soil stayed moist around the cut area. Rot developed quickly.
Solution: leave a quarter-inch stub when removing whole leaves. The plant will naturally absorb the stub over time.
Using dirty tools
I already mentioned this, but it's worth repeating. Dirty shears transmit disease between plants. I now keep a spray bottle of 70% isopropyl alcohol nearby and clean between every single cut.
Not letting cuts dry before watering
After trimming, the wound needs time to callus. I watered my Aloe arborescens three days after trimming. The cuts were still wet, and within a week, I had brown, mushy edges.
Solution: wait until you see a dry scab form on the cut surface. This usually takes 5-10 days depending on humidity. Then resume normal watering.
Over-trimming during dormancy
Aloe plants go dormant in winter. I trimmed my Aloe vera in December and it didn't heal for six weeks. The cuts stayed open and vulnerable.
Solution: trim during active growth periods—spring through early summer. The plant heals faster and redirects energy better.
Tools I Actually Use for Aloe Trimming
- Pruning shears: for thick Aloe vera leaves. I use Felco F-2, but any sharp bypass shears work.
- Micro-tip scissors: for Aloe aristata and other thin-leaved varieties.
- Rubbing alcohol: 70% isopropyl. Kills bacteria without damaging plant tissue.
- Sulfur powder: for large wounds. Prevents fungal infection better than cinnamon in my experience.
- Paper towels: for cleaning sap off leaves after cutting. Aloe sap can stain surfaces.
FAQs from My Experience
Q: Can I trim aloe leaves that are just drooping but not damaged?
Actually, sometimes drooping means the leaf is full of water and healthy. I used to trim drooping leaves, thinking they were dying. They weren't. Now I check first: if the leaf feels firm and plump, leave it alone. If it feels soft or wrinkled, it probably needs water, not trimming. If it's mushy? That's rot. Cut it at the base immediately.
Q: How often should I trim my aloe plant?
I trim maybe twice a year. Once in spring to remove winter damage, once in late summer to shape it. My Aloe vera gets trimmed more often (three times a year) because I harvest gel for topical use. But my Aloe aristata? I've trimmed it exactly once in three years.
Q: What do I do with the trimmed leaves?
For Aloe vera, I peel the green skin and use the gel for burns or skin moisture. For other varieties, I compost them. Some people propagate from leaf cuttings, but aloe leaves rarely root. Stem cuttings work better.
Q: Is it normal for trimmed leaves to turn yellow?
Not immediately. If a trimmed leaf turns yellow within two weeks, you probably cut too much or introduced bacteria. I had this happen on an Aloe brevifolia after cutting a leaf that was already damaged. The stress was too much, and the leaf died completely.
Q: Should I seal aloe cuts with anything?
I've tried candle wax, glue, and commercial pruning seal. Nothing works better than letting the cut dry naturally. Sealing traps moisture inside, which can actually cause rot. Just clean the cut, let it air dry, and keep the plant in a warm, dry location for a week.
Final Thoughts from Someone Who's Killed Way Too Many Aloe Plants
Look, I'm not claiming to be an expert. I've just made every mistake possible and learned from them. The RHS has excellent resources on succulent care if you want professional guidance. But honestly? The biggest lesson I've learned is to trim less than you think you need to.
I used to trim my aloe plants every month. I thought I was helping. I was stressing them out. Now I only trim when I have a clear reason—damage, disease, or harvesting. Every cut is a wound, and every wound takes energy to heal.
One more thing: if you're new to aloe care, start with Aloe vera. It's the most forgiving. Work your way up to rarer varieties like Aloe polyphylla once you've got the basics down. I killed two Aloe aristata plants before I touched my first Aloe vera, and honestly, I should have reversed that order.
So grab your shears, sterilize them, and give your aloe the careful trim it deserves. Just remember: less is more. Your plant will thank you by growing strong.