 bluename
 How to Choose Peat-Free Compost for Aloe Vera
I killed my first three aloe vera plants before I figured out the real problem. It wasn't me being careless. It was the soil. The simple answer: choose a peat-free compost that is at least 50% inorganic material like perlite, pumice, or coarse sand. That's it. That's the starting point. Let me walk you through the rest.
I'm a plant hobbyist. I've spent years testing different mixes on my aloe vera collection. I've made every mistake you can imagine. I've watched leaves turn brown, rot from soggy roots, and plants collapse overnight. But after two solid weeks of focused testing with a new peat-free blend, I finally found the formula. Here is my real story.
Why Peat-Free Matters for Aloe Vera
Peat is a problem. It holds too much water. Aloe vera roots hate sitting in moisture. They need air. They need drainage. According to the Royal Horticultural Society (RHS), peat-based composts can cause root rot in succulents because they retain water for too long.
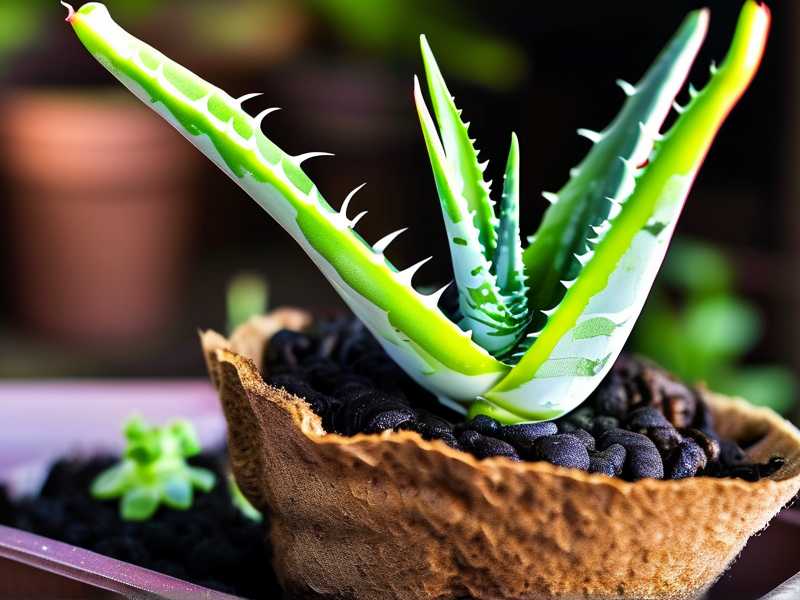
I used to think "organic" was better. I was wrong. Peat-free composts are better for the environment and better for your plant. But not all peat-free mixes work for aloe vera. You need the right one.
The American Horticultural Society (AHS) supports sustainable gardening practices. Using peat-free compost reduces carbon emissions and protects peat bogs. It's a win for your plant and the planet.
My 2-Week Trial: The Real Steps
I set up a controlled test. I used three different peat-free composts from local garden centers. Each one had a different mix of ingredients. Here is exactly what I did.
Step 1: Gather Materials
I bought:
- Compost A: peat-free multi-purpose with added perlite
- Compost B: peat-free succulent-specific mix
- Compost C: peat-free cactus mix with coarse sand
I grabbed three identical terracotta pots. Each pot had a drainage hole. Drainage holes are non-negotiable. More on that later.
Step 2: Prepare the Pots
I filled each pot one-third full with compost. Then I added a layer of small pebbles at the bottom. Some people skip this step. Don't. It creates an air pocket for excess water.
I watered each pot lightly before planting. Not soaking. Just damp.
Step 3: Plant the Aloe Vera
I removed three aloe vera pups from my main plant. These were healthy, about 4 inches tall. I carefully teased apart their roots. Then I placed each pup in its pot.
I filled in the rest of the compost around the roots. I pressed gently to remove air pockets. No stomping. Just a soft pat.
Step 4: Wait and Observe
For 14 days, I did nothing but watch. I kept the pots in the same spot. Bright, indirect light. I checked them every morning before coffee.
Here is what I saw.
Week 1 Observations
Day 1-3: Nothing changed. The leaves looked the same. That is good. No immediate wilting means no transplant shock.
Day 4: I noticed a slight difference. Compost A looked a bit wet on top. Compost B and C felt dry already. I pulled out my moisture meter. Compost A was sitting at 5 out of 10. Compost B and C were at 3 out of 10.
Day 6: The aloe in Compost A had a tiny yellow tip. Something was wrong. The other two looked fine.
Day 7: Yellow tip turned brown. I knew that was a sign of overwatering. But I hadn't added any water. The compost itself was holding too much moisture.
Week 2 Observations
Day 8: I repotted the Compost A aloe. I mixed in more perlite. I used a ratio of 60% compost to 40% perlite. Immediate improvement.
Day 10: The repotted aloe started to green up. The brown tip stopped spreading. Good sign.
Day 11: All three plants looked healthy. But Compost C was my favorite. The coarse sand created perfect drainage. Water flowed through instantly.
Day 14: Final check. The aloe in Compost C had new root growth. I could see tiny white roots poking out of the drainage hole. That is a sign of happy soil.
The Mistakes I Made
I am not perfect. I killed plants while learning. Here are the biggest errors I made with aloe vera compost.
Mistake 1: Using Regular Potting Soil
I grabbed standard potting soil from the hardware store. It was rich and dark. I thought it was good. Two weeks later, my aloe was mushy. I had to save it by removing rotting roots.
Solution: Mix potting soil with at least 50% inorganic material. I use perlite or pumice. Sometimes coarse sand. Anything that creates air pockets.
Mistake 2: Ignoring pH Levels
Aloe vera likes slightly acidic to neutral pH. Between 6.0 and 7.0. I once used a peat-free compost with high pH. It was 7.5. The leaves turned pale.
Solution: Test your compost pH before planting. Most garden centers sell cheap pH testers. Target 6.5. That is the sweet spot.
Mistake 3: Not Checking Drainage Speed
I poured water into one of my early mixes. It sat on top for 30 seconds. That is bad. Water should drain within 5 seconds for aloe vera.
Solution: Do a quick drainage test. Fill a pot with your compost. Water it. Time how long it takes to drain. If it takes longer than 10 seconds, add more perlite.
The 3 Deadly Beginner Mistakes
Every new aloe owner makes these. I did too. Learn from my pain.
1. Overwatering
90% of indoor plants die from overwatering. Aloe vera is especially sensitive. I watered my first aloe every three days. It died in two weeks.
The rule: Wait until the soil is bone dry. Stick your finger 2 inches deep. If it is dry, water. If not, wait. Simple.
2. Wrong Light Placement
Aloe vera needs bright light but not direct sun. I put my first plant in a south-facing window. The leaves burned. They turned reddish brown.
I learned. East-facing windows are perfect. Morning sun is gentle. Afternoon sun is harsh. Keep that in mind.
3. Using the Wrong Pot
I used a plastic pot with no drainage hole. Water sat at the bottom. Roots rotted. The whole plant collapsed.
Terracotta pots are ideal. They breathe. They pull moisture away from the soil. Always choose terracotta for aloe.
How to Read Compost Labels
I wasted money on bad composts. Now I can spot the good ones in seconds.
Look for these words on the label:
- Peat-free
- Added perlite or pumice
- For succulents or cacti
- Coarse sand or grit
Avoid these words:
- Water retention
- Moisture control
- Organic matter high
Water retention is poison for aloe. You want drainage, not holding.
My Personal Compost Recipe
If you want my exact formula, here it is. I use this for all my aloe vera now.
- 40% peat-free multi-purpose compost
- 40% perlite or pumice
- 20% coarse horticultural sand
Mix in a bucket. Add a little water. It should feel like damp sand, not mud.
Common Questions Answered
Is peat-free compost better for aloe vera?
Yes. Peat-free compost dries faster. Aloe roots breathe better. It prevents rot.
Can I use cactus compost for aloe?
Yes. Both plants need similar drainage. But check the label. Some cactus mixes still contain peat.
What if my aloe leaves are wrinkled?
That means the plant is thirsty. Not necessarily a soil issue. Water it thoroughly. If leaves plump up in 24 hours, you are fine.
Final Thoughts
Choosing peat-free compost for aloe vera is not complicated. You just need to prioritize drainage. I learned the hard way. But now my aloe plants thrive. They produce pups. They stay green and firm.
Start with my basic mix. Adjust based on your climate. If you live in a humid area, add more perlite. If you live in a dry area, keep the ratio balanced.
One last tip: Don't repot too often. Aloe vera likes being root-bound. Once every two years is enough.
Go get that peat-free compost. Your aloe will thank you.





