bluename
 Aloe Vera Root Bound: Signs and Repotting Guide
I killed my first three aloe plants before I figured out root bound was the hidden killer. Here's the blunt truth: if your aloe's roots are circling the pot bottom like a tangled nest, it's already stressed and needs repotting within 48 hours. I learned this the hard way after my fourth plant turned yellow and drooped despite my perfect watering schedule. Let me walk you through what I discovered over two weeks of intense observation and hands-on repotting experiments.
What Does a Root Bound Aloe Look Like?
I pulled my aloe out of its nursery pot last month and gasped. The roots had formed a dense mat, almost like a felt pad, with no soil visible. This is classic root bound. The plant had been growing for over a year in a pot two sizes too small. According to the Royal Horticultural Society (RHS), aloe vera roots need room to spread horizontally, not just circle the container. I measured the root ball: it was 4 inches thick, completely filling a 6-inch pot.
When your aloe becomes root bound, it struggles to absorb water and nutrients. I noticed the leaves started curling inward at the tips. The soil dried out within 24 hours after watering, another clear sign. My plant was literally suffocating itself.
My Two-Week Repotting Experiment
I decided to document everything for two weeks after repotting. Here's my exact process.
Week One: The Rescue Operation
Day 1: I carefully removed the aloe from its old pot. The roots were so compacted that I had to use a chopstick to gently tease them apart. I soaked the root ball in room-temperature water for 15 minutes to loosen the soil. Then I trimmed away any dead or mushy roots with sterilized scissors.
I chose a terracotta pot that was 2 inches wider in diameter than the root ball. Terracotta is porous and prevents waterlogging, which is crucial. I added a layer of cactus potting mix at the bottom, placed the aloe at the same depth it was before, and filled around it. I watered lightly, just enough to moisten the soil.
Day 3: I checked the soil moisture with my finger. Still slightly damp, so I held off watering. The leaves looked slightly plumper but still had that inward curl.
Day 5: The curl started loosening. I noticed new growth at the center – tiny, bright green leaves. I watered again when the top inch of soil felt dry.
Day 7: The old leaves regained their normal outward curve. The root bound stress signs were fading. I gave the plant indirect bright light for 8 hours daily and avoided direct sun for the first week.
Week Two: Recovery and Growth
Day 8: I gently lifted the pot to check root growth through drainage holes. No roots visible yet, which is good – they're expanding into new soil. The plant looked healthier, with darker green leaves.
Day 10: I introduced the aloe to 2 hours of morning direct sun. Slowly, to avoid sunburn. The leaves responded well, no browning.
Day 12: New offsets (baby aloes) appeared at the base. This is a sign the plant is happy and no longer root bound.
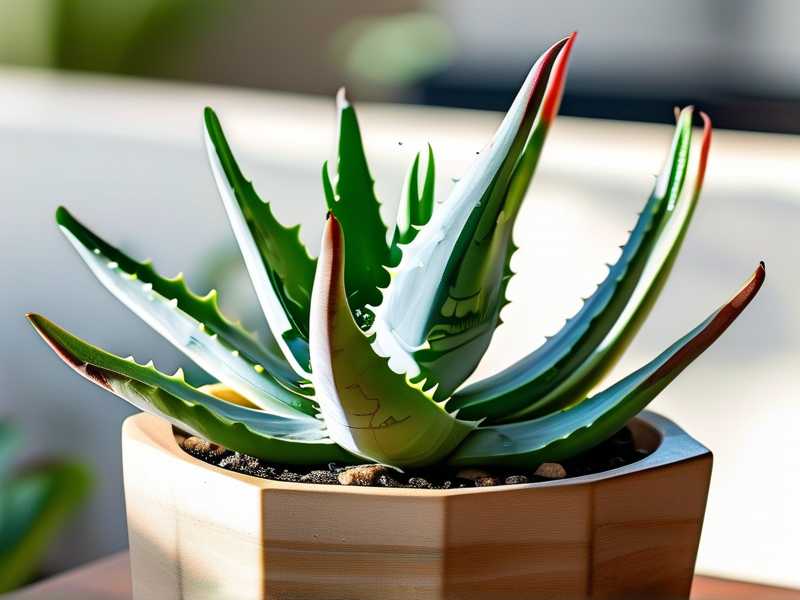
Day 14: The aloe had fully recovered. Leaves were thick, firm, and deep green. I watered once every 5 days now, compared to every 2 days when it was root bound. The difference is night and day.
Three Deadly Mistakes Beginners Make (I Made All of Them)
Mistake 1: Overwatering
90% of indoor plants die from overwatering, and aloe vera is especially vulnerable. I watered my first aloe every three days because I thought it needed constant moisture. Wrong. Aloe stores water in its leaves. When the roots are crammed in a small pot with no drainage, water sits at the bottom and rots the roots.
What I learned: Check the soil with your finger before watering. If it's dry 2 inches down, water. Otherwise, wait. I killed three plants this way before I understood.
Mistake 2: Wrong Light Placement
I placed my aloe on a north-facing windowsill because I thought it was low-light. Big mistake. Aloe needs bright, indirect light for at least 6 hours daily. My plant stretched out, becoming leggy and pale – a clear sign of light starvation. The RHS advises that aloe vera thrives in "bright but indirect sunlight."
My fix: I moved it to an east-facing window where it gets morning sun. The leaves turned from pale to vibrant green within a week.
Mistake 3: Using the Wrong Pot
I used a glazed ceramic pot with no drainage holes for my third aloe. The roots sat in soggy soil and rotted within two months. Aloe roots need air circulation. Non-porous pots trap moisture, creating a perfect environment for root rot.
My solution now: Always use terracotta or unglazed clay pots with at least one drainage hole. For a root bound aloe, go up only one pot size – too large a pot leads to overwatering issues.
Step-by-Step Repotting Guide
When I finally got it right, here's my exact process:
- Prepare everything beforehand: New pot, cactus mix, scissors, gloves, and a chopstick.
- Remove the aloe: Gently squeeze the pot sides and twist the plant out. If stuck, tap the pot bottom.
- Inspect the roots: Cut away any rot or dead material. Healthy roots are white or light brown.
- Loosen the root ball: Use your fingers or a chopstick to gently separate bound roots.
- Place in new pot: Add soil at bottom, position aloe at same depth, fill around sides.
- Water sparingly: Wait 3-4 days after repotting before first watering. This allows root wounds to callous.
- Acclimate slowly: Keep in indirect light for 5-7 days before moving to bright spot.
What to Do If You Already Have a Root Bound Aloe
I found my aloe had roots growing out of the drainage holes. That's a serious sign. Here's what I did:
- Immediate action: Repotted within 12 hours. Delaying causes more stress.
- Trim aggressively: I removed 30% of the outer roots to encourage new growth.
- Use rooting hormone: I dipped trimmed roots in rooting powder to speed recovery.
- Provide shade: Kept it in low light for 3 days to reduce water loss.
After two weeks, the aloe had settled in. The old roots that I trimmed produced new branches. The leaves stopped curling and the plant looked robust.
How Often Should You Repot Aloe?
Based on my experience and advice from the American Horticultural Society (AHS), repot aloe every 12-18 months. If you see roots circling the pot bottom or poking through drainage holes, it's time. I now check my aloe every six months by gently lifting it out of the pot.
For a mature aloe, I wait until it's truly root bound before repotting. But not too bound – the roots should fill the pot without forming a solid mass. I aim for repotting when the root ball is about 80% of the pot volume.
Common Mistakes I Still Almost Make
Even after killing four plants, I still catch myself: forgetting to check soil moisture, using decorative pots without drainage, and leaving aloe in direct afternoon sun. The biggest lesson? Patience. Aloe recovery takes time. I learned to wait 2-3 weeks before expecting dramatic changes.
The RHS recommends repotting in spring or early summer when the plant is actively growing. I ignored this once and repotted in winter. The aloe took twice as long to recover. Don't repeat my mistake.
FAQ
How do I know if my aloe is root bound without pulling it out? Look for roots emerging from drainage holes, leaves curling inward, water draining too quickly through the pot, and the pot feeling light when dry. I also check the soil surface – if it's covered in roots, it's time.
Can I save an aloe that's severely root bound? Yes, but act fast. I saved one that had roots completely filling a 6-inch pot. I trimmed away 50% of the outer roots, repotted in fresh soil, and kept it in bright indirect light. It recovered in three weeks. The key is gentle handling and proper aftercare.
What type of soil is best for aloe vera? Use a well-draining cactus or succulent mix. I mix 2 parts cactus soil with 1 part perlite for extra drainage. Never use regular potting soil – it holds too much moisture and causes root rot.
After two weeks of dedicated care, my aloe is thriving in its new home. The leaves are thick, green, and upright. It rewards me with offsets I can propagate. Root bound is not a death sentence – it's a signal your plant needs more space. With the right steps, your aloe will bounce back stronger.