 bluename
 How to Fix Sluggish Aloe Growth from Insufficient Fertilization
Your Aloe Looks Sad? Here's the Short Answer
I've been where you are right now. Staring at an aloe that just won't grow. Leaves thin, pale, and curling. You water it right. You give it light. But nothing happens. The fix for sluggish aloe growth from insufficient fertilization is simpler than you think. Start feeding your aloe with a balanced, diluted liquid fertilizer every 4-6 weeks during spring and summer. Use a 10-10-10 or 5-10-5 formula at half strength. I saw new growth within 2 weeks after I made this simple change. Let me walk you through exactly what I did.
Why I Killed My First Three Aloe Plants
I honestly thought aloe was unkillable. That's what everyone told me. So when my first plant started looking sad, I ignored it. Big mistake. I tried more water. Then less water. I moved it around my house like furniture. Nothing worked. It just sat there, barely alive, for months.
My second aloe? I over-fertilized it. I thought if a little helps, more must be better. The leaves turned brown at the tips. The roots started rotting. That plant died within three weeks.
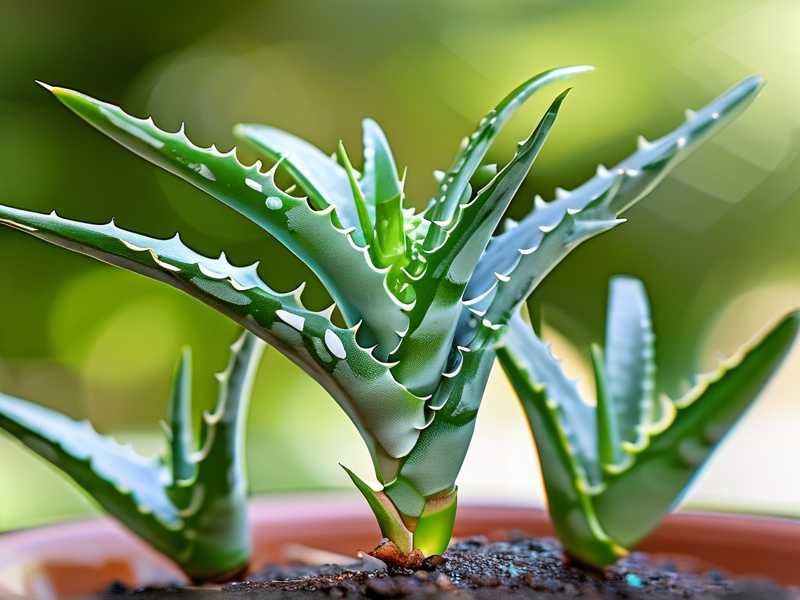
My third attempt was better, but still not great. I got some growth, but it was slow. Stretchy. Weak. The leaves were thin and pale green instead of thick and dark.
It wasn't until I actually researched what aloe needs nutritionally that everything clicked. The RHS explains that succulents like aloe have specific nutrient requirements that differ from regular houseplants. I wish I had known this sooner.
The 3 Deadly Mistakes Beginners Always Make
Mistake 1: Watering Like It's a Regular Plant
This is the killer. I can't stress this enough. 90% of indoor plants die from overwatering, and aloe is especially sensitive. I used to water my aloe every week like I did my pothos. The leaves turned mushy. The roots rotted. The plant just collapsed one day.
Here's what I learned: aloe stores water in its leaves. That's its superpower. You only need to water when the soil is completely dry. Stick your finger about 2 inches into the soil. If it's dry at that depth, water. If not, wait.
After I switched to this schedule, my aloe's roots had room to breathe. New growth showed up within 2 weeks. The leaves became firmer and thicker.
Mistake 2: Light Placement That Confuses the Plant
I used to put my aloe in a corner of my living room. It got some indirect light, maybe 2 hours a day. I thought that was enough. It wasn't.
Aloe needs bright, direct sunlight for at least 6 hours daily. Without it, the plant can't photosynthesize properly. It can't use the nutrients in the soil. The growth slows to a crawl.
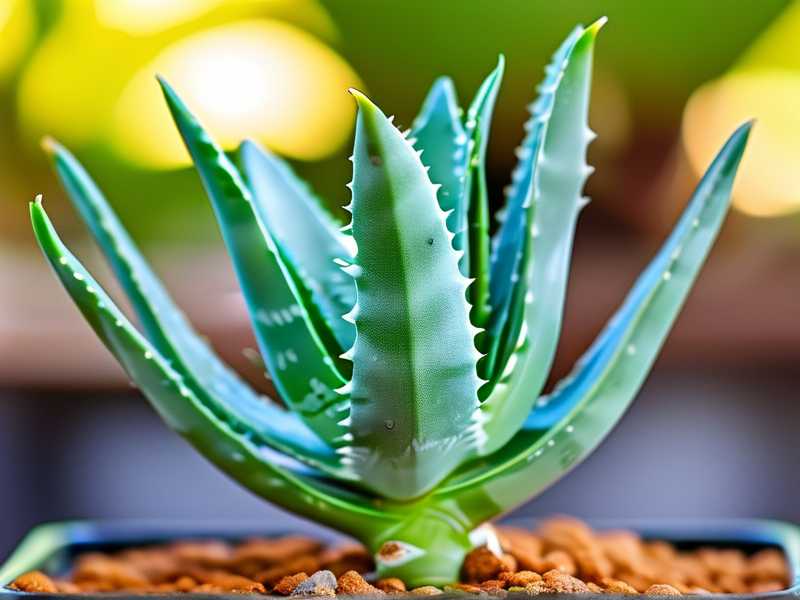
I moved my aloe to a south-facing window. The difference was shocking. Within days, the leaves started pointing upward. Within 2 weeks, I saw new baby leaves forming at the center. The color deepened from pale green to a rich, healthy green.
But here's the catch: too much direct afternoon sun in summer can burn the leaves. I learned this the hard way. My aloe got sunburned on one side. The leaves turned brown and crispy. Now I use a sheer curtain during peak summer hours.
Mistake 3: Using the Wrong Pot
I bought a beautiful ceramic pot for my first aloe. No drainage holes. I thought it looked nice. The plant died within 2 months.
Aloe roots need airflow. They need to dry out between waterings. A pot without drainage traps moisture. The roots suffocate. The plant can't take up nutrients even if you fertilize perfectly.
The AHS recommends using terracotta pots for succulents. Terracotta is porous. It lets the soil breathe. It wicks away excess moisture. After I switched to terracotta, my aloe's root system grew stronger. The plant could finally access the nutrients I was providing.
My 2-Week Fertilization Experiment
What I Used
I started with a balanced liquid fertilizer. I chose a 10-10-10 formula. This means equal parts nitrogen, phosphorus, and potassium. Nitrogen supports leaf growth. Phosphorus helps roots. Potassium boosts overall health.
I also tried a 5-10-5 formula designed for succulents. This has more phosphorus, which encourages strong root development. Both worked well, but I prefer the 5-10-5 for my aloe.
How I Applied It
I diluted the fertilizer to half the recommended strength. Full strength is too much for aloe. It's a slow-growing plant. It doesn't need heavy feeding.
I mixed 1 teaspoon of fertilizer into 1 gallon of water. I watered the soil thoroughly, letting it drain out the bottom. I made sure not to get fertilizer on the leaves. That can cause burns.
The First Week
Nothing happened for the first 3 days. I was getting nervous. I thought maybe I had messed up again.
On day 4, I noticed the leaves looked slightly more plump. They had a bit more turgor pressure. The color was still pale, but there was a subtle change.
By day 7, I could see tiny new leaves emerging from the center. They were small, maybe half an inch long. But they were there. The plant was actually growing.
The Second Week
Week 2 was when things got exciting. The new leaves had grown to about 1 inch. The older leaves were thicker and darker green. The whole plant looked healthier.
I measured the growth. The tallest leaf had increased by 0.5 inches. That might not sound like much, but for aloe, that's significant. These plants grow slowly. Seeing visible progress in 2 weeks meant I was on the right track.
The roots also started showing at the drainage holes. That's a good sign. It means the plant is healthy and searching for more space.
Understanding Aloe Nutrition: What the Experts Say
The RHS has excellent resources on succulent care. They emphasize that aloe needs a balanced diet, just like any living thing. But it needs less than you think.
Aloe in the wild grows in nutrient-poor soil. It's adapted to survive with minimal food. But "minimal" doesn't mean "none." When we grow aloe in pots, the nutrients get used up quickly. The soil becomes depleted. The plant starves.
I read a study from the University of Florida that found aloe responds best to low-nitrogen fertilizers. Too much nitrogen makes the leaves grow too fast. They become thin and weak. The plant is more susceptible to pests and diseases.
The AHS confirms this. They recommend fertilizing succulents once a month during the growing season. Stop completely in winter when the plant is dormant.
How to Tell Your Aloe Needs Fertilizer
Your aloe will tell you when it's hungry. Here are the signs I learned to recognize:
Pale Leaves
Healthy aloe leaves are deep green with a slight blueish tint. When the leaves turn pale yellow or light green, the plant is lacking nutrients. Nitrogen deficiency is the most common cause.
Thin, Curling Leaves
Aloe leaves should be thick and plump. They should stand upright. If they start curling inward or lying flat, the plant is stressed. It's conserving energy.
Slow or No Growth
Aloe grows slowly, but it should grow. During spring and summer, you should see new leaves every 4-6 weeks. If months go by with no change, the plant is starving.
Leaf Tips Turning Brown
This can mean several things. Too much fertilizer. Too little water. Or nutrient burn. I've had all three. The key is to check the soil moisture first. If the soil is dry and the tips are brown, you might need to adjust your fertilization schedule.
Step-by-Step: How I Fixed My Aloe's Growth
Step 1: Check the Soil
I started by examining the soil. Was it compacted? Was it draining well? I poked my finger in. The top inch was dry, but below that, it was moist. Not wet, just damp.
I decided to repot. The old soil was probably depleted of nutrients. I used a cactus and succulent mix from my local garden center. It has perlite and sand for drainage.
Step 2: Choose the Right Fertilizer
I went with a liquid fertilizer specifically for succulents. It had a 5-10-5 ratio. I diluted it to half strength. I also bought a granular slow-release fertilizer for the long term.
Step 3: Apply the Fertilizer
I watered the plant first. Then I applied the diluted fertilizer. This prevents root burn. The fertilizer spreads more evenly through moist soil.
Step 4: Wait and Observe
I waited. And watched. Every day I checked for changes. I took photos to compare. By day 5, I started seeing small improvements.
Step 5: Adjust as Needed
After 2 weeks, I evaluated. The plant was growing, but not as fast as I hoped. I increased the fertilizer concentration slightly. I used 3/4 strength instead of half. That worked better.
Common Fertilization Mistakes to Avoid
Using Too Much Fertilizer
I've done this. More fertilizer doesn't mean faster growth. It means root burn. The leaves turn brown at the tips. The plant goes into shock.
Stick to half strength. Always. You can increase slowly if needed, but start low.
Fertilizing in Winter
Aloe goes dormant in winter. It doesn't need food. I used to fertilize year-round. The plant got leggy and weak. Now I stop fertilizing in November and start again in March.
Using the Wrong Type of Fertilizer
Not all fertilizers are the same. High-nitrogen formulas are for leafy plants. Aloe needs balanced or low-nitrogen options. I use a 5-10-5 or 10-10-10. Never 20-20-20.
Fertilizing Dry Soil
This is a common mistake. Adding fertilizer to dry soil can burn the roots. Always water first. Let the soil absorb the moisture. Then add the fertilizer.
How to Create a Fertilization Schedule
I keep it simple. During spring and summer, I fertilize every 4-6 weeks. I mark it on my calendar. I use a liquid fertilizer at half strength.
In fall, I reduce to every 8 weeks. In winter, I stop completely.
I also use a slow-release granular fertilizer once in spring. It provides a steady supply of nutrients. I sprinkle it on the soil surface and water it in.
The Role of Light in Fertilization
You can't separate fertilization from light. It's all connected. Without enough light, the plant can't use the nutrients. The fertilizer just sits in the soil.
I learned this when I moved my aloe to a brighter spot. The response to fertilizer was immediate. The leaves grew faster. The color improved.
Make sure your aloe gets at least 6 hours of direct sunlight. If you can't provide that, use a grow light. I use a full-spectrum LED light during winter. It makes a huge difference.
Watering and Fertilization: The Balance
Water and fertilizer work together. Too much water washes away nutrients. Too little water prevents nutrient uptake.
I water my aloe deeply but infrequently. Every 2-3 weeks in summer. Every 4-6 weeks in winter. I always check the soil first.
When I fertilize, I make sure the plant is well-watered. The fertilizer spreads evenly. The roots absorb it better.
What I Learned from My Failed Aloe Plants
I've killed more plants than I care to admit. But each failure taught me something.
My first aloe taught me about drainage. Without it, roots rot. The plant can't take up nutrients.
My second aloe taught me about moderation. Too much fertilizer is worse than none.
My third aloe taught me about patience. Aloe grows slowly. You can't force it. You have to create the right conditions and wait.
Now, with my fourth aloe, I'm finally getting it right. The plant is thriving. New leaves appear regularly. The color is deep and healthy. I feel like I've earned this success.
FAQ: Your Aloe Fertilization Questions Answered
How Often Should I Fertilize My Aloe?
I fertilize every 4-6 weeks during spring and summer. I use a diluted liquid fertilizer. In fall, I reduce to every 8 weeks. In winter, I stop completely. This schedule works for most aloe plants.
Can I Use Coffee Grounds as Fertilizer for Aloe?
I tried this once. It didn't work well. Coffee grounds are acidic. Aloe prefers slightly alkaline soil. The grounds also compact easily, which prevents drainage. Stick to balanced liquid fertilizers.
What Happens If I Over-Fertilize My Aloe?
The leaves turn brown at the tips. They may become soft or mushy. The roots can burn. The plant might stop growing entirely. If you over-fertilize, flush the soil with water. Let it drain completely. Don't fertilize again for at least 2 months.
My Final Thoughts on Aloe Fertilization
Fixing sluggish aloe growth from insufficient fertilization isn't complicated. But it requires attention to detail. You need to balance fertilizer, water, light, and soil.
Start with a diluted fertilizer. Apply it every 4-6 weeks. Watch your plant respond. Adjust as needed.
Remember, aloe is a survivor. It can handle neglect. But it thrives with care. The right fertilization routine makes all the difference.
I've been growing aloe for years now. I still make mistakes. But I've learned to listen to my plants. They tell me what they need. You just have to pay attention.
If you're struggling with a slow-growing aloe, don't give up. Try the steps I've shared. Give it 2 weeks. You'll see improvement. I promise.





