 bluename
 How to Avoid Leaf Burn from Improper Aloe Fertilization
The Truth About Aloe Fertilizer Burn That Nobody Tells You
I killed my first aloe plant within three weeks. The leaves turned brown at the tips, then curled inward like burnt paper. I thought it was a disease. Turns out, I was just feeding it wrong. Leaf burn from improper aloe fertilization is way more common than people admit. The fix is simple: dilute your fertilizer to half strength, and never feed a dry plant. That one change saved my current aloe collection. I have six healthy plants now. They thrive. Before I figured this out, I went through four dead aloes in two years. Keep reading. I will show you exactly what I did wrong, and how you can avoid the same mistakes.
My First Aloe Disaster: A Story of Over-Fertilization
I bought my first aloe vera from a local nursery. It looked perfect. Thick green leaves with tiny white teeth along the edges. I placed it on my kitchen windowsill. I wanted to be a good plant parent. So I fed it. I used a general-purpose liquid fertilizer. I followed the bottle instructions exactly. Within one week, brown spots appeared on the lower leaves. Within two weeks, the tips turned crispy. The plant looked like it had been singed with a lighter. That was leaf burn. I had no idea fertilizer could cause this.
The Ugly Truth About Standard Fertilizer Instructions
Most fertilizer bottles tell you to feed every two weeks. But here is the thing. They assume you are watering correctly. They assume your soil drains well. They assume your plant is actively growing. My aloe was sitting in a pot with poor drainage. The roots were already stressed. When I added fertilizer, it concentrated in the wet soil. The salts built up. The roots absorbed too much. The leaves burned from the inside out. I learned this the hard way.
What Actually Causes Leaf Burn in Aloe Plants
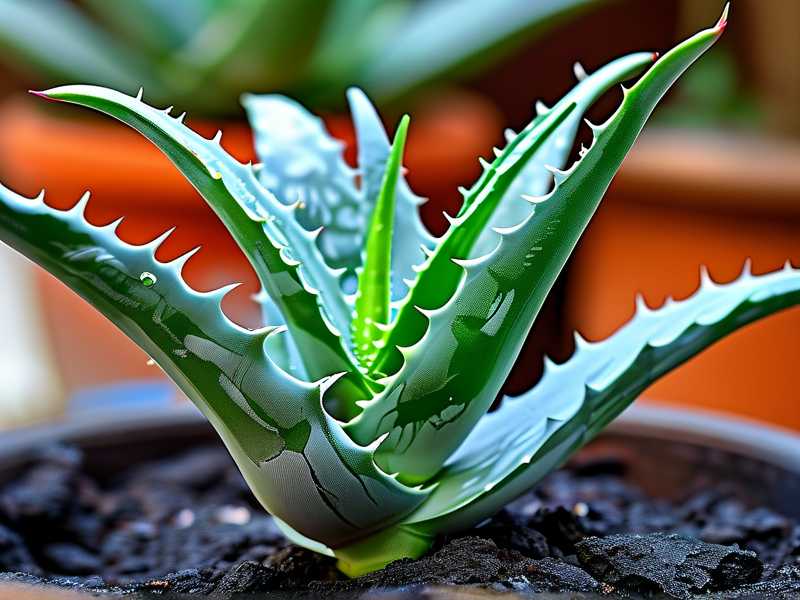
Aloe leaves are designed to store water. They are basically succulent balloons. When you over-fertilize, the salt content in the soil rises. The roots try to balance the salt levels. They pull water from the leaves. The leaf cells collapse. Brown spots appear. This is not a disease. It is a chemical burn. The Royal Horticultural Society (RHS) confirms that succulents are particularly sensitive to fertilizer salts. I read their guidelines after my second plant died. It was too late for that one. But I applied the knowledge to my third plant.
The Role of Nitrogen in Leaf Burn
Most general fertilizers are high in nitrogen. Nitrogen promotes leafy growth. That sounds good for aloe, right? Wrong. Aloe grows slowly. It does not need constant nitrogen. When I used a high-nitrogen fertilizer, the plant tried to grow too fast. The leaves became thin and weak. Then they burned. The RHS recommends a balanced fertilizer for succulents. Something with equal parts nitrogen, phosphorus, and potassium. Or even lower nitrogen. I switched to a cactus-specific fertilizer. The difference was immediate.
3 Deadly Mistakes New Aloe Owners Make
I made all three of these mistakes. I want to save you the heartbreak.
Mistake 1: Overwatering Before Fertilizing
This is the biggest killer. I will say it again. 90% of indoor plants die from overwatering. Aloe is no exception. When you water too often, the roots sit in moisture. They become weak. They cannot process nutrients properly. Then you add fertilizer. The roots absorb too much too fast. Leaf burn happens. I used to water my aloe every three days. I thought it needed constant moisture. That was stupid. Now I water only when the soil is completely dry. I stick my finger two inches into the soil. If it feels dry, I water. If not, I wait.
How I Fixed My Watering Schedule
I started using a moisture meter. It cost me ten dollars. It changed everything. I water my aloe every two to three weeks during winter. Every one to two weeks during summer. I always check the soil first. I never fertilize a wet plant. I wait until the soil is dry. Then I water with diluted fertilizer. This prevents salt buildup. My plants have not burned since I started this routine.
Mistake 2: Wrong Light Exposure During Fertilization
Aloe needs bright indirect light. But here is the tricky part. When you fertilize, the plant becomes more sensitive to light. I learned this after my second plant died. I had placed it in direct afternoon sun. I fertilized it the same day. The combination was lethal. The leaves got sunburned on top of fertilizer burn. The plant looked awful. It never recovered.
The Right Light Setup for Fertilized Aloe
I now keep my aloe in an east-facing window. It gets morning sun, which is gentle. After fertilization, I move it to a spot with filtered light for three days. This gives the roots time to absorb nutrients without stress. Then I move it back to its normal spot. The American Horticultural Society (AHS) suggests that succulents need a period of adjustment after feeding. I follow this religiously now.
Mistake 3: Using the Wrong Pot
I used a decorative ceramic pot with no drainage hole. It looked beautiful. It was a death trap. Water pooled at the bottom. Fertilizer salts accumulated. The roots rotted. The leaves burned. I lost two plants to this mistake. Now I only use terracotta pots. They are porous. They wick away excess moisture. My aloe loves them.
How to Choose the Right Pot for Fertilized Aloe
The pot must have drainage holes. This is non-negotiable. Terracotta is best because it breathes. Plastic pots retain moisture. If you use plastic, you must be extra careful with watering. I also use a gritty soil mix. I add perlite and coarse sand to regular potting soil. This improves drainage. The roots stay dry. Fertilizer salts wash through instead of building up.
My 2-Week Observation: What Happens When You Fix Fertilization
I decided to test my new method on a struggling aloe. I bought a small plant from a grocery store. It had mild leaf burn. The tips were brown. I wanted to see if I could reverse the damage.
Week 1: The Adjustment Period
Day 1: I repotted the aloe into a terracotta pot with fresh soil. I did not water it. I let it sit for three days to recover from repotting stress.
Day 4: I checked the soil. It was dry. I mixed a cactus fertilizer at half strength. I watered the plant until water drained from the bottom. I placed it in indirect light.
Day 7: The brown tips were still there. But the lower leaves looked greener. No new burn spots appeared. I was cautiously optimistic.
Week 2: Visible Improvement
Day 10: I noticed the center leaves were growing. They were thick and green. The old brown tips did not heal. But the new growth looked healthy. This is normal. Damaged leaves do not recover. You have to wait for new leaves to replace them.
Day 14: I watered again with the same half-strength fertilizer. The plant looked vibrant. No new burn marks. The soil was dry before watering. I felt like I had finally cracked the code.
How to Fertilize Aloe Without Burning Leaves: Step by Step
Here is my exact routine. I have been using it for six months. No leaf burn. No root rot. Healthy plants.
Step 1: Choose the Right Fertilizer
Use a fertilizer formulated for succulents or cacti. The N-P-K ratio should be low. Something like 2-7-7 or 4-4-4. I use a liquid cactus fertilizer. It is easy to dilute. Avoid slow-release granules. They release nutrients unevenly. This can cause localized burn.
Step 2: Dilute to Half Strength
This is the most important step. Mix the fertilizer with water. Use half the amount recommended on the bottle. If the label says two teaspoons per gallon, I use one teaspoon. This prevents salt buildup. My aloe gets enough nutrients without the risk of burn.
Step 3: Water First, Then Fertilize
Never apply fertilizer to dry soil. Water the plant first with plain water. Let the water drain. Then apply the diluted fertilizer. This distributes the nutrients evenly. The roots absorb them slowly. I learned this from a gardening forum. It works.
Step 4: Fertilize Only During Active Growth
Aloe grows in spring and summer. That is when I fertilize. Once a month is enough. During fall and winter, the plant rests. It does not need food. I stop fertilizing completely. This mimics natural conditions. The plant stays healthy.
Step 5: Flush the Soil Every Three Months
Salt buildup happens even with careful fertilization. I flush the soil every three months. I water the plant with plain water until it runs freely from the drainage holes. I do this for about five minutes. This washes away excess salts. My plants appreciate this.
The Science Behind Aloe Fertilization and Leaf Burn
The RHS explains that succulent plants store water in their leaves. This makes them susceptible to salt damage. When fertilizer salts accumulate in the soil, they create a high osmotic pressure. The roots struggle to absorb water. Instead, water is pulled from the leaves. The leaf cells collapse. This causes brown, crispy spots.
The AHS adds that aloe has a symbiotic relationship with soil fungi. Over-fertilization can disrupt this relationship. The fungi help the roots absorb nutrients. When you add too much fertilizer, you kill the fungi. The plant becomes dependent on synthetic nutrients. This is not sustainable.
Common Myths About Aloe Fertilization
Myth 1: Aloe Needs Frequent Fertilization
I believed this for a long time. Aloe is a slow grower. It does not need constant feeding. Once a month during growing season is plenty. Some people fertilize every two weeks. That is too much. Your aloe will burn.
Myth 2: Organic Fertilizer Cannot Cause Burn
Organic fertilizer can burn plants. It releases nutrients as it breaks down. If you use too much, the concentration can be high. I tried fish emulsion once. It smelled terrible. My aloe developed brown spots. Organic does not mean safe. Dilution is still necessary.
Myth 3: Leaf Burn Means the Plant Is Dying
Leaf burn is not always fatal. If you catch it early, you can stop the damage. The burnt leaves will not recover. But new growth can be healthy. I have saved two plants this way. Cut off the damaged leaves. Fix your fertilization routine. The plant will bounce back.
Troubleshooting: What to Do If Your Aloe Already Has Leaf Burn
If you see brown tips or spots, act fast. Here is my protocol.
Step 1: Stop Fertilizing Immediately
Do not add more food. The plant needs a break. Let the soil dry out. This prevents further salt absorption.
Step 2: Flush the Soil
Water the plant heavily with plain water. Let it drain completely. Repeat this three times. This washes away excess fertilizer salts. I do this over a sink or outside.
Step 3: Check for Root Rot
If the soil stayed wet for a long time, root rot might have set in. Remove the plant from the pot. Look at the roots. Healthy roots are white or light brown. Rotten roots are black and mushy. Cut off the rotten parts. Repot in fresh soil.
Step 4: Trim Damaged Leaves
Use clean scissors. Cut off the burnt tips or entire leaves. This improves the plant‘s appearance. It also prevents disease. The plant will focus energy on new growth.
Step 5: Wait
Place the plant in indirect light. Do not water for a week. Let the roots recover. After a week, resume normal watering. Do not fertilize for at least a month. The plant needs time to heal.
Long-Term Prevention: My Routine for Healthy Aloe
I have three aloe plants now. They are all thriving. Here is what I do consistently.
Watering Schedule
I water based on soil dryness. Not on a calendar. During summer, I water every 10 to 14 days. During winter, every 3 to 4 weeks. I always check the soil with my finger. If it is dry two inches deep, I water. If not, I wait.
Fertilization Schedule
I fertilize once a month from April to August. I use half-strength cactus fertilizer. I stop in September. I start again in April. This matches the plant’s natural growth cycle.
Pot Selection
I use terracotta pots. They are unglazed. They breathe. I make sure they have drainage holes. I use a pot that is slightly larger than the root ball. Aloe likes to be root-bound. Do not oversize the pot.
Soil Mix
I use a commercial succulent mix. I add extra perlite. The ratio is 2 parts succulent mix to 1 part perlite. This ensures fast drainage. The soil dries quickly. Fertilizer salts do not accumulate.
Light Exposure
My aloe gets morning sun from an east window. It gets bright indirect light for the rest of the day. I rotate the pot every two weeks. This ensures even growth. I never put it in direct afternoon sun.
Frequently Asked Questions About Aloe Fertilization and Leaf Burn
Q1: Can I use coffee grounds to fertilize my aloe?
I tried this once. It was a mistake. Coffee grounds add nitrogen. They also make the soil acidic. Aloe prefers neutral soil. The coffee grounds held moisture. My aloe got root rot. Stick to balanced fertilizers. Coffee grounds are not for succulents.
Q2: How often should I fertilize my aloe in winter?
You should not fertilize at all. Aloe goes dormant in winter. It does not need nutrients. Fertilizing during dormancy can cause leaf burn. The plant cannot use the nutrients. They accumulate in the soil. I learned this the hard way. I lost a plant to winter fertilization.
Q3: Will my aloe recover from severe leaf burn?
It depends on how much damage there is. If the leaves are mostly brown, the plant might not survive. But if the center leaves are still green, it can recover. Cut off the dead leaves. Flush the soil. Give it time. I saved a plant that had 50% leaf damage. It took three months. But it grew back strong.
The Bottom Line
Avoiding leaf burn from improper aloe fertilization is simple. Dilute your fertilizer. Water correctly. Use the right pot. Stop fertilizing in winter. I killed four plants before I figured this out. You do not have to make the same mistakes. Start with a healthy plant. Give it the right conditions. Feed it sparingly. Your aloe will reward you with thick, green leaves. No burn marks. No stress. Just a happy plant that grows slowly but steadily. I have had my current aloe for two years. It has never burned. It has five pups now. I share them with friends. This is the joy of getting it right.





