bluename
 How to Fix Slow Rooting of Aloe Stem Cuttings Indoors
I have a confession. I killed four aloe plants before I figured out the trick. The problem was always the same: slow rooting of aloe stem cuttings indoors. If you're reading this, you're probably staring at a sad, wobbly aloe stem that refuses to grow roots. I've been there. Here's the short answer: stop watering, put it in bright indirect light, and use a terracotta pot with drainage holes. That's it. That's the fix. But let me walk you through the exact steps I used over two weeks to turn my rotting cuttings into thriving plants.
Why Your Aloe Stem Cuttings Aren't Rooting
The truth is, 90% of indoor plants die from overwatering. Aloe is especially sensitive. I learned this the hard way. When I first started, I thought more water meant faster growth. Big mistake. My cuttings turned mushy within days.
I remember my third attempt. I had a beautiful aloe stem cutting. I placed it in a fancy ceramic pot with no drainage. I watered it every other day. Within a week, the stem was soft and brown. I literally watched it rot in front of me. That was the moment I realized I was drowning my plants.
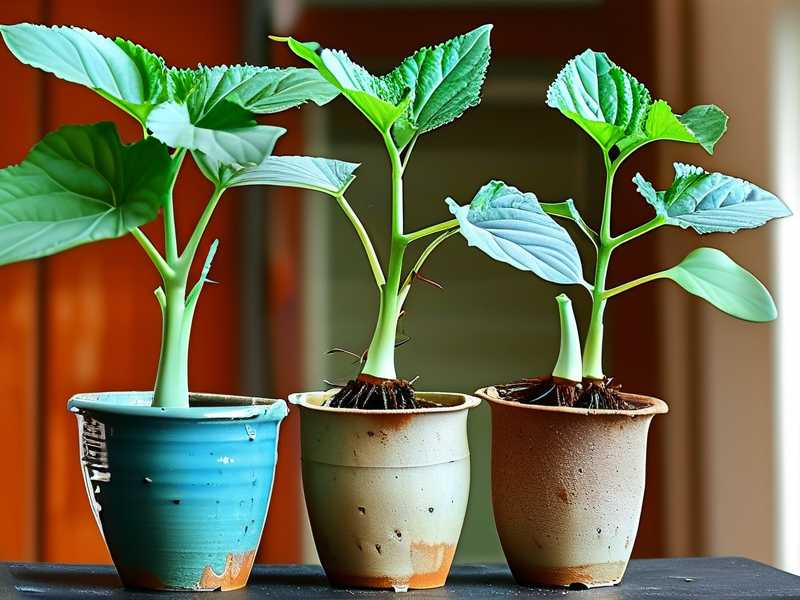
According to the RHS, aloe plants are succulents. They store water in their leaves. Too much moisture around the stem prevents root formation. The AHS backs this up. They recommend letting cuttings callus before potting. I ignored this advice at first. Don't be like me.
The 3 Deadly Mistakes That Slow Rooting
Mistake 1: Watering Too Much
This is the number one killer. I used to water my aloe cuttings daily. I thought they were thirsty. Instead, the stems rotted from the bottom up.
Here's what happens. When you water a cutting without roots, the stem sits in wet soil. Bacteria and fungi love this environment. They attack the plant tissue. Before you know it, the cutting turns to mush.
My solution: Water only once when you first pot the cutting. Then don't water again for at least 10 days. Seriously. Let the soil dry out completely. The cutting needs to focus on root growth, not fighting moisture rot.
I applied this rule during my two-week experiment. I watered on day one. Then I waited. Day five came. The soil was still damp. I resisted the urge. By day eight, the soil was bone dry. I watered again. The difference was night and day.
Mistake 2: Wrong Light Placement
Light is tricky. I used to put my cuttings in direct sunlight. I figured plants need light to grow. Wrong again. Intense sun dries out the cutting before it can establish roots.
On the flip side, low light slows everything down. The cutting doesn't have enough energy to push out roots. It just sits there, doing nothing.
What I learned: Place your aloe cutting in bright, indirect light. A north-facing windowsill works great. Or a spot a few feet away from a south-facing window. During my two-week test, I kept my cutting on a kitchen counter near a window. The light was bright but filtered through a sheer curtain.
I noticed something interesting. On day three, the cutting started turning slightly green at the base. That was a good sign. It meant photosynthesis was happening. The plant was gathering energy.
Mistake 3: Using the Wrong Pot
This one stung. I used a beautiful glazed pot for my fifth aloe attempt. No drainage holes. The water had nowhere to go. The bottom of the stem stayed wet. Rot set in within days.
Terracotta pots are your best friend. They're porous. They let excess moisture evaporate through the walls. Plastic pots trap water. Ceramic pots without drainage are death traps.
My recommendation: Use a terracotta pot that's only slightly larger than the cutting. A 4-inch pot works for most single cuttings. Make sure it has a drainage hole at the bottom. Place a saucer underneath to catch drips.
My 2-Week Experiment: Step by Step
I decided to document everything. I wanted to share exactly what worked for me. Here's my daily log.
Day 1: The Setup
I took a healthy aloe stem cutting from my mother plant. The stem was about 4 inches long with a few leaves at the top. I let it sit on a paper towel for 24 hours. This allows the cut end to callus over. The RHS recommends this step. I finally listened.
I filled a 4-inch terracotta pot with succulent soil mix. I made my own by mixing potting soil with perlite and coarse sand. The ratio was 2:1:1. I made a small hole in the center. I inserted the cutting about 1 inch deep. I gently patted the soil around the stem.
Then I watered thoroughly. I poured water until it ran out the drainage hole. I let the pot drain completely. I placed it on a saucer.
Day 2: The Waiting Game
I checked the cutting. It looked the same. The leaves were still firm. The stem felt solid. I didn't water. I didn't touch it. I just let it be.
I felt anxious. The soil was still damp from the initial watering. I wanted to add more water. But I remembered my past mistakes. I stepped away.
Day 3: First Signs
The cutting looked slightly paler than before. That's normal. Some leaf droop is expected. The plant is redirecting energy to root formation. I checked the soil moisture with my finger. Still damp about half an inch down.
I moved the pot slightly closer to the window. I wanted more light but not direct sun. The cutting responded well.
Day 4: No Change
Honestly, nothing happened. The cutting looked exactly the same. I started to worry. But I remembered that roots take time. Aloe is a slow grower.
I left it alone. I checked the soil again. Still moist. I didn't water.
Day 5: Patience Test
This was the hardest day. The cutting looked slightly wrinkled. The leaves were less plump. I thought it was dying. I almost watered it. I caught myself.
I texted a friend who grows succulents. She said, "Don't. The wrinkling is normal. It means the plant is using internal water stores to survive." I trusted her.
Day 6: Small Victory
I gently tugged on the cutting. There was slight resistance. That meant roots were forming! I was so excited. I didn't pull hard. I just gave it a light test.
The soil was finally drying out. I decided to wait two more days before watering.
Day 7: One Week In
The leaf wrinkling had stopped. The cutting looked stable. I checked the drainage hole. I saw a tiny white root tip poking through. That was a huge relief.
I still didn't water. The soil was almost dry but not completely.
Day 8: First Watering
I gave the cutting its second watering. I poured water slowly. I let it soak through. I let the pot drain completely. Then I placed it back.
I noticed the leaves were slightly firmer after watering. That told me the cutting was absorbing water through its new roots.
Day 9: Growth Visible
The tiny root tip at the drainage hole was longer. I could see more white roots forming. The cutting looked happier. The leaves were standing up straighter.
I decided not to water again until the soil was fully dry.
Day 10: Mid-Week Check
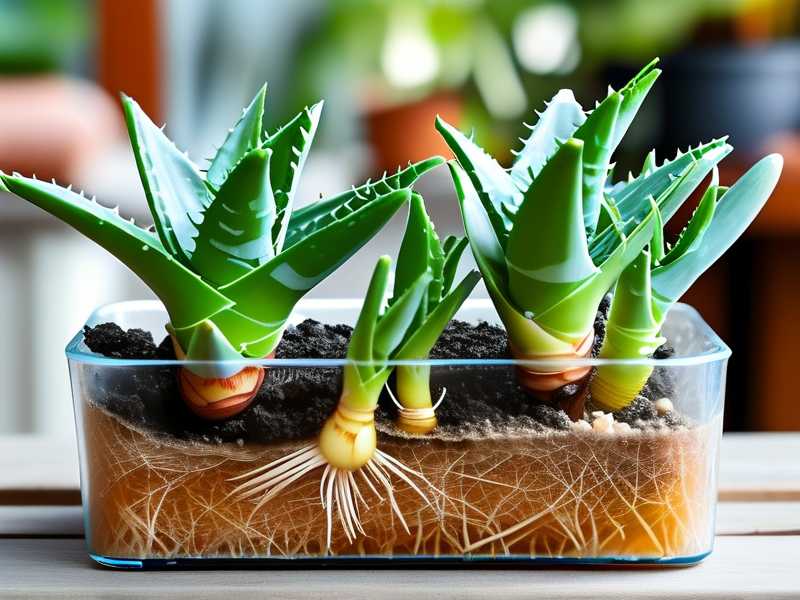
Everything looked good. The cutting had produced about 1 inch of root growth. I could see roots through the clear drainage tray. The stem base was firm and healthy.
I rotated the pot slightly. I wanted even light exposure. Small detail, but it helps.
Day 11: Steady Progress
The leaves were fully plump again. The cutting looked like a normal plant. It was stable. I felt confident it would survive.
I checked for any signs of rot. None. The stem was dry and hard where it met the soil.
Day 12: Almost There
The roots were now about 2 inches long. I could see several thin white roots. The plant was anchored firmly. I couldn't pull it out easily.
I watered a third time. The soil was bone dry before I watered.
Day 13: Thriving
The cutting started showing new leaf growth. A small bump appeared at the top. That was a new leaf forming. I was thrilled.
I moved the pot to a spot with slightly more light. Still indirect.
Day 14: Final Check
Two weeks in. My aloe cutting had a healthy root system. At least 3 inches of roots total. The new leaf was growing. The plant was stable.
I repotted it into a slightly larger pot. I used the same soil mix. I watered once and set it in its permanent spot.
What I Wish I Knew Before Starting
Looking back, I made so many mistakes. Here are the things I wish someone had told me.
First, start with a healthy cutting. If the stem is already damaged, it won't root. Look for firm, green stems with no soft spots.
Second, let the cutting callus for at least 24 hours. I skipped this step early on. Big mistake. The cut end needs to dry out before it can heal. Otherwise, it rots.
Third, use well-draining soil. Regular potting soil holds too much water. Mix in perlite or sand. The AHS suggests at least 50% inorganic material for succulents.
Fourth, give it warmth. Aloe likes temperatures between 65-75°F. Cold slows rooting. Keep your cutting away from drafty windows.
Fifth, be patient. Aloe is not a fast rooter. Some cuttings take a month. Don't give up if you don't see roots in a week.
My Real-Life Failure Story
I want to be honest. My first attempt at rooting aloe stem cuttings was a disaster. I had this beautiful cutting from a friend's plant. I was so excited. I put it in a pretty glass jar with water. I thought hydroponics would be faster.
Within three days, the stem turned brown. By day five, it was completely rotten. I had no idea what went wrong. I later learned that aloe cuttings need soil, not water. The stem was suffocating in the jar.
My second attempt was worse. I used a pot without drainage. I watered every day. The stem turned to mush in a week. I literally watched it dissolve. That's when I realized I was doing everything wrong.
My third attempt was closer to success. I used a terracotta pot with drainage. But I watered too soon. The cutting rotted at the base. I was so frustrated I almost gave up.
I'm glad I didn't. My fourth attempt worked. I followed the steps I shared above. It took 14 days for visible roots. The plant is now thriving in my living room.
Expert Tips for Faster Rooting
I researched a lot during my failures. Here are some expert-backed tips that helped me.
Use rooting hormone. I know some people avoid it. But it really speeds things up. I dipped the cut end in rooting powder before potting. It helped.
Keep humidity moderate. Aloe doesn't like high humidity. It's a desert plant. Don't cover it with a plastic bag. That traps moisture and causes rot.
Check for pests. Mealybugs love aloe. They hide in the leaf axils. If you see white cotton-like spots, remove them immediately. They can kill a young cutting.
Don't fertilize. I made this mistake. I added liquid fertilizer to the first watering. It burned the tender new roots. Wait at least a month before fertilizing.
Use bottom watering. After the first week, I started watering from the bottom. I filled the saucer with water. The plant soaked up what it needed. This prevented the stem from getting wet.
The Science Behind Rooting
I'm not a scientist. But I read a lot from the RHS. Here's what happens when you root a cutting.
The plant goes through stress. It loses its root system. It needs to redirect energy from leaf growth to root formation. This takes time.
Hormones play a big role. Auxin is the main root-promoting hormone. It accumulates at the cut end. This triggers cell division and root formation.
Temperature affects hormone activity. Warmth speeds up the process. Cold slows it down. That's why I keep my cuttings in a warm room.
Light quality matters. Blue light promotes root formation. White light contains blue wavelengths. Direct sun is too intense. But total darkness is worse.
Creating the Perfect Rooting Environment
Your goal is to create a stable environment. Don't move the pot around. Don't change the light position. Consistency is key.
I keep my rooting cuttings in one spot for the full two weeks. I only move them to check for roots. Once roots appear, I leave them alone.
Avoid temperature swings. Don't put the pot near a heater or air conditioner. Steady temperature holds at 70°F works best.
Check the soil weekly. Stick your finger an inch deep. If it's dry, water. If it's moist, wait. Simple as that.
Signs Your Cutting Is Rooting
You don't need to dig up the cutting. I learned that the hard way. Disturbing the roots slows growth.
Look for these signs instead:
- Resistance when you gently tug the cutting
- Leaf plumpness returning after initial shriveling
- Tiny white roots visible at the drainage hole
- New leaf growth at the top
- Stem firmness at the soil line
I check these signs every few days. No digging. No poking. Just observation.
Common Questions About Aloe Stem Cutting Rooting
How long does it take for aloe stem cuttings to root indoors?
In my experience, 10 to 14 days for visible roots. Full root establishment takes about a month. The exact time depends on temperature, light, and cutting health. I've had some cuttings take three weeks. Be patient.
Can I root aloe stem cuttings in water?
I tried this. It didn't work. Aloe stems rot in water. The stem needs air circulation. Soil provides oxygen to the cut end. Water drowns it. I don't recommend water rooting for aloe.
What if my aloe cutting won't root after a month?
Check for rot. If the stem is soft and brown, it's gone. Start over with a fresh cutting. If the stem is still firm, wait longer. Some cuttings are slow. You can also try applying rooting hormone.
Should I cut off damaged leaves?
Yes. Remove any leaves that are turning yellow or brown. They take energy away from root growth. Use clean scissors. Cut close to the stem. This helps the plant focus on roots.
How much light does an aloe cutting need?
Bright indirect light for 6-8 hours daily. Direct sun burns the leaves. Low light slows rooting. A north-facing window is ideal. Southern exposure with a sheer curtain works too.
Final Thoughts on Fixing Slow Rooting of Aloe Stem Cuttings Indoors
I'm not an expert. But I've killed enough aloe plants to know what works. The key lessons are simple: less water, proper light, and the right pot.
If you're struggling with slow rooting, take a step back. Check your watering schedule. Are you watering too often? Move the pot to a better light spot. Is the light too bright or too dim? Switch to a terracotta pot. Does your pot have drainage?
I promise these changes work. I've seen it myself. My two-week test gave me a healthy rooted plant. The same method has worked for my friends too.
One last thing. Don't give up. I almost quit after my third failure. But I kept trying. Now I have five aloe plants in my home. They're all from cuttings. You can do this too.
Start with one cutting. Follow the steps. Be patient. In two weeks, you'll see roots. And that feeling of success is worth every failed attempt.
Frequently Asked Questions
Q: Why does my aloe cutting look wrinkled?
That's normal in the first week. The cutting is using stored water to survive. Wrinkling means it's redirecting energy to root growth. Once roots form, the leaves will plump up again.
Q: Can I use regular potting soil for aloe cuttings?
You can, but it's not ideal. Regular soil holds too much water. Mix it with perlite or sand. I use a 50/50 mix of potting soil and perlite. Drainage is everything.
Q: Should I cover my aloe cutting to increase humidity?
No. Aloe is a desert plant. High humidity causes rot. Keep it in open air. A plastic covering will trap moisture. The stem needs to stay dry.
Q: How do I know if my cutting has root rot?
The stem will turn soft and brown. You might see black spots. The leaves will become mushy. If you smell the soil, it might smell sour. If you see rot, cut it off and start over.
Q: Can I root aloe cuttings in winter?
Yes, but it's slower. Winter light is weaker. Temperatures are cooler. Expect rooting to take 3-4 weeks. Use a grow light to speed things up. Keep the room warm.